Page is loading ...

4x4 and 8x8 18gbps 4k60 (4:4:4) hdmi matrix switchers
18Gb p s HDMI matrix switchers
quick start guide
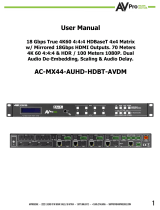
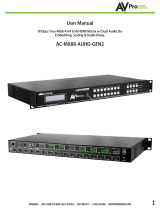
These AVPro Edge matrix switches have 4 (AC-MX44-AUHD) or 8 (AC-MX88-AUHD-
GEN2) HDMI inputs, and 4 or 8 HDMI outputs, allowing 18Gbps HDR signals to
be shown on any of the connected displays. Fully matrix-able audio allows you
to move the audio signal independently from the video signal at any of the
de-embedded audio outputs. Audio delay is also ‘on-board’ so you can manage
lip-sync issues before they become a problem. Also, with built-in scalers you don’t
have to forfeit that 4K signal just because you have a few older displays. Additional features include IP control, EDID
management, military grade stability, LCD Display, and more!
*NOTE - The only difference between the AC-MX44-AUHD and the AC-MX88-AUHD-GEN2 is the amount of inputs and outputs.
The AC-MX44-AUHD has 4 HDMI inputs and outputs while the AC-MX88-AUHD-GEN2 has 8 HDMI inputs and outputs.
Getting connected
All of the connections are located on the rear of the switch
1. Connect sources to the HDMI Inputs on the back of the switch
2. Connect displays to the HDMI Outputs on the back of the switch
3. If you are using Audio Extraction, connect either Toslink or analog audio to an AVR, amplier, or surround
sound processor.
4. If you are using the IR extension, connect the IR extension cable and position the IR receiver in the desired
location.
5. If you are connecting the switch to the network, connect the LAN port to an access point or router.
6. Connect the 12v power supply. Be sure to screw it down so it can’t accidentally fall out.
7. Turn on all sources, devices, and displays
From here the Matrix Switch can be congured via the front panel controls, the web interface, or with our free PC
software.
The Matrix Switch can be controlled via front panel controls, several different automation systems, a web interface, PC
software, or the supplied IR remote control.
*NOTE - The free PC software and a full list of supported automation systems and the accompanying drivers can be
found at www.AVProEdge.com.

HDMI Switching/Matrix Routing
The main function of an HDMI Matrix Switch is to give the end user the ability to choose any source and watch it on any
display. A “traditional” HDMI switch/splitter might allow you to watch multiple displays, but you are restricted to only
one source at a time. With this switch your options are endless as you can congure the inputs and outputs however
you’d like.
To choose inputs and outputs for HDMI Matrix Routing:
1. Press the bottom number button that corresponds with the desired OUTPUT
2. Once the output is pressed, the button will illuminate. The INPUT buttons will illuminate as well indicating
that the switch is ready for you to select an input
3. Select the desired input
*NOTE - Always select the output FIRST
Scaling
The AC-MX44/MX88-AUHD has a scaler built into every HDMI output. In a 2K/4K mixed system you can scale specic
outputs up or down to match the connected display. There are 4 scaler modes to choose from:
1. HD-4K (scales 1080p to 2160p)
2. 4K-HD (scales 2160p to 1080p)
3. AUTO (automatically detects the capabilities of the connected display
4. BYPASS (no scaling)
Using the Scaling buttons on the front panel:
1. Press and hold the button of the desired OUTPUT. The output button will illuminate indicating that the
switch is ready for you to select a scaler mode
2. Press desired scaler mode
3. Press the desired OUTPUT button again to conrm
Audio Extraction
The AC-MX44/MX88-AUHD can extract the audio signal which can then be sent to an AVR, amplier, or surround sound
processor. This is ideal if the system calls for the audio from a source to be played through something besides the TV’s
internal speakers.
You can extract audio via either Toslink or analog 2ch. Analog is ideal for 2ch systems and distributed audio systems,
while Toslink is ideal for (up to 7ch) multi-channel audio systems. Extracted Audio Mode has 3 options:

1. Bind to Output: Extracted audio switches with the video *NOTE - This is the factory default mode
2. Bind to Input: Extracted audio is xed to a corresponding input by the same number.
3. Matrix Mode: Extracted audio can be routed however you’d like. There are commands to allow it to function
as a separate matrix.
By default the audio is bound to the output. This means that the audio from the source will follow the display that you
are watching. You may however want to bind the audio to the input instead of the output. One use case of this is if the
end user wants to listen to music while watching TV.
To set up Audio Binding:
1. Press and hold the BYPASS button for 3 seconds
2. The UP and DOWN buttons will illuminate. Toggle between options using these buttons
3. Once you nd the desired choice (“Bind to Input”, “Bind to Output”, or “Matrix”), quick press the BYPASS
button
*NOTES
• The 2ch analog audio port only supports 2ch PCM. Be sure to set the audio output of the source to 2ch PCM
• Need to downmix multi-channel audio to 2ch? Check out our AC-ADM-AUHD and AC-ADM-COTO
• Premade 2ch audio cables are available for purchase. Check out AC-CABLE-5PIN-2CH
Audio Matrix
Once the switch is set to Matrix audio mode, audio signals can be routed however you’d like. To control the Audio
Matrix from the front panel:
1. Press and hold the BYPASS button for 3 seconds
2. The UP and DOWN buttons will illuminate. Press either one until you locate “Matrix” mode.
3. Quick press the BYPASS button
4. Press the desired OUTPUT button (where you would like the audio to go)
5. Press the desired INPUT button (the source that you would like audio from)
6. Press the BYPASS button to exit the Audio Matrix

Audio Delay
Are the person’s lips out of sync with the person’s voice? If so, there may be an audio delay issue. Luckily the AC-
MX44/MX88-AUHD has a built in audio delay setting that will help.
Audio Delay is set on the extracted audio OUTPUT (both Toslink and analog audio) of the switch. Each can have it’s own
setting. Audio Delay has 4 controls:
1. UP (increases delay)
2. DOWN (decreases delay)
3. MUTE (audio is muted)
4. BYPASS (no delay)
To control Audio Delay:
1. Press and hold the OUTPUT button for the display that you would like to delay the audio
2. The UP, DOWN, MUTE, and BYPASS buttons will illuminate, indicating that the switch is ready for you to
make a selection
3. Press either UP, DOWN, MUTE, or BYPASS depending on what you would like to do
*NOTE - The Audio Delay can be set anywhere from 90ms to 630ms in increments of 90ms
EDID Management
The AC-MX44/MX88-AUHD has 29 factory dened EDID settings as well as 3 user memories. You can also choose to
read the EDID from any OUTPUT. By default, the Matrix Switch is set to a 1080p EDID for maximum plug and play
capability. If you are using 4k/UHD sources you will need to dene a 4k/UHD EDID on each input (unless you capture
the EDID from the display).
To change EDID settings:
1. Press and hold (3 seconds) the button for the INPUT that you would like to change
2. The UP and DOWN buttons will illuminate. Use these to toggle between the different EDID options. These will
be shown on the switch’s LCD display.
3. Once you nd the EDID that you need, press the INPUT button of the source that you would like to apply the
EDID to
*NOTE - You may also copy the EDID from any OUTPUT and apply it to any INPUT by selecting “Copy EDID from Output
x”. This will copy the EDID from the attached display, store it in “USER EDID 1”, and apply it to the INPUT that you have
selected.

Here is a full list of all available EDID options:
Cascade Mode
Cascade Mode is designed to make HDMI connections go smoother when connecting to repeater devices like AVRs, DAs,
HDMI splitters, etc. Cascade Mode can also be used to solve common sync issues such as:
1. Invalid or incorrect EDID from the display
2. Displays that have a hard time changing between resolutions or in and out of HDR mode
3. Flashing and instability from sources or other devices in the system
To use Cascade Mode:
1. Press and hold (3 seconds) INPUT 1 and INPUT 2 at the same time.
2. The LCD screen will say “Cascade Mode ENABLE”
3. Repeat step 1 to disable
IR Control
The AC-MX44/MX88-AUHD comes with a IR remote control. The labels on the left indicate OUTPUTS.
Choose the desired output, then the left and right arrows will then cycle through inputs.
There is an IR receiver on the front of the Matrix
Switch, but you may need the IR receiver in a
different location. Simply plug the IR extension
cable into the “IR.ext” port on the rear of the
Matrix Switch and position the IR Receiver in a
more convenient location.

RS232/IP Control
The AC-MX44/MX88-AUHD can be controlled via IP or RS232 commands. If you are going to use RS232, follow the
diagram below as a guide when making the cable:
*NOTE - See the owner’s manual for a full list of control commands
Web Interface
Along with the front panel controls, you can also control the Matrix Switch with a web interface. The advantage of using
the web interface is that you have access to more features in the Matrix Switch than you would by only using the front
panel controls such as Image Enhancement, access to a Test Pattern Generator, and HDBaseT compatibility mode. See
the owner’s manual for the specics.
To connect to the Matrix Switch and access the Web interface:
1. Connect the LAN port on the rear of the Matrix Switch into an active access point or router
2. Make sure your computer is on the same network
3. Open any web browser and type in the IP address of the Matrix Switch. *NOTE - The default IP address is
192.168.1.239
Once connected, the web interface will
look like this
Across the top of the page you will
see different tabs for Sense Switching
(HDMI Matrix), Video Setting, HDCP
Cong, Audio Setting, Audio Matrix,
EDID Manage, and System Settings.
Simply choose the tab that corresponds
with what you would like to congure.
The rest is a matter of you choosing
what you would like the switch to do.
All of the different functions (plus a
few more) of the Matrix Switch we’ve described so far in this Quick Start Guide can be done easily in the web interface.

Here is an example of the EDID Manage tab:
As you can see, the web interface was
designed with simplicity in mind. Most
integrators nd the web interface to be very
easy to use and prefer setting up the Matrix
Switch this way every time. Please see the
owner’s manual for a full description of
each tab and function in the web interface.
*NOTES
• You can use DHCP on the Matrix
Switch. Turn on DHCP by pressing and holding (3 seconds) INPUT 1 and INPUT 4 together
• You can always check the switch’s IP address by pressing and holding the (3 seconds) INPUT 3 and INPUT 4
buttons on the front panel
PC Software
Much like the web interface, the Matrix Switch can also be congured and controlled with software. This software is free
and can be downloaded from our website.
To use the PC software:
1. Download the software from our website. Check
your specic product’s page, scroll to the bottom,
locate “Resources”, click “PC Software”
2. Connect the switch to your laptop using RS232
3. Open the software. It will look like this
4. Click “Turn on Port”
5. Click “Search Machine”
6. You should now be connected. If not, be sure that
the right COM port is selected.
Across the top of the page you will see different tabs for Matrix Signal Route Setting, EDID Management, IP Setting,
and Video Audio. Simply choose the tab that corresponds with what you would like to congure, then rest is a matter of
you choosing what you would like the switch to do. Please see the owner’s manual for a full description of each tab and
function in the PC software.
Troubleshooting
Having problems? Here are some general troubleshooting steps that may help:
1. HDMI sync issues? Try cascade mode
2. Missing part of the audio with Extracted Audio? Be sure that the audio output of the source is set to 2ch PCM
3. Factory reset - On the front panel, press and hold (10 seconds) the following buttons:
a. HD - 4K b. 4K - HD c. MUTE d. BYPASS
4. Not sure if the signal is getting through the system? Check by using the built in test pattern
a. Press and hold (3 seconds) the desired INPUT and OUTPUT buttons simultaneously
b. Repeat to turn the test pattern off
5. Is the switch connected to a large or non-standard network? Turn on DHCP by pressing and holding (3
seconds) INPUT 1 and INPUT 4 together

Have a question or need assistance?
Don’t hesitate to contact us!
SUPPORT: +1 605-274-6055
USA TOLL FREE: 877-886-5112
EMAIL: support@avproedge.com
Drivers are available at
www.avproedge.com/drivers
/


