Page is loading ...

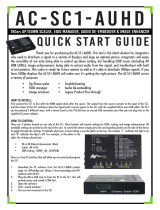
AC-SC1-AUHD
The Ultimate Toolbox: 18Gbps Up/Down Scaler, EDID
Manager, Audio De-Embedder & Image Enhancer
USER MANUAL
AC-SC1-AUHD
Page 1

The AVProEdge's AC-SC1-AUHD in the ideal solution for integrators that are needing to distribute a
signal to a variety of displays and keep an optimal picture. Integrators will enjoy its versatility of
not only being able to control up/down scaling but handling EDID issues (including 4K HDR EDID's),
image enhancement, and being able to access audio from the stream. This scaler is ready for future
content as well as it's able to distribute 18GBPS signaling. Yet if you have 1080p displays the AC-
SC1-AUHD will make sure it's getting the right picture.
What's in the Box?
•1 x AC-SC1-AUHD
•1 x Mini USB Cable
•1 x 5V 1A USB Power Supply
•Mounting Ears
•User Manual
Features
•HDMI 2.0a w/HDR & HDCP 2.2
•4K-->1080P Downscaler
•1080P-->4K Upscaler
•Plug & Play Auto Scaling & EDID
•16 EDID Options (Including Auto & HDR EDID Options)
•Custom User EDID Option
•L/R Audio De-embedding
•Video Enhancement Circuit
•Simple, easy to use. 3-Button Operation
Typical Applications
•For mixed systems with SD, HD and UHD displays in a matrix. Since a matrix will typically down-
clock to the lowest common format putting a scaler in will “trick” the matrix into send 4K UHD
material and the scaler will downscale the content to 1080P for the HD display.
•As an Audio Extractor – stand-alone audio extractors cost about the same thing…no brainer
•EDID causes about 80% of HDMI connectivity issues – you can fix them all with the SC1
•EDID capture and emulation – would you like to test end points prior to hanging that 600-pound
projector 100 feet up on the ceiling? Use the AC-SC1-AUHD and your problem is solved.
AC-SC1-AUHD
Page 2

AC-SC1-AUHD
Page 3

AC-SC1-AUHD
Page 4

Powering the device
:
The easiest way to use the AC-SC1-AUHD is to simply plug the device in to power using one of 2 methods:
1. Use the supplied 5V power adaptor and plug it in to a power outlet using the Mini USB cable.
2. Plug the Mini USB cable directly into a USB port on a display or other peripheral device. REMEMBER,
when powering this way, the device it is plugged into may not provide constant power to the AC-SC1-
AUHD, while the settings you put in will stay the same, sync times may increase slightly due to having to
power up when the device it is plugged into is being turned on.
Setting the device
:
The AC-SC1-AUHD used a simple on device control method, and all of the available settings are printed on the top
as pictured below:
Top View
Toggle Buttons
To control the device simply press the
corresponding button on the front of the
device to toggle through the settings
(Pictured Above. To indicate what your
current setting is there are lights on the
top)
Pictured to the right whereas the number
“1” indicates the light is on and “0”
indicates the light is off.
HDMI In Mini USB
Power / Control
3.5mm Audio Out
HDMI Out
Above Settings: 1080P_3D_2CH(PCM), Upscaled to 4k, and MEDIUM Video Enhancement
AC-SC1-AUHD
Page 5

Video Enhancement:
This feature enables incredible video enhancement when upscaling from 1080P to 4K. The
enhancement is designed take full advantage of the 4K Pixel Space and maximize the end
user experience while using legacy (1080P) sources on new displays/projectors.
•
OFF
– No enhancement is added
•
Weak
– A minimal amount of enhancement is added
•Ideal for high quality 1080p content, e.g. Blu-Ray
•
Medium
– Adds a medium level of enhancement
•Ideal for poor quality sources, e.g. Cable boxes
•
Strong
– Adds significant amount of enhancement
•Ideal for long distance viewing situations
Scaler:
This simple scaler was designed to be a cost effective way to overcome resolution compatibility
issues in mixed resolution systems. It can be placed in line to “right size” the output for the
situation. This prevents the practice of reducing the system quality due to individual components,
especially when using switching devices
•
Bypass
– Scaler is OFF
•
4K->2K
– Downscales 4K to 1080P (Ideal after a 4K switching product when a 1080P display
is in the system to prevent system downscale)
•
2K->4K
– Up-scales 1080P to 4K (Ideal to maximize legacy (1080P) sources on 4K displays)
•
HDBT C Mode
– Reduces the bandwidth of 9.1G – 18G signals (HDR/4K60 4:4:4) to 9G using
the least destructive methods based on the input signal. (Ideal to reduce 4K sources to fit
down traditional extension pipelines like HDBaseT)
•HDBT C Mode 2 (Both Lights Flash) – ICT Mode (Invisible Conversion Technology). You need
two AC-SC1-AUHDs on either end of the transmission for this to work.
•The Modes are
•1 = BYPASS
•2 = 4K > 2K
•3 = 2K > 4K
•4 = HDBT C Mode
•5 = HDBT C Mode 2
*Note: Image Enhancement is only available when scaling from 1080P to 4K
AC-SC1-AUHD
Page 6

EDID Settings:
With EDID Settings you can manage the sources devices and force a certain output. This is
especially important on newer sources that rely on EDID communications in implement high
bandwidth and HDR signals.
•
1080 EDIDs
– Legacy EDIDs, these will ask the sources (especially high bandwidth ones) to
output 1080 to function in 1080 Systems.
•
4K30 EDIDs
– Asks the sources to output 4K30 and/or 4K60 4:2:0 (Ideal to force source
device to work on common extension infrastructure that are less than 10G like HDBaseT)
•
4K60 EDIDs
– Asks the source to output 4K60 4:4:4 or signals above 9G
•
HDR EDIDs
– When you see HDR in the EDID, the EDID will ask the source to send HDR
regardless of resolution.
•USER EDID – If you press and hold the EDID button for 2 seconds while connected to a
display that's powered on will copy the displays EDID.
Test Pattern Generator:
There are two built in Test patterns available
To Enable and Disable press and hold "Enhance & EDID" Buttons for 2 seconds.
•Pres and hold the first time will enable the 1080p test
pattern
•3 sets of color bars (see right)
•Press and hold to again will disable the test pattern
•Press and hold a third time will enable the 4k test pattern
•5 sets of color bars (see below, right)
•Press and hold a fourth time will disable the test pattern
Lock Function:
Locks the device so setting can't be changed by mistake
You can also send the commands
SET OUT1 SGM EN
SET OUT1 SGM DIS
•Press and hold the "ENHANCE & SCALER" buttons for 2 seconds
•All the lights will flash twice and the device is now locked.
•Repeat to unlock
AC-SC1-AUHD
Page 7

AC-SC1-AUHD Software Operation:
1. Plug the Micro USB cord in from the PC to the AC-SC1-AUHD and this will provide power and
install a COM Port.
2. Open the Software
3. Click “Search Machine”
4. You are now connected to the software.
Software Screen Shots:
Settings Screen: Allows you to set the Video Enhancement and the Scaler.
There is also a simple to use software utility for the AC-SC1-AUHD. To use this software simply:
AC-SC1-AUHD
Page 8

EDID Management Screen: Allows you to set the EDID.
AC-SC1-AUHD
Page 9

CTRL/ISP
1. Mini USB Port for firmware and control.
2. Command list below.
For CTRL, use a Micro to USB cable and set the serial communications to:
57600,n,8,1 (baud: 57600, no parity, 8 data bits and 1 stop bit) with no handshaking.
AC-SC1-AUHD ASCII Command List:
AC-SC1-AUHD
Page 10

Applications:
AC-SC1-AUHD
Page 11

AC-SC1-AUHD
Page 12

Troubleshooting
•Verify Power - When power is applied all lights on the top of the device will flash. You
can also press any of the 3 buttons on the side to change settings, the corresponding
lights should change if the unit is powered up.
•Verify Connections - Make sure all connected cables are properly connected. There are
blue LED lights next to the HDMI ports, these lights will go solid when the source/
displays handshake is complete.
oYou can use the built in Test Pattern Generator to verify signal path from SC1 to
the display
•Source not syncing, default EDID is 0000 (all off) EDID BYPASS. If this is not working try
one of the built in EDIDs Pg.6, or Copy from the Display using the USER EDID Pg. 8
•Extracted Audio not working - This unit does not downmix, the source must be set to
2ch for the extracted 3.5mm audio port to work.
•Still having issues, contact us
oSupport Direct - +1-605-977-3477
oAll inquiries - +1-605-274-6055
oSubmit a support request ticket
https://support.avproedge.com/hc/en-us/request
AC-SC1-AUHD
Page 13

•Use the power supplies provided. If an alternate supply is required, check
voltage, polarity and that it has sufficient power to supply the device it is
connected to.
•Do not operate these products outside the specified temperature and
humidity range given in the above specifications.
•Ensure there is adequate ventilation to allow this product to operate
efficiently.
•Repair of the equipment should only be carried out by qualified
professionals as these products contain sensitive components that may
be damaged by any mistreatment.
•Only use this product in a dry environment. Do not allow any liquids or
harmful chemicals to come into contact with these products.
•Clean this unit with a soft, dry cloth. Never use alcohol, paint thinner or
benzene to clean this unit.
Maintenance
To ensure reliable operation of this product as well as protecting the safety of any
person using or handling this device while powered, please observe the following
instructions.
•The DC power supply cord or AC adaptor has been damaged
•Objects or liquids have gotten into the unit
•The unit has been exposed to rain
•The unit does not operate normally or exhibits a marked change in
performance
•The unit has been dropped or the housing damaged
Damage Requiring Service
The unit should be serviced by qualified service personnel if:
AC-SC1-AUHD
Page 14

Support
Should you experience any problems while using this product, first, refer to the
Troubleshooting section of this manual before contacting Technical Support. When
calling, the following information should be provided:
•Product name and model number
•Product serial number
•Details of the issue and any conditions under
which the issue is occurring
Warranty
If your product does not work properly because of a defect in materials or
workmanship, AVProEdge (referred to as “the warrantor”) will, for the length of the
period indicated as below, (Parts/Labor (10) Years), which starts with the date of
original purchase (“Limited Warranty period”), at its option either (a) repair your
product with new or refurbished parts, or (b) replace it with a new or a refurbished
product. The decision to repair or replace will be made by the warrantor. During the
“Labor” Limited Warranty period there will be no charge for labor. During the
“Parts” warranty period, there will be no charge for parts. You must mail-in your
product during the warranty period. This Limited Warranty is extended only to the
original purchaser and only covers product purchased as new. A purchase receipt or
other proof of original purchase date is required for Limited Warranty service.
This warranty extends to products purchased directly from AVPro or an authorized
dealer. AVPro is not liable to honor this warranty if the product has been used in any
application other than that for which it was intended, has been subjected to misuse,
accidental damage, modification or improper installation procedures, unauthorized
repairs or is outside of the warranty period. Please direct any questions or issues you
may have to your local dealer before contacting AVPro.
AC-SC1-AUHD
Page 15

AC-SC1-AUHD
Page 16

AC-SC1-AUHD
Page 17

Thank you for choosing AVProEdge!
Please contact us with any questions. We are happy to be
of service!
AVProEdge
2222 E 52nd St N ~ Sioux Falls, SD 57104
1-877-886-5112 ~ 605-274-6055
AC-SC1-AUHD
Page 18
/