Page is loading ...

SMARTBoard® 8055i,
8055i-SMP and
8055ie-SMP
Interactive flat panels
User’s guide

Product registration
If you register your SMART product, we’ll notify you of new features and software upgrades.
Register online at smarttech.com/registration.
Keep the following information available in case you need to contact SMARTSupport.
Serial number:
Date of purchase:
FCC warning
This equipment has been tested and found to comply with the limits for a Class A digital device, pursuant to Part 15 of the US Federal Communications Commission
Rules. These limits are designed to provide reasonable protection against harmful interference when the equipment is operated in a commercial environment. This
equipment generates, uses and can radiate radio frequency energy and, if not installed and used in accordance with the manufacturer’s instructions, may cause
harmful interference to radio communications. Operation of this equipment in a residential area is likely to cause harmful interference in which case the user will be
required to correct the interference at his own expense.
Trade-mark notice
SMARTBoard, SMART Ink, SMARTNotebook, SMARTMeetingPro, DViT, SMARTGoWire, smarttech, the SMART logo and all SMART taglines are trade-
marks or registered trade-marks of SMARTTechnologiesULC in the US and/or other countries. Mac and Macintosh are trade-marks of Apple Inc., registered in the
US and other countries. Windows is either a registered trade-mark or a trade-mark of Microsoft Corporation in the US and/or other countries. All third-party product
and company names may be trade-marks of their respective owners.
Copyright notice
© 2012 SMARTTechnologiesULC. All rights reserved. No part of this publication may be reproduced, transmitted, transcribed, stored in a retrieval system or
translated into any language in any form by any means without the prior written consent of SMARTTechnologiesULC. Information in this manual is subject to
change without notice and does not represent a commitment on the part of SMART.
Patent No. US6320597; US6326954; US6741267; US6803906; US6947032; US6954197; US6972401; US7151533; US7236162; US7411575; US7619617; US7643006;
US7692625; US7755613; US7757001; USD612396; US6563491; US6829372; US7880720; USD612396; USD616462; USD617332; and USD636784. Other patents
pending.
06/2012

Important information for your
interactive flat panel
W A R N I N G
l Failure to follow the installation instructions sent with your SMART product could result
in personal injury and product damage which may not be covered by your warranty.
l Do not open or disassemble the SMART product. You risk electrical shock from the high
voltage inside the casing. Opening the casing also voids your warranty.
l Do not stand (or allow children to stand) on a chair to touch the surface of your SMART
product. Rather, mount the product at the appropriate height.
l To reduce the risk of fire or electric shock, do not expose the SMART product to rain or
moisture.
l If your SMART product requires replacement parts, make sure that the service
technician uses replacement parts specified by SMARTTechnologies or parts with the
same characteristics as the original.
l Ensure that any cables extending across the floor to your SMART product are properly
bundled and marked to avoid a trip hazard.
l Do not insert objects inside the cabinet ventilation holes, because they could touch
dangerous voltage points and cause electric shock, fire or product damage which may
not be covered by your warranty.
l Do not place any heavy objects on the power cable. Damage to the cable could cause
shock, fire or product damage which may not be covered by your warranty.
l Useonly extension cords and sockets into which this product’s polarised plug can be
fully inserted.
l Use the power cable provided with this product. If a power cable is not supplied with this
product, please contact your supplier. Use only power cables that match the AC voltage
of the power outlet and that comply with your country’s safety standards.
l If the glass is broken, do not touch the liquid crystal. To prevent injury, handle glass
fragments with care when disposing of them.
l Do not move or mount the interactive flat panel by connecting rope or wire to its handles.
Because the interactive flat panel is heavy, rope, wire or handle failure could lead to
personal injury.
l Use only VESA®-approved mounting hardware.
i

l Disconnect all power cables for your interactive flat panel from the wall socket and seek
assistance from qualified service personnel when any of the following occurs:
o
The power cable or plug is damaged
o
Liquid is spilled into the interactive flat panel
o
Objects fall into the interactive flat panel
o
The interactive flat panel is dropped
o
Structural damage such as cracking occurs
o
The interactive flat panel behaves unexpectedly when you follow operating
instructions
C A U T I ON
l Before you clean your SMART product, shut down or disconnect the computer.
Otherwise, you may scramble the desktop icons or inadvertently activate applications
when you wipe the screen.
l Avoid setting up and using the SMART product in an area with excessive levels of dust,
humidity and smoke.
l Make sure that an electrical socket is near your SMART product and remains easily
accessible during use.
l For SMARTBoard 8055ie-SMPinteractive flat panel only: The external power supply
needs to meet the Limited Power Source (LPS) requirements of CSA/UL/IEC/EN 60950-
1, when required.
l This SMART product should be used only with European TN and TT power distribution
systems.
It is not suitable for older, IT-type power distribution systems found in some European
countries. "This system (IT-type) is widely used isolated from earth, in some
installations in France, with impedance to earth, at 230/400V, and in Norway, with
voltage limiter, neutral not distributed, at 230V line-to-line." (IEC 60950:1999)
Contact qualified personnel if you’re uncertain of the type of power system available
where you’re installing your SMART product.
l You must connect the USB cable that came with your SMARTBoard® interactive flat
panel to a computer that has a USB compliant interface and that bears the USB logo. In
addition, the USB source computer must be compliant with CSA/UL/EN 60950 and bear
the CE mark and CSA and/or UL Mark(s) for CSA/UL 60950.This is for operating safety
and to avoid damage to the SMARTBoard interactive flat panel.
I M P O R T A N T I N F O R M A T I O N F O R Y O U R I N T E R A C T I V E F L A T P A N E L
ii

Contents
Important information for your interactive flat panel i
Chapter 1: About your interactive flat panel 1
Feature highlights 2
Interactive flat panel components 3
Chapter 2: Installing your interactive flat panel 9
Environmental requirements 9
Wall-mounting your interactive flat panel 10
Chapter 3: Connecting computers and peripheral devices 13
Installing the speakers 14
Connecting a room control system 15
Connecting computers to your interactive flat panel 16
Connecting to power and computer 1 17
Installing computer 2 connection 18
Disabling the USB port on the side terminal panel 19
Connecting peripheral devices to your interactive flat panel 20
Chapter 4: Installing SMART software 21
Installing SMARTMeetingPro software 21
Installing SMARTNotebook software 22
Chapter 5: Using your interactive flat panel 23
Turning your interactive flat pane on and off. 24
Understanding presence detection 25
Using the infrared remote control 26
Getting started with your SMARTBoard interactive flat panel 30
Playing audio files on your interactive flat panel 41
Using the USB port 42
Chapter 6: Using guest laptops with your interactive flat panel 43
Connecting a guest laptop 43
Using a SMARTGoWire cable 44
Connecting computer 2 46
Chapter 7: Maintaining your interactive flat panel 47
Updating your SMART software and firmware 47
Calibrating your interactive flat panel 50
Orientating your interactive flat panel 51
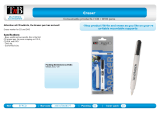
Replacing a pen nib 51
Cleaning the screen 52
Cleaning the presence detection sensors 52
iii

Cleaning the camera windows and reflective tape 53
Maintaining ventilation 53
Preventing condensation 54
Checking the interactive flat panel installation 54
Removing your interactive flat panel 54
Transporting your interactive flat panel 56
Chapter 8: Troubleshooting for your interactive flat panel 57
Resolving image issues 57
Resolving touch control and digital ink issues 61
Resolving audio issues 64
Resolving remote control issues 65
Troubleshooting presence detection 65
Resolving issues using the SMART Connection Wizard 67
Resolving issues using SMART Board Diagnostics 67
Appendix A: Adjusting video settings with the on-screen display menu 69
Changing settings in the OSD menu 69
Main menu settings 70
Appendix B: Hardware environmental compliance 75
Waste Electrical and Electronic Equipment regulations (WEEE directive) 75
Restriction of Certain Hazardous Substances (RoHS directive) 75
Batteries 75
Packaging 75
Index 77
C O N T E N T S
iv

Chapter 1: About your interactive flat panel
Feature highlights 2
Commercial-grade, touch-enabled flat panel 2
Elegant, sophisticated design 2
Software 2
Presence detection 2
Dual sketch capabilities 2
SMARTInk™ 2
Touch and gestures 3
Durable surface 3
Interactive flat panel components 3
Front view 3
LCD screen 3
Presence detection 3
Camera and reflective tape channel 4
Pen and eraser holders 4
Colour select module 4
Front control panel 5
Infrared remote control 5
Left side view 6
Menu control panel 6
USB port 6
Side terminal panel 6
Back view 6
Bottom terminal panel 7
Inside terminal panel 8
Speaker wire connections 8
Chapter 1
1

Feature highlights
Commercial-grade, touch-enabled flat panel
Your SMARTBoard 8055i interactive flat panel features SMART’s proprietary DViT® (Digital
Vision Touch) technology on an LCD screen which enables you to select, write and erase on the
interactive surface. It enables you to do everything that you can do at your computer—open and
close applications, conference with others, create new documents or edit existing ones, visit
websites, play and manipulate video clips and more—just by touching the interactive surface.
Two users can also draw on the interactive surface at the same time and you can use an array of
gestures within applications.
Elegant, sophisticated design
The professional design and crisp, eye-catching visuals of the SMARTBoard 8055i interactive
flat panel make it perfect for any high-end workspace.
Software
To use all the features of your interactive flat panel described in this guide, go to
smarttech.com/downloads and ensure that you have the latest version of SMART software and
SMART Product Drivers installed on your computer.
Presence detection
The interactive flat panel has two presence detection sensors on its frame that can detect people
up to 5m (16') away. When the sensors detect people in the room, the interactive flat panel turns
on. When the sensors no longer detect people in the room, the interactive flat panel turns off.
Dual sketch capabilities
Two people can each pick up a pen and draw on the interactive surface at the same time,
providing a higher degree of interactivity.
SMARTInk™
SMARTInk enables you to write and draw in digital ink over open applications, files, folders,
websites and any other open window on your computer. When you write outside the open
windows on your computer, a SMARTInk Note appears and you can write inside the note.
When you open an application that has its own ink tools, you can turn off SMARTInk and then
use the application's ink tools to write in the content.
For more information, see the SMARTInk user’s guide for Windows® operating systems
(smarttech.com/kb/170191) or SMARTInk user's guide for MacOSX operating system software
(smarttech.com/kb/170192).
C H A P T E R 1
About your interactive flat panel
2

Touch and gestures
You can perform mouse functions with your finger and write and erase digital ink with a pen tray
pen or the eraser. The object awareness feature enables you to pick up a pen and then write,
select or erase without replacing the pen.
Durable surface
The SMARTBoard 8055i interactive flat panel features a hardened glass screen.
Interactive flat panel components
Front view
The front of your interactive flat panel includes the LCD screen, the cameras and reflective tape
channel, sensors for presence detection, the pen holders with the pens, the eraser holder with an
eraser and the colour select module.
LCD screen
The screen is 133cm W x 82cm H (52 3/8" × 32 5/16"), with a 140cm (55") diagonal, 16:9 format.
For information on cleaning your LCD screen, see Cleaning the screen on page 52.
Presence detection
The interactive flat panel has two presence detection sensors on its frame that can detect people
up to 5m (16') away.When the sensors detect people in the room, the interactive flat panel turns
on.When the sensors no longer detect people in the room, the interactive flat panel turns off.
For information on cleaning your sensors, see Cleaning the presence detection sensors on page
52.For more information on presence detection settings, see Proximity control settings on page
72.
C H A P T E R 1
About your interactive flat panel
3

N O T E
If ECOSTANDBY is enabled, presence detection functionality is limited.For more information,
see Setup settings on page 72
Camera and reflective tape channel
The interactive flat panel screen is bordered by a channel that contains reflective tape. Each
corner has a camera that tracks finger and pen positions across the screen.For information on
cleaning your camera windows and reflective tape, see Cleaning the screen on page 52.
C A U T I ON
l Do not damage or remove the reflective tape.
l Keep the reflective tape dry.
I M P O R T A N T
l Do not attach items such as adhesive notes to the screen because they will interfere
with the cameras.
l Do not place anything in the channel because it will interfere with the cameras.
Pen and eraser holders
The bottom bezel contains magnetic holders for two pens and an eraser. Removing a pen or the
eraser from the holders activates it and enables you to either draw or erase digital ink.
C A U T I ON
When returning the pen or eraser to the magnetic holder, ensure that it is centred on the holder
to prevent the pen or eraser from falling and potentially being damaged.
Colour select module
The colour select module enables you to access the help function, open the on-screen keyboard,
select pen colour, activate the right-click and orientate the interactive flat panel.
C H A P T E R 1
About your interactive flat panel
4

Front control panel
The front control panel contains the volume
control, mute, input and power buttons, as
well as the status light and infrared remote
control sensor.
I M P O R T A N T
Do not cover or block this area or you
could have reduced use of the infrared
remote control.
In normal use
l
The volume, mute and input buttons
are blue.
l
The power button is green.
l
The status light is green.
For information on diagnosing issues using
the front control panel lights, see
Diagnosing blank screen issues using the
front control panel lights on page 57.
Infrared remote control
The infrared remote control enables you to turn on and turn off your interactive flat panel, change
the input source, adjust the volume, access the on-screen menu and more.For more information
on the infrared remote control, see Using the infrared remote control on page 26.
C H A P T E R 1
About your interactive flat panel
5

Left side view
The left side of your interactive flat panel has
the menu control panel and the side terminal
panel.
Menu control panel
The menu control panel enables you to access the on-screen display menu to adjust display and
audio settings.For more information on the on-screen display menu, see Adjusting video settings
with the on-screen display menu on page 69.
USB port
The USB port takes a USB type A connector, such as a USB memory drive.For more information
on this port, see Using the USB port on page 42.
N O T E
You can disable this USB port so that a computer cannot access it.For instructions, see
Disabling the USB port on the side terminal panel on page 19.
Side terminal panel
The side terminal panel has USB and HDMI ports for connecting a guest laptop.For more
information on the side terminal panel, see Connecting a guest laptop on page 43.
Back view
The back of the interactive flat panel includes the bottom terminal panel, the inside terminal panel
and the speaker wire connections.
I M P O R T A N T
Connect all required cables before you wall-mount your interactive flat panel. Some connectors
could be inaccessible after wall mounting.
C H A P T E R 1
About your interactive flat panel
6

Bottom terminal panel
The bottom terminal panel contains the main power switch and several connections, including
both touch control connections and connections for auxiliary input and output devices, such as
DVD players, Blu-ray™ players and VCRs.
C A U T I ON
The AC power socket is designated for a component of the SMART Board 8055ie-SMP
interactive flat panel with appliance.See Replacing the appliance on your SMART product
(FRU - Appliance - SB8) (smarttech.com/kb/170062).
C H A P T E R 1
About your interactive flat panel
7

Inside terminal panel
The inside terminal panel is on the left side of
the interactive flat panel and contains the
touch control USB connections and the room
control input and output.
Speaker wire connections
The speaker wire connections are located in the
bottom terminal panel.
C H A P T E R 1
About your interactive flat panel
8

Chapter 2: Installing your interactive flat
panel
Environmental requirements 9
Wall-mounting your interactive flat panel 10
Important mounting considerations for trained installers 11
Choosing a mounting location 11
Choosing a mounting height 12
You need a team of professional installers to install your SMARTBoard 8055i interactive flat
panel.
This chapter provides additional considerations and details for installing your interactive flat
panel.
I M P O R T A N T
Because the ports might not be accessible after wall-installation, consider connecting cables
for speakers, computers and peripheral devices whilst the interactive flat panel is still in its
packaging or is suspended from a lifting device.For more information, see Connecting
computers and peripheral devices on page 13.
Environmental requirements
Before installing your interactive flat panel, review the following environmental requirements.For
more detailed information, see SMART Board 8055i and 8055i-SMPinteractive flat panel
specifications (smarttech.com/kb/170179) or SMART Board 8055ie-SMPinteractive flat panel
with appliance specifications (smarttech.com/kb/170178).
Environmental requirement Parameter
Power requirements 0.8A to 1.8A at 100V to 240V AC, 50 Hz to 60 Hz
Power consumption at 25ºC
(77ºF)
Typically up to 148 W (brightness at 80% and volume at 50),
maximum 178 W (brightness and volume at maximum)
Operating temperature 5°C to 35°C (41°F to 95°F)
Storage temperature -20°C to 60°C (-4°F to 140°F)
Chapter 2
9

Environmental requirement Parameter
Humidity 5% to 80% relative humidity, non-condensing
Ventilation Maintain a 10cm (4”) ventilation area around your interactive
flat panel to enable its cooling fans to operate. Do not store or
operate your interactive flat panel in dusty environments
because dust could interfere with the product’s ventilation and
cooling.
Water and fluid resistance l Intended for indoor use only. Doesn’t meet any salt-
spray or water ingress requirements.
l Don’t pour or spray liquids directly onto the interactive
flat panel or any of its sub-components. These liquids
might get into areas where they could damage
sensitive electronic components.Refer to page 52 for
detailed instructions on cleaning your interactive flat
panel.
Wall-mounting your interactive flat panel
Use a team of trained, professional installers to install your interactive flat panel.
W A R N I N G
l Improper installation can result in personal injury or product damage.
l Your interactive flat panel weighs 44.5kg (98 lb). Refer to local building regulations to
ensure that your installation area can support this weight.
C A U T I ON
Do not allow the weight of the interactive flat panel to rest on the colour select module because
it is not designed to support product weight. Attach other components whilst the interactive flat
panel is either still in its packaging or suspended from a lifting device to prevent the weight of
the interactive flat panel from damaging the colour select module.
I M P O R T A N T
l Save all product packaging so that it is available if you need to transport your interactive
flat panel.If your original packaging is not available, you can purchase new product
packaging from your authorised SMART reseller (smarttech.com/where).
l Attach the speakers and connect the speaker wires to the interactive flat panel before
you wall-mount it.For more information, see Installing the speakers on page 14.
C H A P T E R 2
Installing your interactive flat panel
10

Important mounting considerations for trained installers
Consider the following when mounting the interactive flat panel on a wall:
ll Plan your workflow to include cabling because some cable connection points might not be
accessible after installation.
l Carry and lift the interactive flat panel by gripping the handles and sides.
l To mount the interactive flat panel on a wall, you require a standard VESA 600 mm × 400
mm compatible wall mount bracket (not included). The wall mount bracket must have
minimum depth of 14 mm to ensure sufficient space for the speakers.
l Use M8 screws to fasten the wall bracket. The screws must be 14–15 mm long plus the
thickness of the bracket and the washer.
l The recommended fasten force is 11.25–13.75 N·m (99.57–121.70 in-lb. ).
l Refer to the instructions included with the mounting equipment for more detailed
information.
Choosing a mounting location
Consider the following when you select a location for the interactive flat panel:
l The wall must be strong enough to support the interactive flat panel and the mounting
equipment. The interactive flat panel weighs 44.5kg (98lb).
l Do not install the interactive flat panel in a location where a door or gate could hit it.
l Do not install the interactive flat panel in an area where it will be subjected to strong
vibrations or dust.
l Do not install the interactive flat panel near where the main power supply enters the
building.
l Ensure adequate ventilation or provide air conditioning around the interactive flat panel so
that heat can flow away from the unit and the mounting equipment.
C H A P T E R 2
Installing your interactive flat panel
11

l If you mount the interactive flat panel in a recessed area, leave at least 10cm (4") of space
between the interactive flat panel and the recess walls to enable ventilation and cooling.
Choosing a mounting height
Consider the general height of your user community when your choose the mounting height for
the interactive flat panel.
C H A P T E R 2
Installing your interactive flat panel
12

Chapter 3: Connecting computers and
peripheral devices
Installing the speakers 14
Connecting a room control system 15
Connecting computers to your interactive flat panel 16
Interactive flat panel touch control and video input connections 16
Connecting to power and computer 1 17
Computer 1 connection diagram 17
Installing computer 2 connection 18
Computer 2 connection diagram 18
Disabling the USB port on the side terminal panel 19
Connecting peripheral devices to your interactive flat panel 20
Bottom terminal panel 20
This chapter includes information on connecting your interactive flat panel to computers and other
peripheral devices.
I M P O R T A N T
Because the cable connection points might not be accessible after wall-mounting, consider
connecting these devices before wall-mounting your interactive flat panel.
Chapter 3
13

Installing the speakers
Your interactive flat panel comes with two 15 W speakers.
g To install the speakers
1. Attach the speakers to the speaker mounting holes on the side of the interactive flat panel
with the screws included.
2. Connect the speaker wires to the speaker wire connections on the bottom terminal panel.
3. Run the speaker wire for the left speaker (when viewed from the back of the interactive flat
panel) below the bottom terminal panel and secure it with the small clamps included.
C H A P T E R 3
Connecting computers and peripheral devices
14
/