Page is loading ...

CLYMER.
PL5LKATIONS
PEUOEOT
MOPED
OWNER.
SERVICE
/REPAIR.
1976-1978

PEUGEOT
OWNER.SEBVICE/QERAIR.
1976-1978
By
ED SCOTT
ERIC JOHGENSEN
Editor
JEFF ROBINSON
Publisher
CLYMER. PUBLICATION}
World's largest publisher
of
books devoted exclusively to
automobiles, motorcycles, and boats.
222
NORTH
VIRGIL AVENUE,
LOS
ANGELES, CALIFORNIA
90004

Copyright ©
1978
Clymer
Publications
All rights
reserved.
No part
of
this
publication
may be
reproduced,
stored in a
retrieval
system,
or
transmitted,
in any form
or by
any
means,
electronic,
mechanical,
photocopying,
recording or
othenvise,
without
the
prior written
permission
of
Clymer
Publications.
First Edition
First
Printing
January, 1978
Second Printing
June, 1978
Printed
in U.S.A.
ISBN:
0-89287-202-0
Technical
assistance by
Cycles
Peugeot (U.S.A.),
Inc.,
Gardena,
California
Technical
illustrations by
Sieve
Amos
Photographs by Mike
Bishop

Chapter One
General Information
Chapter Two
Basic Hand
Tools
Chapter Three
Tune-up, Lubrication,
and Maintenance
Chapter Four
Troubleshooting
Chapter Five
Engine
Chapter Six
Clutch/Transmission
Chapter Seven
Fuel and
Exhaust
Systems
Chapter Eight
Electrical System
Chapter
Nine
Brakes
Chapter
Ten
Suspension
and Frame
Index

CONTENT}
CHAPTER
ONE
GENERAL
INFORMATION
Basic components
Manual
organization
Service hints
Safety
first
Parts replacement
Expcndablesupplies
CHAPTER
TWO
BASIC
HAND TOOLS
Fasteners
Screwdrivers
Pliers
Box and
open-end wrenches
Adjustable
(crescent) wrenches
Socket
wrenches
Cone wrenches
inch
Torque
Impact
driver
Ignition gauge
Tire
lever
Spoke wrench
Mechanic's tips
CHAPTER
THREE
TUNE-UP,
LUBRICATION,
AND
MAINTENANCE
Periodic
lubrication
Periodic
maintenance
Cleaning solvents
CHAPTER FOUR
TROUBLESHOOTING
Operating
requirements
Emergency troubleshooting
Engine
Clutch
Brakes
Electrical
Suspension
CHAPTER FIVE
ENGINE .
. .
Principles of operation
Lubrication
Cooling
Removal/installation
Cylinder head
Cylinder
Piston and wrist pin
Piston cleaning
and inspection
Piston ring
Decompressor valve
Crankshaft seal
Intake
valve
Splitting the crankcase

chapter
six
clutch/transmission
Clutch
Crank
arm
Variable
drive
pulley
Chains
Pedals
Drive
pulley
CHAPTER
SEVEN
FUEL
AND
EXHAUST
SYSTEMS
Carburetor
Air
filter
Fuel
shutoff valve
Exhaust
system
CHAPTER
EIGHT
ELECTRICAL
SYSTEM
Magneto
Speedometer
illumination
light
Accessories
and
instruments
Switches
Headlight
Horn
Taillight/brakelight
CHAPTER
NINE
BRAKES
. . .
.
Cable
CHAPTER
TEN
SUSPENSION
AND
FRAME .
Front
wheel
Rear wheel
Front
and rear
wheel
hubs
Spokes
Tires and
tubes
Tire repairs
Handlebar
Headset
Front fork
Rear
shock
absorbers
Rear
swing arm
Seat
INDEX

CHAPTER ONE
GENERAL INFORMATION
Although mopeds have long been a
favorite
in Europe, it is only
recently
that they
have
become
popular in
the
United States. Today
they are more numerous and are ridden more
often than ever before.
The majority of moped dealers also sell
bicycles or motorcycles. The number of compe-
tent mechanics available cannot keep pace with
the demand. Moped owners must often do their
own maintenance and repair.
Moped maintenance and repair is not
dif-
ficult if you
know what
tools to use and
what
to
do. Anyone not afraid to get
his or her hands
dirty, of
average
intelligence, and with enough
mechanical
ability to change a
light bulb can
perform most of the procedures in this book.
In some cases, a repair job may require tools
or skills not
reasonably expected of
the
home
mechanic. These instances are noted in each
chapter and
it
is
recommended that
you
take
the job to your dealer, competent
mechanic, or
machine shop.
BASIC COMPONENTS
Basically the moped
is
an engine
powered
bicycle. It has
two pedals and can be ridden as
an ordinary bicycle without running the engine.
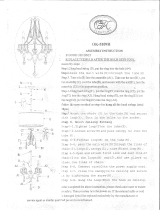
Figure 1 shows the major components of a
moped.
Frame
A
heavy duty, step-through bicycle frame
with provisions for an engine.
Engine
The
engine is a very simple one-cylinder,
2-
stroke engine
cooled
by
air. It produces approx-
imately 2
horsepower. This is the same type of
engine used on
outboard motors, iawn
mowers,
and many motorcycles. It is
very reliable and
easy to maintain.
Clutch/Transmission
The clutch/ transmission is automatic, that
is,
there are no gears to
shift
and no
clutch pedal
or
lever
to worry about. The engine
power is
transferred
to the
rear wheel by a
drive
chain
just like on a bicycle or motorcycle.
Suspension
Spring-type front forks
and rear shock ab-
sorbers
smooth
out rough roads. These are
similar
to
those used on motorcycles but are
simpler and require very little maintenance.
Brakes
The brakes are operated by
levers
on the
handlebars similar
to
those used
on
bicycles and

2
CHAPTER
ONE


4
CHAPTER ONE
motorcycles.
The left
hand operates the
rear
brakes and
the right hand, the
front brakes.
Wheels
and Tires
Wheels and
tires are basically
the same as
those used on
bicycles
except that they
are a lit-
tle
heavier in order to
accommodate the addi-
tional weight of
the moped.
Lighting
and Instruments
There is no
battery to be
concerned with on a
moped. The
electricity for lights
and spark plug
is
provided by a
small generator
called a
magneto. It is
similar to the
generator on
an
automobile. The only
instrument
is the
speedometer and it is
illuminated for
use at
night.
MANUAL
ORGANIZATION
This
manual
provides
service
information
and
instructions
for your
moped. All
dimen-
sions and
capacities are
expressed
in English
units
familiar to
U.S.
mechanics as
well as in
metric units.
This
chapter
provides general
information
and
specifications.
It also
identifies and ex-
plains all of the
major
components.
Chapter Two
explains selection
and use
of
the
tools you will
need to
work
on
your
moped.
Chapter
Three explains all
periodic
lubrica-
tion
and routine
maintenance
necessary to keep
your
moped running
well.
Chapter
Four provides
methods and
sugges-
tions
for quick
and accurate
diagnosis
and
repair of
problems.
Troubleshooting
proce-
dures
discuss
typical logical
methods to
pin-
point the
trouble.
Subsequent
chapters describe
specific
systems
such as
the engine,
clutch/transmis-
sion,
and
electrical system.
Each chapter
pro-
vides
disassembly, repair
and
assembly pro-
cedures in
simple
step-by-step form.
If repair is
impractical for a
home
mechanic, it is
in-
dicated. It is
usually faster
and less
expensive to
take such
repairs to a
dealer or
competent
repair shop.
Some
of the
procedures in
this manual
specify special
tools. In all cases,
the tool
is il-
lustrated either
in actual use
or alone. A
well-
equipped
mechanic may
find that he
can sub-
stitute
similar tools already
on hand
or can fab-
ricate his
own.
The terms
note,
caution and
warning
have
specific
meanings
in this manual.
A note pro-
vides additional
information to
make a step
or
procedure
easier or clearer.
Disregarding a
note
could cause
inconvenience,
but
would not cause
damage
or personal
injury.
A caution
emphasizes areas
where
equip-
ment damage
could result.
Disregarding a
cau-
tion could
cause
permanent
equipment
damage;
however,
personal injury
is unlikely.
A
warning
emphasizes areas
where
personal
injury or
even death
could
result from
negligence.
Mechanical damage
may also oc-
cur,
warnings are to
be taken
seriously.
In
some cases,
serious injury or
death has
resulted
from
disregarding
similar warnings.
Throughout
this manual
keep in
mind two
conventions.
"Front" refers to
the front
of the
moped.
The front
of any
component such as
the engine
is the end
which faces
toward the
front
of the
moped. The
left and right
side refer
to
a person
sitting on the
seat facing
forward.
For
example, the
clutch/transmission is on
the
left
side. These
rules are
simple, but
even ex-
perienced
mechanics
occasionally
become dis-
oriented.
SERVICE
HINTS
Most of
the service
procedures
covered are
straightforward and
can be
performed
by
anyone
reasonably handy
with tools.
It is sug-
gested,
however, that you
consider
your
own
capabilities
carefully
before
attempting any
operation
involving
major
disassembly of the
engine.
1,
Some
operations,
for
example, require
the
use of a
hydraulic
press. It
would be
wiser to
have these
performed by a shop
equipped
for
such
work, rather
than try to
do the
job
yourself
with makeshift
equipment.
2. There
are many
items
available that can
be
used on
your hands
before and
after
working
on your
moped.
A little
preparation prior to
getting
"all greased
up" will
help cleaning
up
later.

GENERAL
INFORMATION
5
Before
starting on your task, work Vaseline,
soap, or a commercially available
product like
ProTek
into your hands
and under your finger-
nails and cuticles.
This will make cleanup
a lot
easier.
3. For cleanup use a waterless
hand soap,
like
Sta-Lube,
and
finish
up with powdered
Boraxo
and a fingernail
brush.
4. Repairs
go
much
easier and faster
if your
moped is
clean before you begin work.
There
are
special cleaners like, Gunk
Cycle Degreaser,
for washing
the engine and related
parts.
Follow
the manufacturer's
instructions.
Clean
all oily
or greasy parts with
cleaning solvent as
you remove
them.
WARNING
Never
use gasoline as
a cleaning solvent.
It prevents
an extreme
fire hazard. Be
sure
to work in a well-ventilated
area
when using
cleaning solvent.
Keep a fire
extinguisher,
rated
for
gasoline
fires,
handy in any
case.
5. Special tools are required
for some repairs.
These may be purchased
at a dealer, rented
from
a tool rental dealer or fabricated
by a
mechanic or machinist, often
at a considerable
savings.
6. Much of the labor charge for
repairs made
by delaers is for the removal
and disassembly of
other parts in order
to reach the defective
unit.
It is
frequently possible
to
perform
the pre-
liminary operations yourself
and then take the
defective unit
to the dealer for repair
at con-
siderable savings.
7. Once you have decided
to tackle the
job
yourself, read
the entire section in this manual
which
pertains to it. Study the illustrations,
photos
and text until you have a
good idea of
what is involved
in completing
the job satisfac-
torily. If special
tools are required, make ar-
rangements
to get them before
you start. It is
frustrating
and time consuming
to get partly in-
to a job and
then be unable
to complete it.
8.
During
disassembly of
parts, keep a few
general cautions
in mind. Force is rarely
needed
to
get
things
apart. If parts have a tight
fit, like
a bearing in a case,
there is usually a tool
designed
to separate them. NeveT
use a screw-
driver
to pry apart parts with
machined sur-
faces, such as
crankcase halves. You will
mar
the surfaces and end up with
leaks.
9. Make diagrams whenever
similar-appearing
parts are found.
For instance, crankcase
studs
are not the same length. You
may think you
can
remember where everything
came from
—
but
mistakes
could be costly.
There is also the
possibility you may be sidetracked
and not
return
to work for
days or even weeks
—
in
which interval
carefully laid out parts may have
become
disturbed.
10. Tag all similar
internal parts for location
and mark all mating
parts for position. Record
numbers and thickness oT any
shims as they are
removed.
Small parts such as
bolts can be iden-
tified by placing
them in plastic sandwich
bags.
Seal and label with
masking tape.
1 1
.
Wiring
should be tagged with masking
tape
and marked as each wire
is removed. Again, do
not rely on memory alone.
12. Protect finished surfaces
from physical
damage or corrosion. Keep
gasoline off of
painted
surfaces.
13. Frozen
or very tight bolts and screws
can
often
be loosened by soaking with
penetrating
oil, like Liquid
Wrench or WD-40,
then sharply
striking the bolt
head a
few
times with a ham-
mer
and punch (or screwdriver
for screws).
Avoid heat unless
absolutely necessary, since it
may melt, warp,
or remove the temper
from
many parts.
14. Avoid
flames or sparks when working near
flammable liquids,
such as gasoline.
15.
No parts, except those assembled with
a
press fit, require force during assembly.
If a
part is hard to remove or install,
find out
why
before proceeding.
16. Cover all openings
after
removing
parts to
keep dirt, small tools, etc., from falling
in.
17.
When
assembling two parts,
start all
fasteners,
then tighten evenly.
18.
Clutch/transmission parts, wiring connec-
tions, and brake
shoes should be kept clean and
free of grease and oil.
19. When assembling
parts, be sure that all
shims and washers are
replaced exactly as they
came out.

6
CHAPTER ONE
20.
Whenever a rotating
part butts
against a
stationary part,
look for a
shim or washer.
Use
new gaskets if there
is any doubt
about the con-
dition of
the old ones.
Generally you
should ap-
ply gasket cement to
one mating
surface only so
the parts may
be disassembled
in the future.
A
thin
coat of oil on gaskets
helps them
seal effec-
tively.
21.
Heavy grease can be
used to
hold small
parts in
place if they
tend to fall out
during
assembly.
However, keep grease
and oil
away
from electrical
components,
brake and
clutch
parts.
22. Carbon
can be
removed from the
head and
top of
the piston with a
dull
screwdriver. Do
not
scratch either
surface. Then
wipe off the
surfaces with a
clean cloth.
23.
Carburetors
are best
cleaned by
disassembling them and
soaking the
parts in a
commercial carburetor
cleaner.
Never soak
gaskets
or plastic or
rubber parts in
these
cleaners.
Never use wire to
clean out the jet
and
air passages; they
are easily
damaged. Use com-
pressed air to
blow out the
carburetor only if
the
float has been
removed first.
Take your
time and do
the job right. Do
not
forget that a
newly rebuilt
engine must
be
broken in the
same as a
new one.
SAFETY
FIRST
Professional mechanics
can work for
years
and
never sustain a
serious injury,
if you
observe a
few
rules
of common
sense and
safety, you can
enjoy many
safe hours servicing
your
own moped. You could
hurt
yourself or
damage the moped
if you ignore these
rules.
1 . Never use gasoline as
a cleaning
solvent.
2. Never
smoke or use a
torch in the
vicinity of
flammable
liquids, such
as cleaning
solvent
in
open
containers.
3. Use
the
proper sized
wrenches to
avoid
damage to riuts
and injury to
yourself.
4. When
loosening
a tight
or stuck nut,
be
guided by
what
would happen if
the
wrench
should slip.
Protect
yourself
accordingly.
5. Keep
your work area
clean and
uncluttered.
6.
Wear safety goggles
during
all operations in-
volving drilling,
grinding, or
use of a
cold
chisel.
7.
Never use
worn tools.
8. Keep
a fire
extinguisher
handy and
be sure il
is
rated for
gasoline and
electrical fires.
PARTS
REPLACEMENT
Manufacturer's
make frequent
changes
dur-
ing the
model
year; some
relatively
major.
When you
order
parts from the
dealer or
other
parts
distributors, always
order by
engine and
frame
number.
Write the numbers
down
and
carry them
with you.
Compare
new parts to
old
before
purchasing them.
If they
are not
alike,
have the parts
manager
explain
the
difference
to
you.
EXPENDABLE
SUPPLIES
Certain
expendable
supplies are also
re-
quired.
These
include grease, oil,
gasket
ce-
ment,
wiping rags,
and cleaning solvent.
Ask
your dealer for
Ihc special
locking
compounds,
silicone
lubricants, and
commercial
chain
cleaners and
lubrication products
which
make
moped
maintenance simpler and
easier.
Solvent
is
available at most
service stations.

CHAPTER TWO
BASIC HAND
TOOLS
A number of
tools are required to maintain a
moped in
top
condition. You
may
already have
some around for other
work
such as home and
car repairs. There are also tools made especially
for moped repair; these you
will have
to pur-
chase. In any case, a wide
variety
of quality
lools will make moped repairs more effective
and convenient.
Top
quality tools are essential
—
and also
more economical. Poor grade tools are made of
inferior materials, and are thick, heavy, and
clumsy. Their rough finish makes them difficult
to clean and they usually don't stand up long.
Quality tools are made of alloy steel and are
heat treated for greater strength. They
are
lighter and better balanced than inferior ones.
Their surface
is smooth, making them a plea-
sure
to
work with and
easy to clean.
The initial
cost of top
quality
tools may be
relatively
high,
but longer life and ease
of
use make
them
less
expensive in the long run.
It is aggravating to search for a certain tool in
the middle of a repair, only to find it covered
with
grime. Keep your lools in a tool box. Keep
wrench
sets, socket sets, etc., together. After
using a tool,
wipe off
dirt and grease
with
a
clean cloth and replace the tool in its correct
place.
This
chapter describes
various
hand tools re-
quired
to perform
virtually
any
repair
job on a
moped. Each tool is described
and recommen-
dations as to proper size
are made
for
those not
familiar with
hand tools. Table 1 includes
tools
for emergency repairs
on the road. Table 2 in-
cludes tools which
should be on hand at home
for simple repairs or major overhaul.
FASTENERS
In order to better understand and select basic
hand tools, a
knowledge
of
various
fasteners
used on
mopeds is important. This knowledge
will also aid selecting replacements when
fasteners are damaged or corroded beyond use.
Threads
Nuts, bolts, and
screws
are manufactured in
a wide range of thread patterns. To join a nut
and bolt, it is necessary that the bolt and the
diameter of the hole in
the
nut be
the
same. It
is
equally important that the threads on both
be
properly matched.
The best
way
to insure that threads on
two
fasteners
arc
compatible
is to turn the nut on
the bolt with fingers only. If much force is re-
quired, check the thread condition on both
fasteners,
if thread
condition is good, but the
fasteners jam, the threads are not compatible.
Take the fasteners to a hardware store or
moped dealer for proper
mates.

s
CHAPTER TWO
Table 1
EMERGENCY TOOL
KIT
Tool
Size or Specification
Common
screwdriver
Chonse smallest tools
Combination wrench 8 X
lOmn
Cone
wrenches
possible
lo lit
small
carrying pouch.
Tire levers
Tire patch kit
Table 2
HOME WORKSHOP
TOOLS
Tool
Size or
Specification
Screwdrivers
is k b
in, 11 ace
si°t
\\\2
in.
blade
Phillips
Size 2 tip, 6
in. blade
Pliers
Gas
pliers
6 in. overall
Vise
Grips* ID
in. overall
Needle nose
6 in. overall
Channel lock 12 in. overall
Snap ring
Wrenches
Box-end set
10-17, 20, 32mm
Open-end
set
10-17, 20,32mm
Crescent (adjustable) 6
and 12 in. overall
Socket set
Vim drive ratchet
with
10-17,20,
32mm sockets
Allen set
2-10mm
Cone
wrenches
Spoke
wrench
Other
Special Tools
Impact driver
%
in.
drive with ass't tips
Torque wrench iain.
drive-
0-100
ft.-lb.
Tire levers For
moped or motorcycle
tires
Most
fasteners are cut so
that a
fastener must
be
turned clockwise to
tighten it.
These are
called right-hand
threads. Some
moped compo-
nents,
such as
pedals, have
left-hand threads;
they must be
turned
counterclockwise to
tighten
them.
NOTE: When
replacing threaded com-
ponents,
rely on
your dealer's ex-
perience;
take the old
part in
for
replacement.
Machine
Screws
There
are many
different types
of machine
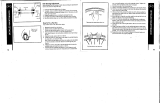
screws. Figure
1 shows a number
of screw
heads
requiring
different
types
or turning tools.
Heads are also
designed to
protrude
above the
metal
(round) or to be
slightly recessed
in the
metal (flat).
When replacing a
damaged
screw, take it to a
hardware store
or moped
dealer.
Match the
head type,
diameter,
and threads
exactly.
In
addition, match
the type of
mcial used. For
ex-
ample, if
the old
screw is
chrome plated,
the
new one
must be
chrome plated
also to resist
corrosion
and rust.
Bolts
Commonly called
bolts, the
technical name
for these
fasteners is
cap screws. They are
nor-
mally
specified by
diameter,
threads-per-inch
(tpi), and
length, e.g.,
K-20
x 1 specifies
a bolt
'4
in.
in
diameter with
20 tpi 1 in. long. The
measurement across
two flats
on the head
of
the bolt
indicates the proper
wrench size to
be
used.
When replacing
damaged
bolls,
follow
the
same
advice given for
machine
screws.
Nuts
Nuts are
manufactured in a variety of
types
and
sizes. Most nuts
on mopeds are
hexagonal
(6-sided) and fit
on bolts, screws
and studs with
the same diameter
and threads-per-inch.
Figure 2
shows several nuts
usually round on
mopeds. The common
nut (A), is
normally used
with a
lockwasher. The nut (B) has a
nylon in-
sert which
prevents the nut
from loosening
and
does not require
a
locknut.
To
indicate the size
of the
nut, manufacturer's
specify the
diameter
of the
opening and the
threads-per-inch (tpi),
e.g.,
W-20indicates a
{
A in.
opening and 20 tpi.
This is,
of course, the
same as for bolts,
but
with no length dimension
given. In
addition,
the
measurement across two flats on
the nut in-
dicates the proper
wrench size to be used.
When replacing a
damaged nut,
take it
to
a
hardware store
or moped dealer.
Match the
type,
diameter, and threads
exactly, in addi-
tion, match
the type of
metal used, e.g.,
chrome
plating to resist rust
and corrosion.

BASIC HAND TOOLS
9
O CD CD
CD
CD
©
CD
MACHINE SCREWS
Phillips Aller
OPENINGS FOR TURNING
TOOLS
©
A. Common nut 8. Self-locking nut
©
Plain lockwasher
Internal tooth lockwasher External tooth
lockwasher
Washers
There are two
major types of washers
—
flat
washers and
lockwashers. Flat
washers
are sim-
ple discs with a hole to fit a
screw or bolt.
Lockwashers
are
designed
to
prevent a fastener
from working loose, due to
vibration, expan-
sion,
and contraction. Figure 3
shows several
washers. Note that flat
washers
are
often used
between a lockwasher and a
fastener
to
act as a
smooth bearing
surface. This permits the
fastener to be
turned easily with a tool.
SCREWDRIVERS
The
screwdriver is a very basic tool, but
many
people don't use it properly and conse-
quently, do more damage
ihan good. The slol
on a screw has a definite
dimension and shape.
A
screwdriver must be selected to conform to
that shape. A small
screwdriver
in a large
slol
will twist the
screwdriver
out
of shape and
damage the slot. A large
screwdriver
on a
small
slot
will also damage [lie slot. In addition, since

10
CHAPTER
TWO
the sides
of the screw
slot are parallel,
the sides
of the
screwdriver near
the tip must be
parallel.
If
the tip sides are tappered,
the screwdriver
wedges
itself
out of the
slot; this makes
the
screw
difficult to remove
and may damage
the
slot.
Two basic
types of screwdrivers
are required
to repair
the moped
—
a common screwdriver
and
a
Phillips
screwdriver.
Both
types are il-
lustrated
in Figure 4.
Screwdrivers
are available
in sets which
often
include an
assortment
of common and Phillips
blades. If
you purchase individual
screwdrivers,
as a minimum
obtain:
a. Common screwdriver,
7,
6
x 6 in. blade
b. Common
screwdriver, V
s
x
12 in. blade
c. Phillips screwdriver,
size
2, 6 in. blade
Use screwdrivers
only for driving
screws.
Never
use a screwdriver for
prying or chiseling.
In addition, never
use a common
screwdriver
to
remove a Phillips
or Allen head
screw; you can
damage the
head so that even
the proper tool
cannot
remove the screw.
Keep
screwdrivers
in proper condition
and
they will last longer
and perform
better. Always
keep the tip
in good condition.
Figure 5 shows
how
to grind the tip
to proper shape if it
is
damaged.
Note the parallel
sides at the
tip.
PLIERS
Pliers
come in a wide range
of types and
sizes. Pliers are useful
for cutting, bending,
and
crimping.
They should never
be used
to cut
hardened
objects or
to turn nuts or bolts.
Figure 6 shows several
pliers useful
in moped
repairs.
Each
type of pliers has
a specialized function.
Gas
pliers are general
purpose and are used
mainly for holding things
and bending. Vise
Grips
are used as pliers
or to grip objects very
tightly like a vise.
Needle nose pliers are
used to
hold or bend small
objects. Channel lock
pliers
can be adjusted
to hold various size objects; the
jaws remain parallel
to grip round
objects such
as pipe or
tubing. There are
many more types of
pliers. The ones
described here are most
suitable for moped repairs.
©
Coned
way to grind blade
Correct taper and site
Taper
too
steep

BASIC
HAND TOOLS
11
BOX
AND
OPEN-END
WRENCHES
Box wrenches and
open-end wrenches
are
available in sets
or separately in a
variety of
sizes. See Figure
7 and 8. The
size stamped near
the end
refers
to
the
distance
between two
parallel flats on a
hex head bolt ot nut.
A set covering
10
to
17mm and
21mm is ade-
quate for
service on the moped.
Box
wrenches are usually
superior to open-
end wrenches.
Open-end
wrenches grip a nut on
only 2 flats.
Unless it fits
well,
it
may slip and
round off the
points on the nui.
The box
wrench grips all 6 flats.
Both 6-point
and
12-
point openings
on box wrenches
are available.
The
6-point gives superior
holding
power; the
12-point
allows a shorter
swing.
Combination wrenches
which are open on
one end
and boxed on the
other are also
available. Both ends
are Ihe same size.
ADJUSTABLE (CRESCENT)
WRENCHES
An
adjustable wrench {also
called crescent
wrench) can be
adjusted to fit nearly any
nut or
bolt head. See Figure
9. However, it can loosen
and slip,
causing damage to
the nut. Use
only
when
other wrenches are not
available.
Crescent wrenches
come in
sizes ranging
from
4-18
in.
overall. A
6
or 8 in.
wrench is
recommended as an
all-purpose wrench.
SOCKET
WRENCHES
This type is undoubtedly
the fastest, safest,
and most
convenient to use. See
Figure 10.
Sockets
which attach to a ratchet
handle are
available with 6-point or
12-point openings and
'A,
Vi,
Vi, and
V* inch drives. The
drive
size in-
dicates the size of the
square hole
which
mates
with the ratchet
handle. Sockets are
available
in
metric and inch sizes.
CONE WRENCHES
Cone wrenches
are nothing more than
especially thin
open-end wrenchs. See Figure
11. These
wrenches are
available separately or
in sets of metric or
inch sizes. Obtain the
size
re-
quired for your moped;
they are available at
most moped
and bicycle dealers.

12
CHAPTER TWO
TORQUE WRENCH
Torque wrench is
used
with
a socket to
measure how tight a nut or bolt is installed. See
Figure 12. They
come in a
wide
price range and
with
either
%
or
'/>
in. square drive. The drive
size indicates the size
of the square
drive
which
mates
with
the socket. An inexpensive one that
measures
from
1-100
ft. -lb. (0-140 N-m) retails
For about
$15.
IMPACT
DRIVER
This
tool might
have
been designed with
the
moped in mind. See Figure 13. It
makes
removal
of engine
and
clutch
parts easy and
eliminates damage
io bolts and screw slots. A
good
one runs about $15 at large hardware
or
auto parts
stores.
IGNITION
GAUGE
This tool measures
point gap. It also has
round wire gauges for measuring
spark plug
gap. See Figure 14. A good one runs about
$3
and is available
at most auto or motorcycle sup-
ply stores.
TIRE LEVER
These
are used to
remove
or install moped
tires.
See Figure 15. Check the working end of
the tool before use and remove
any burrs.
Never
use a screwdriver in place
of a tire lever.
Chapter Ten explains
its use.
SPOKF.
WRENCH
This
special
wrench
is used to tighten spokes
(Figure
16).
It
is
available
at most moped or
motorcycle supply shops.
MECHANIC
S TIPS
Remuving Frozen
Nuts and Screws
When a fastener rusts
and cannot be remov-
ed,
several
methods may be used
to loosen it.
First,
apply penetrating oil such as Liquid
Wrench
or WD-40 (available
at any
hardware
or auto supply store). Apply
it liberally. Rap
the fastener several times with
a small hammer;
don't hit it hard
enough to cause damage.

For
frozen
screws,
apply
oil
as
described
then
insert
a
screwdriver
in
the
slot
and
rap
the
top
of
the
screwdriver
with
a
hammer.
This
loosens
the
rust
so
the
screw
can
be
removed
in
the
normal
way.
If
the
screw
head
is
too
chewed
up
to
use
a
screwdriver,
grip
the
head
with
Vise
Grip
pliers
and
twist
the
screw
out.
For
a
frozen
bolt
or nut,
apply
penetrating
oil,
then
rap
it
with
a
hammer.
Remove
with
a
proper
size
wrench.
If
the
points
are
rounded
off,
grip
with
Vise
Grip
pliers
as
described
for
Remedying
Slripped
Threads
Occasionally,
threads
are
stripped
through
carelessness
or
impact
damage.
Often
the
threads
can
be
cleaned
up
by
running
a tap
(for
internal
threads
on
nuts)
or
die
(for
external
threads
on
bolts)
through
the
threads
See
Figure
17.
screws.
T

CHAPTER TWO
Removing
Broken
Screws
or
bolls
When
the
head
breaks
off a
screw or
bolt,
several
methods are
available for
removing the
remaining
portion.
If a
large
portion
of the
remainder
projects
out, try
gripping
it
with Vise
Grips.
If the
pro-
jecting
portion
is too
small,
iry filing
it to
fit a
wrench or
cut a
slot in it to
fit a
screwdriver
(Figure 18).
If the
head
breaks
off flush,
try
using a
screw
extractor.
To do
this,
center
punch
the exact
center of
the
remaining
portion
of the
screw
or
bolt.
Drill a
small
hole in
the screw
and tap
the
extractor
into
the hole.
Back
the
screw out
with
a
wrench on
the
extractor. See
Figure
19.
3. Tap in
screw extractor
4.
Remove broken stud
/