Sony ICF-C1IPMK2 User manual
- Category
- Supplementary music equipment
- Type
- User manual
This manual is also suitable for

SONY:
3-873-060-12(1 )
FM/AM
Clock
Radio
ICF-C1iPMK2
Operating
Instructions
DREAM
MACHINE
Dream Machine is a trademark of Sony Corporation.
No Power No problem is a trademark of Sony Corporation.
©2008 Sony Corporation Printed
in
China

Design
and
specifications are subject to
change
without notice,
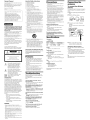
Precautions
~:=
:..r
Only
insert
up
to here.
Insert the cord while
pushing down the
terminal clamp,
4 Make sure the
AM
loop antenna
is
connected finnly by pulling softly.
Adjusting
the
AM
loop
antenna
Find
a place
and
an orientation that provide
good
reception.
•
Do
not place the
AM
loop antenna
near
the unit
or
other
AV equipment. as noise may result.
•
If
you use an external polarized
AM
antenna. be
sure to
connect
the
ground
cord
to the
th
tenninal.
The
supplied
AM
antenna
cord
has no polarity.
1 Remove only the loop part from the plastic
stand.
2 Set up the AM loop antenna.
3
Connect
the
cords
to
the
AM
antenna
terminals.
The
cords
(A
and
B) can
be
connected to either
tenninal.
Tip
Adjust the direction
of
the
AM
loop
antenna
for best
AM
broadcast sound.
Connecting
the
antenna
To
connect
the
AM
loop
antenna
The
shape and the length
of
the antenna is designed to
receive
AM
signals.
Do
not dismantle
or
roll up the
antenna.
10KHz
0.1
MHz
Channel step
AM
530-1
710kHz
Time
display
12-hour
System
Frequency range
Speaker
Approx. 5, I
cm
(2 inches) dia., 12.Q
Power
output
3 W + 3 W (at [0% harmonic distortion)
Power requirements
120
V AC,
60
Hz
For
clock
backup: 3 V DC,
one
CR2032
battery
Dimensions
Approx.
300
x 130 x 139
mm
(wthld)
(t
I l31i6 X 5
I/S
x 5
112
inches) inc!. projecting parts
and
controls
Mass
Approx. 1.8 kg (3
Ib
15.4
oz)
incl.
CR2032
battery
Supplied accessories
Remote
commander
(I)
Audio
connecting cable (1)
AM
loop antenna
(I)
FM
87.5
-
108
MHz
Band Frequency
If you have any
questions
or
problems
concerning
your
unit, please
consult
your
nearest
Sony
dealer.
Specifications
• Operate the unit on the
power
sources specified in
"Specifications"
• To disconnect the power
cord
(mains
lead), pull it
out by the plug,
nOI
the cord.
•
The
unit is not disconnected from the AC
power
source (mains) as long as it is connected to the wall
outlet, even
if
the unit itself has been turned off.
•
Do
not leave the unit
in
a location
near
a heat
source.
such
as a radiator
or
airduct.
or
in
a place
SUbject to direct sunlight. excessive dust,
mechanical vibration,
or
shock.
• Allow adequate air circulation to prevent internal
heat build-up.
Do
not place the unit
on
a surface
(a
rug. blanket, elc.)
or
near
materials
(a
curtain) that
might block the ventilation holes.
• Should
allY
solid object
or
liquid fall into the unit.
unplug the unit and have il
checked
by qualified
personnel before operating it
any
further.
• To clean the casing, usc a soft cloth
dampened
with
a mild detergent solution.
NOTES ON LITHIUM
BATTERY
• Wipe the battery with a dry cloth to assure a
good
contac!.
•
Be
sure to observe the correct polarity when
installing the battery.
• Do not hold the batlery with melallic tweezers,
otherwise ashort-circuit
may
occur.
• Dual
alann
FM/AM
Clock radio with iPod dock.
• Various type
of
alarms- iPed. radio
and
buzzer.
• Automatic time set - \Vhcn you plug the clock
in
for the lirst time, the current time will be shown in
the display.
• Autumatic Daylighl Saving
Time/Summer
lime
adjustment.
•
CLOCK
bullon to display month, day
and
year.
• Brightness control (High/Middle/Low).
• No Power
No
Problem™
alarm system
lO
keep the
clock
and the alarm operating during a power
interruption with a
CR2032
bal1ery installed.
Troubleshooting
Should
any
problem
occur
with the unit. make the
following simple checks to determine whether
or
not
servicing is required.
If
the problem persists. consult
your
nearest Sony
dealer.
For
the
state
of
california,
USA
only
Perchlorate
Material-special
handling may apply.
See
www.dtsc.ca.govthazardouswastc/perchlorate
Perchlorate Material: Lithium battery contains
perchlorate
The iPod cannot be charged.
• Make sure the iPod is securely connected.
I)
13) Unplug this apparatus during lightning
stonns
or
when unused for long periods
of
time.
14) Refer all servicing to qualified service personnel.
Servicing is required when the apparatus has been
damaged
in
any
way. such
as
power-supply
cord
or
plug is damaged. liquid has been spilled
or
objects have fallen into the apparatus. the
apparatus has been exposed to rain
or
moisture,
does not operate nonnally.
or
has been dropped.
The
clock
displays
"AM
12:00"
due
to a
power
interruption.
•
The
battery is low. Replace the ballery. Remove the
old battery and install a new one.
When daylight
saving
time begins,
the
clock
does not employ
the
daylight
saving time
automatically.
• Make sure the
clock
is set correctly.
•
Press
and
hold
CLOCK
and
TIME
ZONE/ALARM
DISPLAY simultaneously for at least two
seconds
to employ the
DST
function.
Important Safety Instructions
1)
Read these instructions.
2) Keep these instructions.
3)
Heed all warnings.
4)
Follow all instructions.
5)
Do
not use this apparatus
near
water.
6) Clean
only
with dry cloth.
7) Do not block any ventilation openings.
Install
in
accordance
with the manufacturer's
instructions.
8) Do not install near any heat sources such as
radiators. heat registers. stoves.
or
olher apparatus
(including amplifiers) that produce heat.
9)
Do not defeat the safety purpose
of
the polarized
or
grounding-type plug. A polarized plug has two
blades with
one
wider than the other. A grounding
type plug has two blades
and
a third grounding
prong. The wide blade
or
the third prong arc
provided for your safely.
If
the provided plug does
1101
fit
into your outlet. consult an electrician for
replacement
of
the obsolete outlet
10) Protect the power cord from being walked on
or
pinched particularly
at
plugs. convenience
receptacles.
and
the point where they exit from the
apparalUs.
I
I)
Only
use attachments/accessories specified by the
manufacturer.
12) Use
only
with the cart, sland, tripod. bracket,
or
table specilied by the manufacturer.
or
sold with
the apparatus. When a cart is used. use caution
when moving the cart/apparatus combination to
avoid injury from tip-over.
The alarm does not
sound
at the preset alarm
time.
• Has the desired alarm been activated? (i.e.. Does the
ALARM
A (or
B)
indicator light up?)
The radio
or
iPod alarm
is
activated
but
no
sound
comes on at
the
preset alarm time.
• Has
VOLUME
been adjusted?
There
is
no
sound
from
the
iPod.
• Make sure the iPod is securely connected.
• Adjust the
VOLUME
The iPod cannot be operated
with
this
unit.
• Make sure the iPod is securely connected.
Features
Owner's Record
To
reduce
the
risk
of
fire
or
electric
shock,
do
not expose
this
apparatus
to
rain
or
moisture.
To reduce the
risk
of
electrical shock,
do
not
open the cabinet. Refer servicing to qualified
personnel only.
To
reduce the risk
of
fire,
do
not
cover
the ventilation
of
the apparatus with newspapers, tableclOlhs.
curtains. etc. And
do
not place lighted candles on the
apparatus.
The
apparatus shall nol be exposed
10
dripping
or
splashing
and
that no objects filled with liquids. such
as vases. shall be placed on the apparalus.
Do not install the appliance
in
a confined space. such
as a bookcase
or
built-in cabinet.
As the main plug is used to disconnect the unit from
the mains. connect the unit to an easily accessible
AC
outlet. Should you notice an abnormality
in
the unit.
disconnect the main plug from the
AC
oullet
immediately.
You are cautioned that any changes
or
modifications not expressly approved
in
this manual
could
void your authority to opemte this equipment.
DO NOT REMOVE COVER (OR BACK)
WARNING
• Danger
of
explosion
if
ballery is incorrectly
replaced. Replace only with the samc
or
equivalent
type.
• Replace the battery for the clock backup with a
Sony CR2032 lithium ballery.
and
the ballery for the
remote
commander
with a Sony
CR2025
lithium
banery. Use
of
another baHery may present a risk
of
fire
or
explosion.
• Baltery may explode
if
mistreated.
Do
not recharge.
disassemble
or
dispose
of
in fire.
• Do not expose the banery to excessive heat such as
direct sunlight, fire
or
the like.
• Dispose
of
used battery promptly. Keep away from
children.
For customers
who
purchased this product in the
USA
Please register this product on line at
http://wwwsony.com!productrc&istratioo.
Proper registration will enable us
10
send you
periodic mailings about new products. services.
and
other important announcements. Registering
your
product will also allow us
10
conlact you in
the unlikely event that the product needs
adjustment
or
modification. Thank
yOll.
This
symbol
is
intended
to
alert
the
user
to
the
presence
of
uninsulated
"dangerous
voltage"
within
the
product's
enclosure
that
may
be
of
sufficient
magnitude
to
constitute
a
risk
of
electric
shock
to
persons.
This
symbol
is
intended
to
alert
the
user
to
the
presence
of
important
operating
and
maintenance
(servicing)
instructions
in
the
literature
accompanying
the
appliance.
Class
II
equipment symbol
This
symbol
indicates that the unit has a double
insulation syslem.
The
model number and the serial number are located
on
the rear exterior.
Record the serial
number
in
the space provided below.
Refer
10
them whenever you call upon
your
Sony
dealer
regarding this product.
Model No. ICF-CIiPMK2
Serial No. _
~1""""',,,o""'"""'1
~
~
[)Q
NOT OPEN
~
This equipment has been tested and found
to
comply
with the limits for a Class B digital device. pursuant to
Part
15
of
the FCC Rules. These limits are designed to
provide reasonable protection against
hannful
interference
in
a residential installation.
This
equipment generates. uses
and
can
radiate radio
frequency energy and.
if
not installed and used
in
accordance with the instructions. may
cause
harmful
interference to radio communications. However. there
is
no
guarantee that interference will not
occur
in
a
particular installation.
If
this equipment does
cause
harmful interference to radio
or
television reception.
which can be determined by turning the equipment
off
and on. the user is
encouraged
to try
10
correct the
interference by one
or
more
of
the following
measures:
- Reorient
or
relocate the receiving antenna.
-Increase
the separation between the equipmelll
and receiver.
- Connect the equipment into an outlet
on
a
circuit different from that to which the receiver
is connected.
- Consult the dealer
or
an experienced
radiorrV
technician for help.
INFORMATION

• Pressing and holding +
or
- changcs the year.
month, day
or
time rapidly.
• While selling the clock. you must perform each step
within about 65 seconds.
or
the clock setting mode
will be cancelled.
Note
During the shipmenl and your first use. a clock
error
may occur.
In
this case. refer
to
"Setting the
dock
and
dale"
to
set the correCl time.
To deactivate the
Automatic
DST/Summer Time
adjustment
during
the
daylight
saving
time
(summer
time) period.
The Automatic DST/Summer Time adjustment can be
cancelled.
Pres' CLOCK
and
TIME
ZONE/ALARM
DISPLAY
for more than two seconds. The Automatic
D5TI SummerTime adjustment will be cancelled.
To
active the Automatic DST/Summcr
Time
adjustment
again. repeat the same operation.
You can enjoy iPod audio by connecting this unit.
To
use
an
iPod, refer
to
the
user's
guide
of
your iPod.
Setting
the
clock
and
date
To
display
the
year
and
date
Press
CLOCK
once
for the date. and wilhin
about 5 seconds press
it
again for the year.
The display shows the datc or year for about
5 seconds and then changes back 10 the current lime.
Hifh
(default) - Middle - Low J
To
change Ihe setting manually, follow the procedure
from step
1,
1 Press
CLOCK
for more than 2 seconds.
The
year will start
to
flash in the display.
2 Press
TIME
SET
+
or
- until the correct
year appears
in
the display.
3 Press
CLOCK.
4 Repeat steps 2 and 3
to
set Ihe month. day
and time.
After setling the minute lhe clock starts from
oseconds. But
if
you do not set ·'Minule". the
clock does not start from 0 second flat.
When
daylight
saving
time
(summer
time)
begins
This model employs the Automatic Daylight Saving
Time/Summer Time adjustment. The DST indicalor
in
the display appears
in
the display at lhe beginning
of
the daylight saving time (summer time). and
disappears al the end
of
it.
• Daylight saving time begins at: 2:00 AM on the
second Sunday
of
March.
• Standard lime begins at: 2:00
AM
on the first
Sunday
of
November.
Setting
the
brightness
of
the
display
Three levels
of
brightness are available by
pressing
SNOOZE/BRIGHTNESS.
Compatible
iPod
models
The compalible iPod models are
as
follows. Update
your iPod
10
lise the latest soflware before you use it.
Playing
the
iPod
Battery Warning
When the unit will be left unplugged for a long time,
remove lhe baltery to avoid undue bauery discharge
and damage
10
the unit from banery leakage.
Before using the card remOle commandcr for lhe first
time. remove the insulation film, (See Fig.
I!J-CD)
Notes
•
You
cannot reset unless lhe lilhium bauery is
installed.
• Set the clock again after the unit
is
reset.
Preparing
the
remote
commander
If
the
time
in
the
display
is
incorrect
after
the
battery
is
changed
(RESET)
Push Ihe Reset switch with the poinled dcvicc. The
Reset switch
is
in the small hole localed in the baucry
compartment.
About
the
backup
battery
When
to
replace
the
battery
With normal use. the battery (CR2025) should last for
about six months. When the remOle commander no
longer operates the
unit
replace the battery with new
ones. (Sce Fig.
m·@)
Note
When you replacc the battery. keep the AC plug
connecled to a wall ollliet. Otherwise, current time
and alarms will be initialized if the rcplacement
is
not
completcd within around onc minute.
Notes
• Do
not
charge the batlery.
• When you are not going to use the remOle
commander for a long time. remove the battery to
avoid any damage caused by leakage and corrosion.
If a power interruption occurs when the baltery is
weak. the brightness
of
characters
in
the display
darkens. If the battery runs out during the inTerruption,
the current time and alarm functions will be
initialized.
Knowing
when
to
replace
the
battery
To
keep good time. as a backup power
1;ource.
this
unit has
one
CR2032 battery inside
of
the unit
in
addition to the house current.
The bauery keeps the clock and the alarm operating in
the event
of
a power inlcrruption.
Note
that the
backlight
will not light up
during
a
power interruption,
Replace the battery with a Sony CR2032 lithium
battery. Use
of
another bauery may present a risk
of
fire
or
explosion.
Replacing
the
backup
battery
1 Keep the AC plug connected to the AC
outlet. remove the screw that secures the
battery compartment at the bottom
of
the
unit using a screwdriver. and remove the
batlery compartment. (Sec Fig.
Et-CD)
2 Insert a new battery
in
the battery
compartment with the 0 side facing up.
To
remove the battery from the battery
compartment. push it out from the side marked
PUSH. (Sec Fig.
m-®l
3 Insert the battery compartment back into the
unit and secure
it
with the screw.
(See Fig.
Et-@l
FM
wire
antenna
CR2032
BAH.
PAESETTUNING
---
AUDIO IN
~
2.
(;;
I'
~
@
11
R~~~
TU",NGf
...
~...
TU~H
'\
VOLUME
\V
SNOOZE/BRIGHTNESS
.;
(E]J)
~~
~~~:.1~EAaLARM
ABALAR.M
..
BBTlMEBZONf
"i~"~,,R;i>-ti>i·E;.~
...
~
__
a
B""--,:B---.;B~
I
WAKE
UP
VOL
STEREO
~m"=",,
"BB·BS.H'
FM12AM
II
.
hHz
There
is
a tactile
dot
on the VOLUME +,
~/II
and PRESETTUNING 3 button.
1r=====~===============:::A:c:Piower
cord
III
o
CR2025
<>~
Setting
the
clock
for
the
first
time
This unit is preset to the current date and lime at the
faclory. and
is
powered by the back up battery. All
you need
10
do
the first time is just plug
it
in and
selccl your time zone.
1 Plug
in
the unit.
2 Press
TIME
ZONE
for more then two
seconds.
Area number
"2"
appears
in
the display.
If you live
in
the Easlern Time zone, you do not
need
to
adjust the area selling.
Area number Time zone
Atlanlic SlandardIDaylight Time
Eastern Standard/Daylight Time
iPod touch
iPhone
iPod n;mo 3rd
generalion
(video)
iPod n:mo 2nd
generation
(aluminium)
irodc1assic
iPod51h
generation (video)
(default)
There
is
a tactile
dot
on
the VOL +,
~
III,
t and PRESET + button.
Central StandardlDaylight
Time
Mountain StandardIDaylighl Time
Pacific StandardlDaylight Time
Yukon StandardlDaylighl Time
Hawaiian StandardIDaylight Time
iPod nano 1st
generallOn
iPod 4th generation
(color
display)
iPod.l.th
generation
3 Press
TIME
SET
+
or
- repeatedly until
the desired number appears.
4 Press
TIME
ZONE
to complete
Ihe
setting.
iPod mini

Other
useful
functions
To get
the
MEGA Xpand
effect
You can fall asleep to the radio and also be awakened
by lhe radio
or
buzzer alarm at the
prescttime.
1
Set
the
alarm.
(See
'·Setting
the
alarm".)
2
Set
the
sleep
timer.
(See
"Setting
the
sleep
timcr".)
Press
MEGA
Xpand.
"MEGA
Xpand" appears
in
Ihe display. You can get the effect
of
expansion
of
the
sound field.
To
return to normal sound, press the
button again.
To
turn
off
the
unit
before the
preset
time
To
stop
listening
Press
OFF. and stop playback on the connected
unit.
9O~60~30~
15
L-OFF-J
To return
to
the iPod
Press~/lI.
To use
both
sleep
timer
and
alarm
To return
to
the radio
Press
RADIO
ON.
The
frequency
is
shown
in
the
display.
Press
OFF.
The
display returns to clock mode five seconds
after you have finished setting the duration selling
and
released
SLEEP.
and then the sleep timer
stans.
The
unit will play for the duration you set. and
then shul off.
2 Press
AUDIO
IN
to
display "AUDIO IN".
3
Play
the
equipment
connected
to
the
AUDIO
INjack.
4 Adjust the volurne using
VOLUME.
Setting
the
sleep
timer
Connecting
external
equipment
To listen
to
sound
1 Connect the
AUDIO
IN
jack
or
the unit
to
thc
line
out
jack
or
headphone
jack
of
thc
external
equipment
using
the
audio
connecting
cable
(supplied).
You can fall asleep to the sound using the built-in
sleep timer that turns
off
the unit automatically after a
preset duration
1
Press
SLEEP
while
the
unit
is
turned
on.
SLEEP
appears
in
the display.
2
Press
SLEEP
to
set
the
sleep
timcr
duration.
Each time
yOll
press
SLEEP.
the duration
changes as follows:
Notes
• Before selling the alarm. make sllre to set the clock
(see ··Selling lhe
dock
and dale").
•
The
factory setting alarm time
is
·'AM 12:00".
• To set the radio alarm. first tune
in
to a station
(see ··Playing the radio").
To deactivate
the
alarm
Press
ALARM
SET
A (or B)
to
turn offthe
ALARM
A (or
B)
indicator
from
the display.
Note
on
alarm
in
the
event
of
a
power
interruption
• When the alaml sound
is
set to RADIO or iPod. it
will change to
BUZZER
automatically.
•
If
the backup battery
is
exhausted. the alarm will not
work
in
the event
of
power interruption. Replace the
battery periodically.
The
dual alarm function allows you to set
two
alarm
programs (ALARM A and ALARM
B).
The
alarm time can be set for each program and the
alarm sound
is
selectable from RADIO. BUZZER
or
iPod.
To
stop
the alarm
Press
OFF
1O
turn
off
the
alarm.
The
alarm will come
on
sound again
at
the same time
the next day.
If
OFF
is
not pressed. the huzzer
alann
sounds
continuously for about
3 minutes. and then
it
stops
automatically.
The RADIO and iPod sound continuously until
OFF
is
pressed.
To
set
the alarm
time
To doze
for
a few more
minutes
Press
SNOOZE/BRIGHTNESS.
The
sound turns
off
but will automatically
come
on
again after about
5 minutes.
The maximum length
of
the snooze time
is
40
minutes.
Notes
on
using
iPod
touch/iPhone
• If you set the iPod alarm while iPod touchliPhone
music
is
playing. and then turn the unit power off.
when the alarm time comes on. the
alann
music will
resume from the point where the power was turned
oil".
• Even
if
the iPod alarm sctting
is
complete.
if
you
tum the iPod touch/iPhone power
off
before lhe
unit. the iPod alarm will not work.
To set ALARM A
1 Press
ALARM
SET
A for a
few
seconds.
2 Press
TIME
SET
+1-
to
set the desired
hour, and press
ALARM
SET
A.
3 Press
TIME
SET
+1-
to
set the desired
minute, and press
ALARM
SET
A.
4 Press
TIME
SET
+1-10
set the desired
alarm mode (RADIO. BUZZER or iPod)
and press
ALARM
SET
A.
5 If you select the RADIO or iPod. press
TIME
SET
+1-
to
set
the wake
up
volume and press
ALARM
SET
A.
Notes
• When you use the radio almm. the timed alaml
sounds with the last broadcasting station tuned to
before the power went off. When you SCi the radio
alarm. select the desired hrondcasting station before
turning the power off.
•
The
ALARM
A (or
B)
indicator flashes
in
the
display when the alarm sounds.
•
If
a second
alann
sounds during a
fi~t
(or the
SNOOZE
function
is
active). the second
alann
takes
,prionty.
• The alarm function works as usual at the beginning
and end day
of
the daylight saving time (summer
time). While thc Automatic
DST/Summcr Time
adjustment
is
set. as a result.
if
the alarm
is
set at a
time skipped when the daylight saving time (summer
time) begins. the alarm
is
skipped.
or
if the alarm
is
set at a time overlapped when the daylight saving
time (summer time) ends. the alarm sounds twice.
• If the same alarm time
is
set for both alarm
(ALARM
A and
8).
the
ALARM
A takes priority.
To activate
the
alarm
After
setting
the
alarm
time,
follow
these
steps:
To activate
rhe
ALARM
A, press
ALARM
SET
A 10 display
ALARM
A.
To activate the
ALARM
B. press
ALARM
SET
B
to
display
ALARM
B.
Notes
• The alann sounds at the set time even
if
the unit
is
• Make sure the iPod is inslalled correctly after
selling the iPod alarm.
To
set
ALARM
B. follow the same steps above using
ALARM
B instead
of
ALARM
A.
To
change the display betwecn
ALARM
TIME A and
ALARM TIME
B.
press
TIME ZONE/ALARM
DISPLAY
When
using
iPod
touchliPhone
To
use music stored
in
an iPod touch/iPhone to wake
up. put thc iPad touchliPhonc illla the unil first.
follow the steps above to set alarm time. and then
select the desired music.
Setting
the
alarm
Presetting a
station
1
Follow
steps
1
to
4 in
"Playing
the
Radio"
and
manually
tune
into
the
station
you
wish
to
preset.
2 Press and hold the desired
PRESET
TUN
I
NG
button
for
more
than
two
seconds
for
registration.
After the preset has finished. the preset number
appears on the display.
Example:
To
preset AM I
260
kHz onto preset
2 button
2 Press
RADIO
ON
repeatedly
to
select the
desired
band.
Each press changes thc band as follows:
r
FMl
-+
FM2
-+
AM J
You can preset up to
10
stations
in
FM (5 stations
in
FM
I.
5 stations
in
FM2). and 5 stations in AM.
a few seconds after +
Note
When you are listening 10 the radio with an iPhone
connected to the unit. interference with radio
reception may occur.
FM: Extend the
FM
wire antenna fully to
increase reception sensitivlty
AM: Connect the supplied
AM
loop antenna to
the unit. Rotate the alllenna horizontally
for optimum reception.
Keep away digital music player or mobile phone from
the AM loop antenna or the
FM
wire amenna. as this
may lead to interference
of
reception.
Tuning
into
a preset
station
1
Press
RADIO ON
1O
turn
on
the
radio.
2 Press one of
the
PRESET
TUNING
buttons
where
the
desired
station
is
stored.
3 Adjust volume using
VOLUME.
To
turn
off
the radio. press
OFF.
Tip
If
the FM broadcast is noisy. press
FM
MODE on
the remote commander to turn
off
"STEREO'·
in
the
display. The radio becomes clearer although the sound
becomes monaural.
To
preset another station. repeat these steps.
To
change the preset station. tune into the desired
station and hold down the
PRESET
TUNING
1
to 5 bUllon. The new station will replace the
previous sialion on the prcset button.
Presetting
your
favourite
station
-Preset
tuning
Improving
the
reception
FM
I and FM2 are the same frequency bands.
3
Use
TUNING
+
or
-
to
tune
into
the
desired
station.
The
FM
frequency advances or reverses
in
0.1
MHz
channel sleps and the AM frequency
in
10
kHz channel steps.
4 Adjust volume using
VOLUME.
On
copyrights
• iPod
is
a trademark
of
Apple Inc
..
registered in the
U.S. and other countries.
• iPhone is a trademark
of
Apple Inc.
• All other trademarks and registered trademarks arc
of
their respective holders.
In
this manual.
'1"1>1
and ®
marks are not specilied.
Playing
the
radio
-Manual
tuning
1 Press
RADIO
ON
to
turn
on
the radio.
The display shows the band and frequency.
Press
MENU'
....... (forward)
or
.....
(backward) while playing and
hold
it
until you find the point
....... (forward)
or
.....
(backward) in pause and hold
it
until you find the point.
Go back to the
previous tfack
Go back to the
prevIous menu
Locate
a point
while listening to
Ihe sound
Locate a point
while observing
the display
To
Go to the next
track
2 Press
~/II.
The iPod begins to play 3utomatically.
You can operate the connected iPod
by
the unit
or
iPod buttons.
Pause playback
~/II
To resume
p13Y.
press
it
again.
Turn
off
the iPod
OFF.
or
press and hold ......
Adjust the rear support forward
or
backward
checking the back
of
the iPod
filS
snugly against
the rear support to protect the connector.
Execute the
ENTER*
selected menu or
the playback
Select a menu
til*
item or a truck
for playback
To
use
the
unit
as
a
battery
charger
You can use the unit as a baiter)' charger
The
charging oegins when thc iPod is placed on the
connector
The
charging status appears
in
the iPod display. For
details. see the user's guide
of
your iPod.
'"
These operations are available only whcn using the
supplied renlote commander.
Notes
• When placing or removing the iPod. keep
it
straight
and parallel with the rear support.
• Do not carry the unit with
an
iPod set
011
the
connector. Doing so may cause a malfunction.
• When placing or removing the iPod. brace the unit
with one hand and take care not to press the controls
of
the iPod by mistake.
• Do not pull on the rear support strongly as
it
cannot
be detached from the unit and may cause a
malfunction.
• To usc
an
iPod. refer to the user's guide
of
your
iPod.
• Before disconnecting the iPod. pause playback.
Tip
Apple·s iPod Universal Dock Adapter can be used
with this unit.
1
Put
the
iPod
into
the
unit's
connector.
Notes
• The connector
of
the unit is for sole usc for iPod.
When you use the devices
do
not match with the
connector, connect
it
to Ihe AUDIO
IN
terminal
of
this unit with the supplied audio connecting cable.
• Sony cannot accept responsibility
in
the event that
data recorded to iPod
is
lost or damaged when using
an
iPod connected to this unit.

http://www.sony.netl
Parts: For a period
of
one (1) year
from
the original date
of
purchase
of
product ("Parts Warranty"!,
Sony
will
supply
new
or
refurbished replacement parts in exchange
for
parts determined
to
be defective.
labor:
For a period
of
one (1) year
from
the original date
of
purchase
of
the product
("Labor
Warranty"!,
Sony
will, at its option, repair
or
replace
with
new
or
refurbished product, product determined to be defective.
If
Sony
elects
to
replace the product after this Labor Warranty has expired but
while
the Parts Warranty
below
is still in
effect, it
will
do
so
for
the applicable laborcharge.
?~'.\
S 0
N-Y;;~::'}:
I ® IPortable
Audiol
I,
'~"
LIMITED
WARRANTY
(u.s.
Only)
x~~
·~.-.:;
..
~.:.t.·.,.·...
Sony
Electronics Inc.
("Sony")
warrants this product against defects in material
or
workmanship
for
the
time
,
..
~.~
...
::\k.~.~
..
:.;.·
.
',,;
periods and
as
set forth below. Pursuant
to
this Limited Warranty,
Sony
will, at its option,
(i)
repair the product '
:~st
using
new
or
refurbished parts
or
(ii) replace the product
with
a
new
or
refurbished product. For purposes
of
this
:;,::;y
:~~~
Limited Warranty,
"refurbished"
means a product
or
part that has been returned
to
its original specifications.
In
A<<.,,~
.·"XY;
the
event
of
a
defect,
these
are
your
exclusive
remedies.
.:'.~,:jJ:,':~.:.:
:<':;':~;
.
~~
:;;&,,;:
~~;
*<;:
~~~
~~r,:
:~;,
This Limited Warranty covers
only
the hardware components packaged
with
the Product. It does
not
cover
~~~$
technical assistance for hardware
or
software usage and itdoes
not
coverany software products
whether
or
not
':;y::-
contained in the Product; any such software is provided
"AS
IS" unless expressly provided
for
in any
enclosedy.;7·
~I
~i~:;;;a;~~:~~~t:~~::;;
~=~~~'~~~o
,~~~~u,e,
Lken,e
Ag,eemen"
inel
oded
w;th
the Pcod"c! fo'
YO"'~r
Z;'-<;.,;?
Instructions:
To
obtain
warranty
service,
you
must
deliver the product, freight prepaid, in either its original
:ti!:
~~:
packaging
or
packaging affording an equal degree
of
protection to the
Sony
authorized service facility specified.
<2l,{<'
~<
It
is
your
responsibility
to
backup
any
data,
software
or
other
materials
you
may
have
stored
or
pre-
',;"V
~i!:
served
on
your
unit.
It
is
likely
that
such
data,
software,
or
other
materials
will
be
lost
or
reformatted
·.::
..
m!·.·.·.:
..
~
..
(T.',~.:
...
·
.....
·.
~::";:
during
service
and
Sony
will
not
be
responsible
for
any
such
damage
or
loss.A dated purchase receipt is
'>
\"
i
'eq"
;'ed.
Foe
,p,cific
;n""ction,
on how to
:;::;0:;:::
:;:,""
fo'
yO"'
pcod"ct,
~
W~
www.sony.com/service
:i;f,~::
~~
Or call the
Sony
Customer
Information
Service
Center
~.;_;'.,:.:::f.,'.~.":':~
•
.'.~.'.
~.~
...
:.,~.~.~._,
.•
:'
1·800·222-S0NY
(76691
:~./.:;:f;.;.:.'
.•.
:O~;~'~
For an accessory
or
part
not
available
from
your
authorized dealer, call:
;.
;
~i
'-800-488-S0NY(7669) :
.•
~.i
..
(
...
,
~:;::t).
Repair
/
Replacement
Warranty:
This Limited Warranty shall apply
to
any repair, replacement part
or
replace-
)t<:{
S'~"
ment
product for the remainder
of
the original Limited Warranty period
or
for ninety
(901
days, whichever is
·~W
~.:~.t.}i..
longer.
Any
parts
or
product replaced
under
this Limited Warranty will become the property
of
Sony.
~~~~
. This Limited Warranty
only
covers product issues caused bydefects in material
or
workmanship
duringordinary
.-~
..
,
'.
~~t<~
consumeruse; it does
not
cover product issues caused
by
any
other
reason, including
but
notlimited
to
product
fit
~i
issues due to commercial use, acts
of
God, misuse, limitations
of
technology,
or
modification
of
or
to
any part
of
,y>.
:~:::;;
the
Sony
product. This Limited Warranty does not cover
Sony
products sold AS
IS
or
WITH ALL FAULTS
or
"
..
".j,.:,
..
:.:.ii.·
..
:,:
~;}
consumables (such
as
fuses
or
batteries). This Limited Warranty is invalid
if
the factory-applied serial
number
..
:./<.
:~~~:;I:I:r::
o~::::e::~::::
:::~:t~:~s
~~m~~:::a~~::~~~~:~:~:i~~:eo~n~~::t::~·ENTIAL
~~.
l:
.•
;.:::
..
~.:
..
:
..•.
:.:~~.'.:,,:,:.·.:,.:.~~.'::.·.:.:.:.
:~:::,::
::
,::::
:A:::::S:X~:~~~E:;::Z~
'::H:~:R~:~:L1CABLE
LAW,
ANY
~<"u"i.f\
...
'>~:Wf;~
.•
)J
:~
- IMPLIED WARRANTY
OF
MERCHANTABILITY
OR
FITNESS
FOR
A PARTICULAR PURPOSE ON THIS PRODUCT 2"0
.';_
IS
LIMITED IN DURATION TO
THE
DURATION
OF
THIS WARRANTY
..
~>.
.'-0 .
:~~
Somestates
do
not
allow
the exclusion
or
limitation
of
incidental
or
consequential damages,
or
allow
limitations
~
~'*
on
how
long
an
implied
warranty lasts, sothe above limitations
or
exclusions
may
not
apply
to
you.ThisLimited
¢f:'.,,;3
~
Warranty gives
you
specific legal rights and
you
may
have other rights which vary
from
state
to
state.
@}~
~ ~
~~~~~~~~~2~~~~~;;;::::€!<~<;::
:;.~
X-::::.~.::::>.>.,~:-::\>;:.
>~-:>~~{
::::
..
:>:/.\
::"
..
:
..
'.:
~.;r:;:~~:-.:;~:C}::.~·~~;~:~}:;::(::th<;:}:f~~<:}~~;f:~~~~:
D455714503
This unit includes a preinstalled Sony Lithium battery (CR2032) as back-up power source for the clock, which is preset
to EST/EDT (Eastern Standard Time/Daylight Time) at the factory. And this battery
is
considered part
of
the product.
-
 1
1
-
 2
2
-
 3
3
-
 4
4
-
 5
5


Sony ICF-C1IPMK2 User manual
- Category
- Supplementary music equipment
- Type
- User manual
- This manual is also suitable for
Ask a question and I''ll find the answer in the document
Finding information in a document is now easier with AI
Related papers
-
Sony ICF-C7IP Operating instructions
-
Sony DREAM MACHINE ICF-C318 Operating instructions
-
Sony ICF-C218BLACK User manual
-
-
-
Sony ICF-C707 Operating instructions
-
-
Sony ICF-CS15iP User manual
-
Sony ICFC1W.CED Owner's manual
-
