Page is loading ...

By
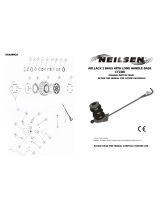
THE ULTIMATE CORDLESS KIT CT3658
INSTRUCTION MANUAL
Please read the entire instruction manual before using the product and then save
it for future reference.

Ϯ
CAUTION
Warning! Read all the instructions. Failure to adhere to the following instructions
may lead to electric shocks, fires and/or serious injury.
SAVE THESE INSTRUCTIONS!
1) Work area
a) Keep the work area clean and well illuminated. Cluttered and poorly lit areas
invite accidents.
b) Do not use power tools in explosive environments, e.g. near flammable liquids,
gases or dust. Power tools generate sparks that can easily ignite dust or fumes.
c) Keep children and other bystanders a safe distance away from the area where
you intend to use the power tool. Distractions can cause you to lose your
concentration and control.
2) Electrical safety
a) The power tool’s plug must fit correctly into the wall socket. Never modify the plug
in any way. Never use an adaptor together with earthed power tools. Unmodified
plugs and suitable wall sockets minimize the risk of electric shocks.
b) Avoid physical contact with earthed objects, such as pipes, radiators, ovens or
refrigerators. There is an increased risk of receiving an electrical shock if your body
is earthed.
c) Do not expose the power tool to rain or other wet conditions. If water gets inside it
increases the risk of electric shock.
d) Do not abuse the mains lead. Never use the lead to carry the tool or pull the plug
from a wall socket. Keep the lead away from heat, oil, sharp edges and moving
parts. Damaged or tangled leads increase the risk of electric shock.
e) When using power tools outdoors, use an extension lead that is suitable for
the purpose. The use of an extension lead designed for outdoor use decreases
the risk of electric shocks.
f) If for some reason you must use a power tool in a wet environment, always
connect it to the mains via an earth-fault circuit breaker such as an RCD (residual
current device). Using an RCD significantly reduces the chances of you receiving
an electric shock.
3) Personal safety
a) Pay attention to what you are doing and use common sense when using power
tools. Never use power tools if you are tired or under the influence of drugs,

ϯ
alcohol or medication. One moment of inattention while using a power tool may
result in serious injury.
b) Wear protective clothing. Always wear safety glasses. Using protective clothing
such as dust masks, non-slip safety shoes, helmets and ear defenders when
needed decreases the risk of injury.
c) Avoid accidental starts. Make sure that the power switch is set to OFF before
plugging the tool into a wall socket. Never carry a power tool with your finger on
the trigger and never connect the power tool to a wall socket when the switch is
set to ON, since it may result in injury.
d) Remove all service tools/spanners before switching the power tool on. A service
tool left on any moving part of the power tool may result in injury.
e) Do not overreach. Make sure you stand steady and well balanced at all times.
This will allow you to have more control in unexpected situations.
f) Wear suitable clothing. Do not wear loose-fitting clothing or jewellery. Keep hair,
clothes and gloves away from moving parts. Loose-fitting clothes, jewellery or
long hair could become caught in moving parts.
g) If equipment for dust extraction or collecting is available, make sure that it is connected
and used properly. Using technical aids may decrease dust related hazards.
4) Use and maintenance of power tools
a) Do not force the power tool. Use a power tool suitable for the work you are about
to perform. The proper power tool will perform the task better and safer if used at
the correct feed rate.
b) Never use the power tool if the power switch does not switch the tool on and
off properly. All power tools that cannot be controlled by the power switch are
dangerous and must be repaired.
c) Unplug the lead from the wall socket before making any adjustments, changing
accessories or storing the power tool. These precautions reduce the risk of
the power tool starting unexpectedly.
d) Store power tools that are not being used out of children’s reach. Do not allow
people who are unfamiliar with the tool or its functions to operate it. Power tools
can be dangerous if they fall into the hands of inexperienced users.
e) Maintaining power tools. Check for any incorrect settings, parts that catch,
broken parts or anything else which may cause the power tool to malfunction.
If something is damaged it must be repaired before use. Many accidents are
caused by poorly maintained power tools.
f) Keep tools sharp and clean. Properly maintained cutting tools with sharp blades
are less likely to jam and are easier to control.
g) Use the power tool, accessories and similar according to instructions and in

ϰ
an appropriate manner suitable for the type of power tool used. Also, take into
consideration your work environment and the type of work to be done.
Using the power tool for a purpose other than that for which it is intended could
result in a dangerous situation.
5) Use and maintenance of cordless power tools
a) Make sure that the power switch is set to OFF before fitting the battery. Attaching
a battery to a power tool when the power switch set to ON is inviting an accident.
b) Only charge the battery using a charger approved by the manufacturer. A charger
suitable for one type of battery can constitute a fire hazard if used for another type
of battery.
c) Only use rechargeable batteries that are strictly compatible for those particular
machines. The use of other types of batteries might cause damage or fire.
d) When not in use, the battery should be stored away from metal objects such as
paper clips, coins, keys, nails, screws or any other small objects that could bridge
the gap between the battery terminals. Short circuiting the battery terminals can
cause burn injuries or fires.
e) If batteries are abused there is a risk of them leaking acid. Avoid contact with any
acid. Rinse your skin with water if you accidentally come into contact with the acid.
If the acid comes into contact with your eyes, consult a doctor. Battery acid can
cause irritation and burns.
6) Service
a) Repairs and service should only be performed by qualified tradesmen, and
only with original spare parts. This guarantees that the safety of the power tool
is maintained.
Product safety symbols
5HDGWKHHQWLUHLQVWUXFWLRQPDQXDO
$OZD\VXVHHDUSURWHFWLRQ
$OZD\VXVHVDIHW\JODVVHV
$OZD\VXVHUHVSLUDWRU\SURWHFWLRQ

ϱ
Overload protection and other safety features
The machine/battery has a number of safety features that prevent damage to
the machine and battery during use.
• During short high-load situations the overload protection may turn off the machine/
battery. This protection resets automatically. Release the trigger, wait a few seconds,
ensure that there is no load and restart the machine. The machine should now
function normally again.
• During high-load situations for an extended period of time the overheating
protection will turn off the machine/battery. This feature is self-resetting once
the saw returns to normal operating temperature. Let the machine cool properly
before trying to restart it. Adverse temperatures can occur in direct sunlight and
should therefore be avoided.
• The battery has low-voltage protection which comes into effect when the battery
becomes discharged. The low-voltage protection turns off the machine automatically
and the battery should then be recharged.
Assembly and setup
Important: Always remove the battery from the power tool before adjusting, servicing
or repairing it.
Charging
Note: The battery needs to be charged fully before initial use.
1. Remove the battery from the drill by pressing the battery release button (6) and
pulling out the battery. If the battery feels very warm, as after hard use, allow it to
cool properly before charging.
2. Connect the charger to a wall socket. The green LED will then be lit.
3. Insert the battery into the charger. Whilst the battery is charging, the green LED will
shine steadily and the red LED will flash once per second.
4. When the battery is fully charged, both the red and the green LEDs will shine steadily.
Steady green light and red light off: The charger is connected to the mains but there is
no battery in it.
Red light flashing once per second and steady green light: Charging is in progress.
Steady green and red light: The battery is fully charged.
Red light flashing thrice per second and steady green light: Faulty battery.
• Charge time 1.5 Ah battery: approx 60PLQ$KEDWWHU\DSSUR[PLQ
• The battery may become warm during charging. This is completely normal.
• The battery and charger function best at normal room temperature. Do not charge
in direct sunlight or in colder temperatures. The temperature range for charging is
between 5 and 40 °C.

ϲ
• When the battery becomes discharged, the battery’s electronics will turn off
the machine automatically.
• For long-term storage (months) the battery should first be fully charged.
Care and maintenance
• Always keep the motor’s ventilation openings free from dust and debris.
• Clean the product using a lightly moistened cloth. Only use mild cleaning agents,
never solvents or corrosive chemicals.
• For long-term storage (months) the battery should first be fully charged.

ϳ
Declaration of Conformity
We the importer
CANNON TOOLS LTD
Add: 20 station road, Rowley Regis, west midlands,B65 0JU.U.K.
Declare that the product SANDER of No CT3658.
Are in conformity with the following Directives to the specification
Under which conformity is declared.
The Machinery Directive (2006/42/EC)
The EMC Directive (2004/108/EC)
CANNON TOOLS LTD
Sign

ϴ
• Wear a dust mask whenever sanding and a dust extractor connected to
the machine should also be used wherever possible.
• Extra caution should be taken when sanding lead paint, wood, metal or other
materials which produce toxic dust. Make sure any bystanders in the work area
are well protected.
• Remember that dust caused by sanding can be very flammable when mixed with air.
Buttons and functions
1. [ I ]/[ 0 ] Power switch 3. Dust extractor connection
2. Battery connection 4. Sanding pad
Operating instructions
This machine is designed for sanding and polishing wood, dry filler, painted or
varnished surfaces. Make sure that the surfaces you plan to sand/polish are dry.
1. Stand steady and balanced, holding the sander in a firm grip.
2. Press [ I ] on the power switch to turn the sander on.
3. Turn off the sander by pressing [ 0 ] on the power switch.
Changing sanding sheets
1. Remove the battery from the sander before changing the sanding sheet.
2. Remove the old sanding sheet and replace it with a new one.
Troubleshooting guide
1
4
2
3
Safety instructions specific to sanders

ϵ
Problem Possible cause Action
The sander will
not start.
Flat/discharged battery. Recharge the battery.
The battery is overheated. Let the battery cool down.
Worn brushes. Contact our Customer Services.
Faulty power trigger. Contact our Customer Services.
The sander is
sluggish and/
or cuts out.
Worn sandpaper. Replace the sandpaper.
Too much pressure applied. Decrease applied pressure.
Flat/discharged battery. Recharge the battery.
The battery is overheated. Let the battery cool down.
The motor is overheated. Let the machine cool down.
Sparks in
the motor.
Faulty brushes. Contact our Customer Services.
Winding short circuited.
Dirty commutator.
Specifications
Hook and loop sanding plate 140 x 140 x 80 mm
Strokes per minute 22,000
Battery 18 V lithium-ion
Noise level LpA: 79 dB(A), (Uncertainty KpA: 3 dB)
LwA: 90 dB(A), (Uncertainty KwA: 3 dB)
Vibration value ah: 7,121 m/s2 (Uncertainty K: 1.5 m/s2)

ϭϬ
Declaration of Conformity
We the importer
CANNON TOOLS LTD
Add: 20 station road, Rowley Regis, west midlands,B65 0JU.U.K.
Declare that the product TORCH of No CT3658.
Are in conformity with the following Directives to the specification
Under which conformity is declared.
The Low Voltage Directive (2006/95/EC)
The EMC Directive (2004/108/EC)
CANNON TOOLS LTD
Sign

ϭϭ
Safety
• Never position the light so that it shines directly onto a wall socket.
• Never cover the light when it is in use.
• Never let children play with the light.
• Do not use the light in humid environments and keep it dry. The light is not waterproof.
• Never place the worklight close to a wash basin or bathtub if there is a risk that it
might fall in.
• Do not use the worklight in environments containing flammable liquids or gases.
• Do not expose the worklight to extremely high temperatures or fire.
• Never use the product if it is damaged.
• Never modify the product. None of the parts, except the battery, are replaceable.
• Never look directly into the beam and do not shine the light at another person’s eyes.
Product description
95° pivoting head. 18 V LXC battery and charger ava ilable as accessories.
Operation
• Push the ON/OFF button to turn the worklight on or off.
• Adjust the direction of the beam by pivoting the lamp head.
Care and maintenance
Clean the product by wiping it with a soft, dry cloth.
Never use solvents or abrasive cleaning agents.
Disposal
This product should be disposed of in accordance with local regulations.
If you are unsure how to proceed, contact your local authority.
Specifications
Aperture 70 mm
Luminous flux 137 lm
LED bulb 3 W
Battery 18 V lithium-ion

ϭϮ
Declaration of Conformity
We the importer
CANNON TOOLS LTD
Add: 20 station road, Rowley Regis, west midlands,B65 0JU.U.K.
Declare that the product BIT DRIVER of No CT3658.
Are in conformity with the following Directives to the specification
Under which conformity is declared.
The Low Voltage Directive (2006/95/EC)
The EMC Directive (2004/108/EC)
CANNON TOOLS LTD
Sign

ϭϯ
ϭ
Ϯ
ϯ
ϰ
ϱ

ϭϰ

ϭϱ
Specifications
Speed : 0-2500rpm
Torque : 160Nm
Battery: 9OLWKLXPLRQ
with Quick Chuck

ϭϲ
Declaration of Conformity
We the importer
CANNON TOOLS LTD
Add: 20 station road, Rowley Regis, west midlands,B65 0JU.U.K.
Declare that the product ANGLE GRINDER of No CT3658.
Are in conformity with the following Directives to the specification
Under which conformity is declared.
The Machinery Directive (2006/42/EC)
The EMC Directive (2004/108/EC)
CANNON TOOLS LTD
Sign

ϭϳ
Special safety warnings applicable to grinding, sanding,
wire brushing or cutting
a) This power tool is intended for grinding, dressing, wire brushing and cutting.
Read all safety warnings, instructions, illustrations, and specifications provided
with this tool. Neglecting to follow all of the instructions listed below can result
in electric shock, fire and/or serious injury.
b) Polishing is not recommended with this power tool. The use of this power tool
to perform tasks for which the tool was not intended, can lead to danger and
personal injury.
c) Do not use accessories which are not intended to be used with this tool and which
are not recommended by the manufacturer. Even if the accessory can be attached
to your power tool, there is no guarantee that it can be used safely.
d) The accessory’s rated speed must at least correspond to the power tool’s
maximum rated speed. Accessories which rotate faster than their rated speed
can break and shatter.
e) The accessory’s outer diameter and size must fall within the rated capacity of
your power tool.
f) The spindle size of the wheels, flanges, and backing plates or other accessories
must fit the spindle on your power tool correctly. Ill-fitting/incorrectly sized
accessories will end up out of balance, vibrate violently, and may lead to loss
of control.
g) Do not use damaged accessories. Inspect the accessory and make sure there are
no splits or cracks in the grinding wheels; cracks or wear and tear on the backing
plates, or loose or torn bristles on the steel brush wheels.
If you drop your power tool or accessory, check for damage. If the accessory
is damaged, use a new/undamaged accessory. After inspecting the tool and
attaching an accessory, keep yourself and others outside of the power tool’s
danger zone and let it run at full speed for one minute. Damaged accessories will
normally break during this test period.
h) Wear personal protective equipment. Depending on how you use the machine;
use a visor/face protection or safety glasses. If necessary use a mask,
ear protection, gloves, and apron/work clothing to protect you from small shards
of metal or splinters from the work object. The eye protection you use must be
able to protect against flying debris produced in different working positions.
The breathing protection should be able to filter any particles produced by
the work. Prolonged exposure to high levels of noise can result in hearing damage.
i) Keep bystanders at a safe distance from the work area. Everyone who visits

ϭϴ
the place of work must wear personal protective equipment. Debris from
the workpiece or from a damaged accessory can fly off and injury people outside
of the immediate work area.
j) Only hold the power tool by its isolated grip when working in positions where
the cutting wheel might possibly cut through hidden cables or its own mains lead.
Cutting wheels which come in contact with an electric cable can electrify metal
parts of the power tool and subject the user to an electric shock.
k) Position the mains lead well away from the rotating accessory. If you lose control,
the lead can be sliced through or become entangled and pull your hand or arm
into the rotating accessory.
l) Never put the power tool down before the accessory has completely stopped
rotating. The rotating accessory can become stuck in the material resulting in
loss of control.
m) Do not run the power tool when you are carrying it. Unintentional contact with
the rotating accessory can cause clothing to become caught and pull the tool
towards your body.
n) Regularly clean the motor’s ventilation ports. The motor’s fan pulls in dust, which
gets inside the outer casing and a build up of this collected metal dust can lead
to electrical dangers.
o) Do not use the power tool near flammable materials. Sparks can easily ignite
flammable material.
p) Do not use accessories which require liquid coolants. The use of water or other
liquid coolants can result in electric shock or electrocution.
Kickback and related warnings
Kickback is a sudden reaction to a wedged or stuck wheel, backing plate, wire brush,
or some other accessory. A jammed or stuck rotating accessory results in the power
tool thrusting violently in the opposite direction of the accessory’s rotation at the point
of binding.
For example, if a grinding disc gets stuck or is jammed into the workpiece, the edge
of the disc can grab onto the workpiece and either dig itself down deeper or
kick upwards. The grinding wheel is either thrown towards or away from the user
depending on the rotation of the grinding wheel. The grinding wheel can also break
under these circumstances.
Kickbacks are the result of the power tool being used in an incorrect manner, on
incorrect objects, or under incorrect conditions and can be avoided by observing
the following precautions.
a) Hold the power tool steady and position your arms and body so that you can
adequately handle any kickback. Always use the auxiliary (side) handle if there

ϭϵ
is one for maximum control during kickback and to be able to control the torque
”kick” produced by turning the angle grinder on. Kickbacks or reactions to torque
can be controlled by the user if the necessary safety precautions are followed.
b) Never place your hand near the rotating accessory. The accessory can be thrown
back onto your hand.
c) Do not stand in the area in which the power tool could possibly end up if it were
to kick back. Kickback will propel the tool in the opposite direction of the grinding
wheel’s rotation at the point of snagging.
d) Be extra careful when working on corners, sharp edges, etc. Avoid bouncing and
getting the accessory stuck. Corners, sharp edges, and bouncing have a tendency
to get the rotating accessory stuck and lead to loss of control of the tool.
e) Never fit a circular saw wood cutting blade or other toothed saw blade.
Such blades frequently lead to kickbacks and loss of control.
Specific safety precautions for grinding and cutting with
a cutting wheel
a) Only use those types of disc/wheel which are recommended for the power tool
and a special shatter guard plate designed for the selected cutting wheel.
Wheels which are not designed for use with the power tool cannot be properly
guarded and can be dangerous.
b) The shatter guard must be fitted to the power tool correctly and adjusted to
provide maximum safety so that the user is exposed to as little of the disc/wheel
as possible. The shatter guard helps to protect the user from shards of shattered
wheel and unintentional contact with the wheel.
c) The wheels/discs must only be used for the recommended work task.
For example: Do not grind with the side of a cutting wheel. Cutting wheels are
intended for cutting using the edge. If force is exerted on the face, they can break.
d) Always use undamaged flanges of a correct size and shape for the wheel you have
selected. Correct flanges support the wheel and minimize the risk of it breaking.
Flanges for cutting wheels can be different from those which are used for
grinding wheels.
e) Never use worn-down wheels designed for use with a larger power tool.
Wheels intended for larger power tools do not have the same speed rating as
those intended for use with smaller tools and can therefore shatter.
Additional safety precautions for cutting with a cutting wheel
a) Do not force the cutting wheel or apply too much pressure. Do not try to cut
too deeply. Overloading the wheel increases the pressure and the likelihood
of the wheel twisting or getting stuck in the cut and increases the chances of
kickback or the wheel breaking.

ϮϬ
b) Never stand in line with or behind the rotating wheel. When the wheel rotates away
from you during use, a kickback can force the rotating wheel and the power tool in
the opposite direction, i.e. towards you.
c) When the wheel gets stuck or if you for some reason want to stop cutting,
turn off the power tool and hold it still until the wheel has stopped completely.
Never attempt to remove the cutting wheel from the cut while the wheel is moving
because it can result in a kickback. Investigate and take the necessary measures
to minimize the risk of the wheel binding.
d) After stopping, do not resume cutting with the wheel in the workpiece. Let the wheel
reach full speed first and then carefully re-enter the cut. The wheel can bind, walk up
out of the cut or kickback, if cutting is restarted with the wheel in the workpiece.
e) Support large planks or other large workieces in order to minimize the risk of
getting stuck or kickback. Large boards tend to sag under their own weight.
Boards should be supported from underneath, both near the cutting line and
near the edges of the board on both sides of the cutting wheel.
f) Be especially careful when plunge sawing into walls or objects where it is not
possible to see what one is sawing. The protruding wheel can cut into gas or
water pipes, electric cables, or other objects which can cause kickback.
Specific safety precautions for sanding
a) Do not use sanding discs which are too large. Follow the manufacturer’s
recommendations when selecting sanding discs. Large sanding discs that
protrude further than the backing pad are liable to wear out the power tool
and can result in the disc getting stuck, breaking, or kickback.
Specific safety precautions for wire brushing
a) Remember that bristles can dislodge from the wire brush even during normal use.
Do not force the wire brush wheel by applying too much pressure. Loose wires
from the brush can easily penetrate skin or thin clothing.
b) If a shatter guard is recommended when wire brushing, make sure that the brush
wheel does not touch the shatter guard. The bristles of wire cup brushes/wire brush
wheels can expand under load or from the centrifugal force so a gap between
the shatter guard and the wheel is essential.
/