1
I-7021, I-7022, I-7024 User ManualRev:B1.2
Warranty
All products manufactured by ICP DAS are warranted
against defective materials for a period of one year from the date
of delivery to the original purchaser.
Warning
ICP DAS assume no liability for damages consequent to
the use of this product. ICP DAS reserves the right to change this
manual at any time without notice. The information furnished by
ICP DAS is believed to be accurate and reliable. However, no re-
sponsibility is assumed by ICP DAS for its use, nor for any in-
fringements of patents or other rights of third parties resulting from
its use.
Copyright
Copyright 1999 by ICP DAS. All rights are reserved.
Trademark
The names used for identification only maybe registered
trademarks of their respective companies.
I-7021/21P, I-7022, I-7024
User Manual
Date:2001-05

2
I-7021, I-7022, I-7024 User Manual Rev:B1.2
Table of Contents
1. Introduction.....................................................6
1.1 More Information.......................................6
1.2 Pin Assignment ..........................................7
1.3 Specifications...........................................10
1.4 Block Diagram .........................................12
1.5 Jumper Setting .........................................14
1.6 Wire Connection ......................................14
1.7 Quick Start ...............................................15
1.8 Default Setting .........................................15
1.9 Calibration ...............................................16
1.10 Configuration Tables..............................22
2. Command.......................................................26
2.1 %AANNTTCCFF ....................................29
2.2 $AA2........................................................30
2.3 $AA5........................................................31
2.4 $AAF .......................................................32
2.5 $AAM ......................................................33
2.6 ~AAO(Data) ............................................34
2.7 #AA(Data) ...............................................35
2.8 $AA0........................................................37
2.9 $AA1........................................................38
2.10 $AA3VV ................................................39

3
I-7021, I-7022, I-7024 User ManualRev:B1.2
2.11 $AA4......................................................40
2.12 $AA6......................................................41
2.13 $AA7......................................................42
2.14 $AA8......................................................43
2.15 #AAN(Data) ..........................................45
2.16 $AA0N...................................................47
2.17 $AA1N...................................................48
2.18 $AA3NVV .............................................49
2.19 $AA4N...................................................50
2.20 $AA6N...................................................51
2.21.1 $AA7N................................................52
2.21.2 $AA7N................................................53
2.22 $AA8N...................................................54
2.23 $AA9N...................................................56
2.24 $AA9NTS ..............................................57
2.25 ~** .........................................................58
2.26 ~AA0 .....................................................59
2.27 ~AA1 .....................................................60
2.28 ~AA2 .....................................................61
2.29 ~AA3EVV .............................................62
2.30 ~AA4 .....................................................64
2.31 ~AA4N...................................................65
2.32 ~AA5 .....................................................66
2.33 ~AA5N...................................................67

4
I-7021, I-7022, I-7024 User Manual Rev:B1.2
3. Application Note............................................68
3.1 INIT* pin Operation ................................68
3.2 Module Status ..........................................68
3.3 Dual Watchdog Operation........................69
3.4 Reset Status..............................................69
3.5 Analog Output..........................................69
3.6 Slew Rate Control....................................70
3.7 Current Readback.....................................71

5
I-7021, I-7022, I-7024 User ManualRev:B1.2

6
I-7021, I-7022, I-7024 User Manual Rev:B1.2
1. Introduction
I-7000 is a family of network data acquisition and control
modules. They provide analog-to-digital, digital-to-analog, digital
input/output, timer/counter and other functions. These modules can
be remote controlled by a set of commands. The basic features of
I-7021, I-7021P, I-7022 and I-7024 are given as following :
z 3000 VDC isolated analog output.
z Programmable PowerOn Value of analog output.
z Programmable slew rate.
z Software calibration.
The I-7021 is an analog output module with 12-bit resolu-
tion and current readback function. The I-7021P is similiar with I-
7021 but with 16-bit resolution. The I-7022 is the dual channel
version of I-7021. The I-7024 is a 4-channel analog output module,
and supports bipolar voltage output.
1.1 More Information
Refer to “I-7000 Bus Converter User Manual” chapter 1
for more information as following:
1.1 I-7000 Overview
1.2 I-7000 Related Documentation
1.3 I-7000 Command Features
1.4 I-7000 System Network Configuration
1.5 I-7000 Dimension

7
I-7021, I-7022, I-7024 User ManualRev:B1.2
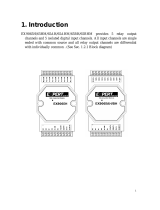
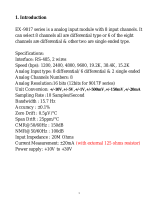
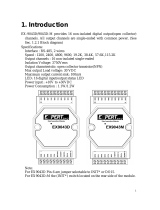
1.2 Pin Assignment

8
I-7021, I-7022, I-7024 User Manual Rev:B1.2

9
I-7021, I-7022, I-7024 User ManualRev:B1.2

10
I-7021, I-7022, I-7024 User Manual Rev:B1.2
1.3 Specifications
I-7021
Analog Output
Output Channel : 1
Output Type : mA, V
Accuracy : ±0.1% of FSR
Resolution : ±0.02% of FSR
Readback Accuracy : ±1% of
FSR
Zero Drift :
Voltage output : ±30µV/°C
Current output : ±0.2µA/°C
Span Temperature Coefficient :
±25ppm/°C
Programmable Output Slope :
0.125 to 1024 mA/Second
0.0625 to 512 V/Second
Voltage Output : 10mA max.
Current Load Resistance :
Internal power : 500 ohms
External 24V : 1050 ohms
Isolation : 3000VDC
Power Supply
Input : +10 to +30VDC
Consumption : 1.8W
I-7021P
Analog Output
Output Channel : 1
Output Type : mA, V
Accuracy : ±0.02% of FSR
Resolution : ±0.002% of FSR
Readback Accuracy : ±1% of
FSR
Zero Drift :
Voltage output : ±10µV/°C
Current output : ±0.2µA/°C
Span Temperature Coefficient :
±5ppm/°C
Programmable Output Slope :
0.125 to 1024 mA/Second
0.0625 to 512 V/Second
Voltage Output : 10mA max.
Current Load Resistance :
Internal power : 500 ohms
External 24V : 1050 ohms
Isolation : 3000VDC
Power Supply
Input : +10 to +30VDC
Consumption : 1.8W

11
I-7021, I-7022, I-7024 User ManualRev:B1.2
I-7024
Analog Output
Output Channel : 4
Output Type : mA, V
Accuracy : ±0.1% of FSR
Resolution : ±0.02% of FSR
Zero Drift :
Voltage output : ±30µV/°C
Current output : ±0.2µA/°C
Span Temperature Coefficient :
±20ppm/°C
Programmable Output Slope :
0.125 to 2048 mA/Second
0.0625 to 1024 V/Second
Voltage Output : 5mA max.
Current Load Resistance :
External 24V : 1050 ohms
Isolation : 3000VDC
Power Supply
Input : +10 to +30VDC
Consumption : 2.3W
I-7022
Analog Output
Output Channel : 2
Output Type : mA, V
Accuracy : ±0.1% of FSR
Resolution : ±0.02% of FSR
Readback Accuracy : ±1% of
FSR
Zero Drift :
Voltage output : ±30µV/°C
Current output : ±0.2µA/°C
Span Temperature Coefficient :
±25ppm/°C
Programmable Output Slope :
0.125 to 1024 mA/Second
0.0625 to 512 V/Second
Voltage Output : 10mA max.
Current Load Resistance :
Internal power : 500 ohms
External 24V : 1050 ohms
Isolation : 3000VDC
Channel-to-channel isolation
Power Supply
Input : +10 to +30VDC
Consumption : 3.0W

12
I-7021, I-7022, I-7024 User Manual Rev:B1.2
1.4 Block Diagram

13
I-7021, I-7022, I-7024 User ManualRev:B1.2

14
I-7021, I-7022, I-7024 User Manual Rev:B1.2
1.5 Jumper Setting
Jumper select the current output power supply of I-7021/21P :
1. Select internal power of module : default setting, may drive
load up to 500 ohms.
2. Select external power of module : may drive larger load. with
24V power, may drive 1050 ohms.
Jumper select the current output power supply of I-7022 :
1. JP1 for channel 0 setting, and JP2 for channel 1 setting.
2. Select internal power : 500 ohms load max.
3. External power : 1050 ohms with external +24VDC power.
1.6 Wire Connection
I-7021/21P/22 Voltage Output Wire Connection

15
I-7021, I-7022, I-7024 User ManualRev:B1.2
1.7 Quick Start
Refer to “I-7000 Bus Converter User Manual” and “Get-
ting Start” for more detail.
1.8 Default Setting
Default setting for I-7021, I-7021P, I-7022 and I-7024 :
z Address : 01
z Analog Output Type : 0 to +10V
z Baudrate : 9600 bps
z Checksum disable, change immediate, engineer unit format
z I-7021, I-7021P, I-7022 jumper setting : internal power.
I-7021/21P/22 Current Output Wire Connection
I-7024 Voltage Output Wire Connection
I-7024 Current Output Wire Connection

16
I-7021, I-7022, I-7024 User Manual Rev:B1.2
1.9 Calibration
Don’t Perform Calibrate Until You Really Understand.
I-7021/21P Current Output Calibration Sequence :
1 Set the jumper1 to internal power and connect mA-meter to
module’s current output. If no mA-meter, you may use Volt-
Meter with shunt resistor(250 ohms, 0.1%), and calculate the
mA by the Volt-Meter value (I = V/250).
2 Warm-Up for 30 minutes.
3 Setting type to 30. (0 to 20mA) -> Refer Sec.2.1.
4 Output 4mA. -> Refer Sec.2.7.
5 Check the meter and trim the output until
4mA match by apply trim command. -> Refer Sec.2.10.
6 Preform 4mA Calibration Command. -> Refer Sec.2.8.
7 Output 20mA. -> Refer Sec.2.7.
8 Check the meter and trim the output until
20mA match by apply trim command. -> Refer Sec.2.10
9 Perform 20mA Calibration Command. -> Refer Sec.2.9.

17
I-7021, I-7022, I-7024 User ManualRev:B1.2
I-7021/21P Voltage Output Calibration Sequence :
1 Connect volt-meter to module’s voltage output.
Short the current output pin for the readback requriement.
2 Warm-Up for 30 minutes.
3 Setting type to 32. (0 to 10V) -> Refer Sec.2.1.
4 Output 10V. -> Refer Sec.2.7.
5 Check the meter and trim the output until
10V match by apply trim command. -> Refer Sec.2.10.
6 Perform 10V Calibration Command. -> Refer Sec.2.13.

18
I-7021, I-7022, I-7024 User Manual Rev:B1.2
I-7022 Current Output Calibration Sequence :
1 Set the jumper to internal power and connect mA-meter to
module’s current output
channel 0. If no mA-meter, you may
use Volt-Meter with shunt resistor(250 ohms, 0.1%), and cal-
culate the mA by the Volt-Meter value (I = V/250).
2 Warm-Up for 30 minutes.
3 Setting output type to 0. (0 to 20mA) -> Refer Sec.2.24.
4 Output 4mA. -> Refer Sec.2.15.
5 Check the meter and trim the output until
4mA match by apply trim command. -> Refer Sec.2.18.
6 Preform 4mA Calibration Command. -> Refer Sec.2.16.
7 Output 20mA. -> Refer Sec.2.15.
8 Check the meter and trim the output until
20mA match by apply trim command. -> Refer Sec.2.18.
9 Perform 20mA Calibration Command. -> Refer Sec.2.17.
10 Repeat step 1 to 9 for channel 1.

19
I-7021, I-7022, I-7024 User ManualRev:B1.2
I-7022 Voltage Output Calibration Sequence :
1 Connect volt-meter to module’s voltage output channel 0.
Short the current output pin for the readback requriement.
2 Warm-Up for 30 minutes.
3 Setting Output type to 2. (0 to 10V) -> Refer Sec.2.24.
4 Output 10V. -> Refer Sec.2.15.
5 Check the meter and trim the output until
10V match by apply trim command. -> Refer Sec.2.18.
6 Perform 10V Calibration Command. -> Refer Sec.2.21.
7 Repeat step 1 to 6 for channel 1.

20
I-7021, I-7022, I-7024 User Manual Rev:B1.2
I-7024 Current Output Calibration Sequence :
1 Connect meter and external power source to module’s current
output
channel 0.
2 Warm-Up for 30 minutes.
3 Setting type to 30. (0 to 20mA) -> Refer Sec.2.1.
4 Output 0mA. -> Refer Sec.2.15.
5 Check the meter and trim the output until
0mA match by apply trim command. -> Refer Sec.2.18.
6 Preform 0mA Calibration Command. -> Refer Sec.2.16.
7 Output 20mA. -> Refer Sec.2.15.
8 Check the meter and trim the output until
20mA match by apply trim command. -> Refer Sec.2.18.
9 Perform 20mA Calibration Command. -> Refer Sec.2.17.
10 Repeat 1 to 9 for channel 1, 2 and 3.
Page is loading ...
Page is loading ...
Page is loading ...
Page is loading ...
Page is loading ...
Page is loading ...
Page is loading ...
Page is loading ...
Page is loading ...
Page is loading ...
Page is loading ...
Page is loading ...
Page is loading ...
Page is loading ...
Page is loading ...
Page is loading ...
Page is loading ...
Page is loading ...
Page is loading ...
Page is loading ...
Page is loading ...
Page is loading ...
Page is loading ...
Page is loading ...
Page is loading ...
Page is loading ...
Page is loading ...
Page is loading ...
Page is loading ...
Page is loading ...
Page is loading ...
Page is loading ...
Page is loading ...
Page is loading ...
Page is loading ...
Page is loading ...
Page is loading ...
Page is loading ...
Page is loading ...
Page is loading ...
Page is loading ...
Page is loading ...
Page is loading ...
Page is loading ...
Page is loading ...
Page is loading ...
Page is loading ...
Page is loading ...
Page is loading ...
Page is loading ...
Page is loading ...
/
