1
Installation Instructions
for Genius
®
ZigZag1 Retractable Screen System (JII-90043)
These instructions describe installation on a large opening patio door. Please read the complete instructions before proceeding. For help
installing, or for replacement parts contact Genius Retractable Screens at 1-866-523-9511 or visit www.geniusscreens.com.
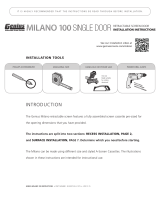
• Power Screw Driver
• Long Phillips Bit
• 2mm Allen Wrench (Provided)
• Tape Measure
• Flat Head Screw driver
• Square
• Pencil
• Scissors
• Flashlight (Recommended)
• Step Ladder (Recommended)
Appropriate Personal Protective Equipment
ZigZag1 Retractable Screen System distributed by JELD-WEN
®
DOOR SCREEN COMPONENTS

Installation Instructions
for Genius
®
ZigZag1 Retractable Screen System (JII-90043)
2
A
A
C
C
D
D
B
B
B
F
F
G
G
G
G
E E
A Top Guide
B Side Guide
C Bottom Guide
D Cassette Assembly
(Qty 1)
(Qty 2)
(Qty 1)
(Qty 1)
E Magnet Prole
F Cord Lock Tensioner
G #8 x 3/4" Phillips Screw
(Qty 2)
(Qty 2)
(Qty 11)
GENIUS ZIGZAG1 DOOR SCREEN COMPONENTS

Installation Instructions
for Genius
®
ZigZag1 Retractable Screen System (JII-90043)
3
Before beginning ensure the opening is plumb, level, square and the bottom sill has a at, stable, and smooth mounting surface. The screen must be
inset (recess) mounted at a depth of at least 1-1/4" on the interior of the opening.
GENIUS ZIGZAG1 DOOR SCREEN COMPONENTS
1 1/4"
Mounting
Depth
Minimum

Installation Instructions
for Genius
®
ZigZag1 Retractable Screen System (JII-90043)
4
Begin by locating the Side Guides (B on page 2). Install one on each side of the opening and push to the top. Secure using #8 x 3/4" Phillips Screws in
the pre-drilled holes on each side (1A below). Next, install the Top Guide (A on page 2) by tucking each end into the Side Guides and centering it in the
opening. Secure with # 8 x 3/4" Phillips Screws in the pre-drilled holes (1B below).
Clean the bottom mounting surface and ensure it is solid, at, and level. If needed, create a at, smooth, and level surface. Locate the Bottom Guide and
position it so it is centered in the opening and tucked into the Side Guides. The white paper backing should be facing down. (NOTE: The adhesive is very
sticky. Use care when positioning). Remove the paper backing from the Bottom Guide and adhere it to the bottom sill.
1A 1B
INSTALL SIDES AND TOP GUIDES
1
INSTALL BOTTOM GUIDE
2

Installation Instructions
for Genius
®
ZigZag1 Retractable Screen System (JII-90043)
5
During Step 3, DO NOT open the Screen Cassette Assembly and expose the screen fabric. Position the Screen Cassette Assembly in the Top
Guide and on the Bottom Guide with the sticker towards the top and the inside. Remove the top and bottom outer wrapping. Push the Screen Cassette
Assembly all the way to the right of the opening as viewed from the inside and snap it into the Side Guide (3A below). Next, remove the tape from the
cords and grasp the left Magnet Prole and carefully pull it to the left side of the opening. Ensure none of the cords are tangled, twisted, or pass over
each other, then snap it into the left Side Guide (3B below).
3A
3B
INSTALL CASSETTE ASSEMBLY
3

Installation Instructions
for Genius
®
ZigZag1 Retractable Screen System (JII-90043)
6
Remove the magnet strip to expose the Cord Lock Tensioners. Ensuring the screen is fully collapsed, adjust the tension by sliding the top and bottom Cord
Lock Tensioners in even increments until there is slight tension and no slack in the cords (4A & 4B below). Secure the Cord Lock Tensioner using the 2mm
Allen wrench provided. Cut the remaining wrapping and test the operation of the screen. Separate the pleats with your ngers as needed. If necessary,
fully collapse the screen and readjust the tension. Push the magnet strip back in the groove of the Magnet Prole (4C below). Refer to the troubleshooting
guide (page 7) if the operation continues to be unsatisfactory.
4A
4B
Lower
Cord Lock
Tensioner
Upper
Cord Lock
Tensioner
Insert Magnet
Strip into the
Magnet Prole
4C
ADJUST TENSION AND TEST OPERATION
4

Installation Instructions
for Genius
®
ZigZag1 Retractable Screen System (JII-90043)
7
For Installation or Warranty Assistance please call Genius Retractable Screens at 1-866-523-9511
OR VISIT WWW.GENIUSSCREENS.COM
The following information is necessary to process your warranty:
1. Registration Number
2. Proof of Purchase
Problem Solution
One of the cords is longer or shorter than the others. A. Ensure there are no snags, tangles, or pinched cords.
B. Remove the Magnet to reveal the Cord Hold and Cord Lock Tensioner.
C. Loosen the hex screws in the Cord Lock Tensioner(s). To adjust the top cords,
adjust the top Tensioner and to adjust the bottom cords, adjust
the bottom Tensioner.
D. Untie the knot and gently pull the cable(s) that have any slack until the slack is
gone.
E. Retie the knot and re-tension the cords using the Cord Lock Tensioners. Then
snap the Magnet Prole back into position and test the operation.
The cords sag into the opening when operating
the Screen.
Try increasing the tension on the corresponding cord tensioner and verify one or
more of the cords is not longer than the others. If so, see One of the cords is longer
or shorter than the others.
The screen doesn’t close all the way. Verify there are no snags in the cords, particularly at the top and bottom of the
Cassette Assembly, also ensure there are no pinched cords in and around the notch
and track of the Top Guide. You may have to loosen the Cord Lock Tensioners to
adjust the cords.
It is difcult to slide the Cord Lock Tensioners. Lubricate the track inside the Side Guides with a silicone spray.
TROUBLESHOOTING GUIDE

Installation Instructions
for Genius
®
ZigZag1 Retractable Screen System (JII-90043)
©2019 JELD-WEN, Inc. This publication and its contents are owned by or licensed to JELD-WEN, Inc. or its afliates or third parties, and are protected by copyright, trademark, and other laws. Unauthorized use
or duplication is prohibited. JELD-WEN reserves the right to change product specications without notice. Please visit our website at jeld-wen.com for current information. All rights reserved.
JII-90043 08/19
Thank you for choosing
Distributed by
/