Page is loading ...

SRX5800 Services Gateway Getting Started
Guide
December 2013
Part Number: 530-055498
Revision 01
This document describes how to install the SRX5800 Services Gateway.
Contents
About This Guide | 3
Step 1: Prepare the Site for SRX5800 Services Gateway Installation | 4
Rack-Mounting Requirements | 4
Tools Required to Unpack and Prepare the SRX5800 Services Gateway for Installation | 6
Step 2: Install the Mounting Hardware | 6
Install the Mounting Hardware in a Four-Post Rack or Cabinet | 6
Install the Mounting Hardware in an Open-Frame Rack | 8
Step 3: Install the Services Gateway | 9
Remove Components | 9
Install the Services Gateway | 11
Reinstall Components | 12
Step 4: Connect the Grounding Cable | 13
Step 5: Connect External Devices and Network Cables | 14
Connect to a Network for Out-of-Band Management | 15
Connect a Management Console | 15
Connect the Network Cables | 15
Step 6: Connect Power Cables | 17
Connect Power to an AC-Powered Services Gateway | 17
Connect Power to a DC-Powered Services Gateway | 21
1

Step 7: Perform the Initial Software Configuration | 25
Enter Configuration Mode | 26
Configure User Accounts and Passwords | 26
Configure System Attributes | 27
Commit the Configuration | 28
Safety Warnings | 31
SRX5800 Services Gateway Compliance Statements for EMC Requirements | 34
Canada | 34
European Community | 35
Japan | 35
United States | 35
SRX Series Documentation and Release Notes | 35
Requesting Technical Support | 36
Revision History | 37
2

About This Guide
This guide contains information that you need to install and configure the SRX5800 Services Gateway
quickly. For complete installation instructions, see the SRX5800 Services Gateway Hardware Documentation
at www.juniper.net/documentation/.
WARNING: This guide contains a summary of safety warnings in “Safety Warnings” on
page 31. For a complete list of warnings for this services gateway, including translations,
see the SRX5800 Services Gateway Hardware Documentation at
www.juniper.net/documentation/.
The SRX5800 Services Gateway is a high-performance, highly scalable, carrier-class security device with
multiprocessor architecture. The services gateway is 16 rack units (RU) tall. Three services gateways can
be stacked in a single floor-to-ceiling rack, for increased port density per unit of floor space. The services
gateway provides 14 slots that can be populated with up to 12 Services Processing Cards (SPCs) and
interface cards and two Switch Control Boards (SCBs) in nonredundant fabric configurations. The interface
cards can be any of the following types:
•
I/O cards (IOCs) have fixed ports on their front panels.
•
Flex I/O cards (Flex IOCs) have two slots on their front panels for smaller cards called port modules that
add additional ports to the services gateway.
•
Modular Port Concentrators (MPCs) have two slots on their front panels for smaller cards called Modular
Interface Cards (MICs) that add additional ports to the services gateway.
The SRX5800 Services Gateway provides redundancy and resiliency. The hardware system is fully redundant,
including power supplies and SCBs.
By installing various combinations of interface cards and SPCs, you can tailor both the number of ports
and the maximum services processing capacity to suit your network. Table 1 on page 3 describes the
minimum system configuration for the SRX5800 Services Gateway.
Table 1: Minimum System Configuration
MinimumComponent
1SPC
1Interface card (IOC, Flex IOC, or MPC)
1SCB
3

Table 1: Minimum System Configuration (continued)
MinimumComponent
1Routing Engine
For detailed information about the cards supported by the services gateway, see the SRX5400, SRX5600,
and SRX5800 Services Gateway Card Reference at www.juniper.net/documentation/.
The services gateway is shipped in a cardboard box strapped securely to a wooden pallet. Plastic straps
secure the top and bottom in place. The services gateway chassis is bolted to this pallet. A printed copy
of this document and a cardboard accessory box are also included in the shipping container.
Step 1: Prepare the Site for SRX5800 Services
Gateway Installation
IN THIS SECTION
Rack-Mounting Requirements | 4
Tools Required to Unpack and Prepare the SRX5800 Services Gateway for Installation | 6
Rack-Mounting Requirements
•
You can install the services gateway in a four-post rack or cabinet or an open-frame rack.
•
The rack rails must be spaced widely enough to accommodate the services gateway chassis’s external
dimensions: 27.75 in. (70.5 cm) high, 23.0 in. (58.4 cm) to 27.7 in. (70.6 cm) deep (depending on power
supply type), and 17.37 in. (44.11 cm) wide. The outer edges of the mounting brackets extend the width
to 19 in. (48.3 cm). See Figure 1 on page 5.
4

Figure 1: SRX5800 Services Gateway Rack Clearance and Chassis Dimensions
•
The rack must be strong enough to support the weight of the fully configured services gateway, up to
400 lb (180 kg). If you stack three fully configured services gateways in one rack, it must be capable of
supporting about 1,200 lb (542 kg).
•
For service personnel to remove and install hardware components, there must be adequate space at the
front and back of the services gateway. Allow at least 30 in. (76.2 cm) in front of the services gateway
and 24 in. (61 cm) behind the services gateway.
•
The rack or cabinet must have an adequate supply of cooling air.
•
Ensure that the cabinet allows the chassis hot exhaust air to exit from the cabinet without recirculating
into the services gateway.
•
The services gateway must be installed into a rack that is secured to the building structure.
•
Mount the services gateway at the bottom of the rack if it is the only unit in the rack.
•
When you are mounting the services gateway in a partially filled rack, load the rack from the bottom to
the top, with the heaviest component at the bottom of the rack.
5

Tools Required to Unpack and Prepare the SRX5800 Services Gateway for
Installation
To unpack the services gateway and prepare for installation, you need the following tools:
•
A mechanical lift—recommended
•
Phillips (+) screwdrivers, numbers 1 and 2
•
2.5 mm flat-blade (–) screwdriver
•
7/16-in. torque-controlled driver or socket wrench
•
1/2-in. or 13-mm open-end or socket wrench to remove bracket bolts from the shipping pallet
•
Electrostatic discharge wrist strap
•
Antistatic mat
Proceed to “Step 2: Install the Mounting Hardware” on page 6.
Step 2: Install the Mounting Hardware
IN THIS SECTION
Install the Mounting Hardware in a Four-Post Rack or Cabinet | 6
Install the Mounting Hardware in an Open-Frame Rack | 8
Install the Mounting Hardware in a Four-Post Rack or Cabinet
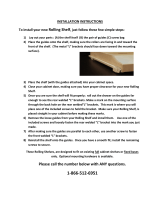
To install the mounting shelf as shown in Figure 2 on page 7:
1. On the front rack rails, install cage nuts in the holes specified in the SRX5800 Services Gateway Hardware
Guide for the large shelf.
2. On the front of each front rack rail, partially insert a mounting screw into the hole containing the lowest
cage nut.
3. Install the large shelf on the front rack rails. Rest the bottom slot of each ear on a mounting screw.
6

4. Partially insert a mounting screw into the top hole in each ear of the large shelf.
5. Tighten all the screws completely.
6. On the rear rack rails, install cage nuts in the holes specified in the SRX5800 Services Gateway Hardware
Guide for the small shelf.
7. On the back of each rear rack rail, partially insert a mounting screw into the hole containing the lowest
cage nut.
8. Install the small shelf on the back rack rails. Rest the bottom slot of each ear on a mounting screw. The
small shelf installs on the back of the rear rails, extending toward the center of the rack. The bottom
of the small shelf should align with the bottom of the large shelf.
9. Partially insert screws into the open holes in the ears of the small shelf.
10. Tighten all the screws completely.
Figure 2: Mount Hardware for a Four-Post Rack or Cabinet
7

Install the Mounting Hardware in an Open-Frame Rack
To install the mounting shelf as shown in Figure 3 on page 8:
1. On the rear of each rack rail, partially insert a mounting screw into the highest hole specified in the
SRX5800 Services Gateway Hardware Guide for the large shelf.
2. Install the large shelf on the rack. Hang the shelf over the mounting screws using the keyhole slots
located near the top of the large shelf flanges.
3. Partially insert screws into the open holes in the ears of the large shelf.
4. Tighten all the screws completely.
Figure 3: Mount Hardware for an Open-Frame Rack
Proceed to “Step 3: Install the Services Gateway” on page 9.
8

Step 3: Install the Services Gateway
IN THIS SECTION
Remove Components | 9
Install the Services Gateway | 11
Reinstall Components | 12
Because of the services gateway’s size and weight, you must use a mechanical lift to install the services
gateway in the rack. Also, you must remove all components, as shown in Figure 4 on page 9 and
Figure 5 on page 10, before you install the services gateway.
Remove Components
Figure 4: Components to Remove from the Front of the Services Gateway
Lower
fan tray
Upper
fan tray
Air
filter tray
SCB0
IOC and
SPC slots
IOCs
IOC and
SPC slots
RE
SCB1
SCB2
or card 6
g030211
9

Figure 5: Components to Remove from the Rear of the Services Gateway
Before you install the services gateway, you must remove the following components:
•
Power supplies
•
Cards (SCBs, SPCs, IOCs, Flex IOCs, and MPCs)
•
Air filter
•
Fan trays
•
Cable management system
To remove the components from the services gateway:
1. Slide each component out of the chassis evenly so that it does not become stuck or damaged.
2. Label each component as you remove it so you can reinstall it in the correct location.
3. Immediately store each removed component in an electrostatic bag.
4. Do not stack removed components. Lay each one on a flat surface.
NOTE: For complete instructions on removing services gateway components, see the SRX5800
Services Gateway Hardware Documentation at www.juniper.net/documentation/.
10

Install the Services Gateway
Before you install the services gateway, you must remove all components (see “Remove Components” on
page 9). To install the services gateway using a lift:
1. Ensure that the rack is in its permanent location and is secured to the building. Ensure that the installation
site allows adequate clearance for both airflow and maintenance. For details, see the SRX5800 Services
Gateway Hardware Documentation at www.juniper.net/documentation/.
2. Load the services gateway onto the lift, making sure that it rests securely on the lift platform (see
Figure 6 on page 11).
Figure 6: Load the Services Gateway onto the Lift
3. Using the lift, position the services gateway in front of the rack or cabinet, centering it in front of the
mounting shelves.
4. Lift the chassis approximately 0.75 in. above the surface of the mounting shelves, and position it as
close as possible to the shelves.
11

5. Carefully slide the services gateway onto the mounting shelves so that the bottom of the chassis and
the mounting shelves overlap by approximately 2 in.
6. Slide the services gateway onto the mounting shelves until the mounting brackets or front-mounting
flanges contact the rack rails. The shelves ensure that the holes in the mounting brackets and the
front-mounting flanges of the chassis align with the holes in the rack rails.
7. Move the lift away from the rack.
8. To install the services gateway in an open-frame rack, install a mounting screw into each of the open
mounting holes aligned with the rack, starting from the bottom.
9. Visually inspect the alignment of the services gateway. If the services gateway is installed properly in
the rack, all the mounting screws on one side of the rack should be aligned with the mounting screws
on the opposite side and the services gateway should be level.
Reinstall Components
To reinstall the components in the services gateway:
1. Attach an electrostatic discharge (ESD) grounding strap to your bare wrist, and connect the strap to
one of the ESD points on the chassis. For more information about ESD, see the SRX5800 Services
Gateway Hardware Documentation at www.juniper.net/documentation/.
2. Slide each component into the chassis evenly so that it does not become stuck or damaged.
3. Tighten the captive screws for each component.
NOTE: Make sure that all empty slots are covered with blank panels before you operate the services
gateway.
Proceed to “Step 4: Connect the Grounding Cable” on page 13.
12

Step 4: Connect the Grounding Cable
WARNING: To meet safety and electromagnetic interference (EMI) requirements and
to ensure proper operation, you must properly ground the services gateway chassis
before connecting power.
1. Attach an electrostatic discharge (ESD) grounding strap to your bare wrist, and connect the strap to
an approved site ESD grounding point. See the instructions for your site.
2. Connect the grounding cable to a proper earth ground.
3. Verify that a licensed electrician has attached the cable lug provided with the services gateway to the
grounding cable. The cable must be 6-AWG (13.3 mm
2
), minimum 60°C wire.
4. Make sure that grounding surfaces are clean and brought to a bright finish before grounding connections
are made.
5. Disconnect the ESD grounding strap from the site ESD grounding point, and connect it to one of the
ESD points on the chassis. For more information about ESD, see the SRX5800 Services Gateway
Hardware Documentation at www.juniper.net/documentation/.
6. Place the grounding cable lug over one of the two grounding points. The right pair is sized for UNC
1/4-20 screws and 1/4 in. split washers, which are provided in the accessory box. The left pair is sized
for M6 metric screws. If you wish to use the metric-sized grounding point, you must provide appropriate
screws and split washers.
7. Secure the grounding cable lug to the grounding point, first with the washers, and then with the screws
as shown in Figure 7 on page 14.
13

Figure 7: Connecting the Grounding Cable
g030295
1/4-20 Grounding Point
M6 (Metric)
Grounding Point
8. Verify that the grounding cabling is correct, that the grounding cable does not touch or block access
to services gateway components, and that it does not drape where people could trip over it.
Proceed to “Step 5: Connect External Devices and Network Cables” on page 14.
Step 5: Connect External Devices and Network Cables
IN THIS SECTION
Connect to a Network for Out-of-Band Management | 15
Connect a Management Console | 15
Connect the Network Cables | 15
To connect external devices and network cables:
14

Connect to a Network for Out-of-Band Management
1. Plug the RJ-45 end of the serial cable into the appropriate CONSOLE or AUX port on the services
gateway Routing Engine.
2. Plug the other end of the cable into the network device.
Connect a Management Console
1. Plug one end of the RJ-45 Ethernet cable into the CONSOLE or AUX port on the services gateway
Routing Engine.
2. Plug the female DB-9 end into the device’s serial port.
Connect the Network Cables
1. Have ready a length of the type of cable used by the interface. For cable specifications, see the SRX5800
Services Gateway Hardware Documentation at www.juniper.net/documentation/.
2. If the cable connector port is covered by a rubber safety plug, remove the plug.
WARNING: Do not look directly into a fiber-optic transceiver or into the ends of
fiber-optic cables. Fiber-optic transceivers and fiber-optic cables connected to a
transceiver emit laser light that can damage your eyes.
CAUTION: Do not leave a fiber-optic transceiver uncovered except when you are
inserting or removing cable. The safety cap keeps the port clean and prevents
accidental exposure to laser light.
3. Insert the cable connector into the cable connector port on the faceplate as shown in
Figure 8 on page 16.
15

Figure 8: Connect Network Cables
4. Arrange the cable in the cable management system to prevent it from dislodging or developing stress
points. Secure the cable so that it is not supporting its own weight as it hangs to the floor. Place excess
cable out of the way in a neatly coiled loop in the cable management system. Placing fasteners on the
loop helps to maintain its shape.
CAUTION: Avoid bending a fiber-optic cable beyond its minimum bend radius. An
arc smaller than a few inches in diameter can damage the cable and cause problems
that are difficult to diagnose.
CAUTION: Do not let fiber-optic cables hang free from the connector. Do not allow
the fastened loops of a cable to dangle, which stresses the cable at the fastening point.
Proceed to “Step 6: Connect Power Cables” on page 17.
16

Step 6: Connect Power Cables
IN THIS SECTION
Connect Power to an AC-Powered Services Gateway | 17
Connect Power to a DC-Powered Services Gateway | 21
Depending on its configuration, the services gateway uses either AC or DC power supplies. Perform the
appropriate procedures for each power supply in the services gateway.
Connect Power to an AC-Powered Services Gateway
This procedure addresses connecting power to services gateways equipped with either standard-capacity
or high-capacity AC power supplies.
WARNING: To meet safety and electromagnetic interference (EMI) requirements and
to ensure proper operation, you must properly ground the services gateway chassis
before connecting power. See “Step 4: Connect the Grounding Cable” on page 13 for
instructions.
NOTE: The services gateway must be running Junos OS Release 10.4 or later in order to use
high-capacity AC power supplies.
NOTE: The device is not shipped with AC power cords. Make sure to order or obtain AC power
cords with a plug appropriate for your geographical location.
17

1. Locate the power cords you will use to connect the device to AC power. See the SRX5800 Services
Gateway Hardware Documentation at www.juniper.net/documentation/ for specifications.
2. Attach an electrostatic discharge (ESD) grounding strap to your bare wrist, and connect the strap to
one of the ESD points on the chassis. For more information about ESD, see the SRX5800 Services
Gateway Hardware Documentation at www.juniper.net/documentation/.
18

3. For high-capacity AC power supplies, check the setting of the input mode switch:
a. Move or remove the metal plate that covers the input mode switch. On some power supply versions,
the cover pivots at one end, and you can simply swing it up out of the way. On other versions, the
cover is secured with two captive screws that you must loosen.
b. Use a sharp, nonconductive object to slide the switch to the desired position. Move the input mode
switch on each power supply to position 0 for one feed or position 1 for two feeds (see
Figure 9 on page 19). We recommend that you use two AC power feeds and set the mode input
switch to 1.
Figure 9: High-Capacity AC Power Supply Input Mode Switch
g006057
0
1
1
0
NOTE: Do not use a pencil to set the mode switch, because fragments can break off and
cause damage to the power supply.
c. Restore the metal plate to its original position over the input mode switch.
4. For each power supply:
a. Move the power switch above the power supply to the OFF position (O). For high-capacity AC
power supplies, also move the switch on the power supply itself to the OFF position (O).
b. Insert the appliance coupler end of a power cord into the appliance inlet above the power supply.
For high-capacity power supplies, also insert the appliance coupler end of a power cord into the
appliance inlet on the power supply itself.
19

c. Insert each power cord plug into an external AC power source receptacle (Figure 10 on page 20
and Figure 11 on page 21.
NOTE: Each power supply must be connected to a dedicated AC power feed and a dedicated
customer site circuit breaker. We recommend using a 15-A (250-VAC), circuit breaker
minimum, or as permitted by local code.
Figure 10: Connecting AC Power to the Services Gateway (Standard-Capacity AC Power Supplies)
20
/