32 33
Ody
ssey7Q Menus
(Continued)
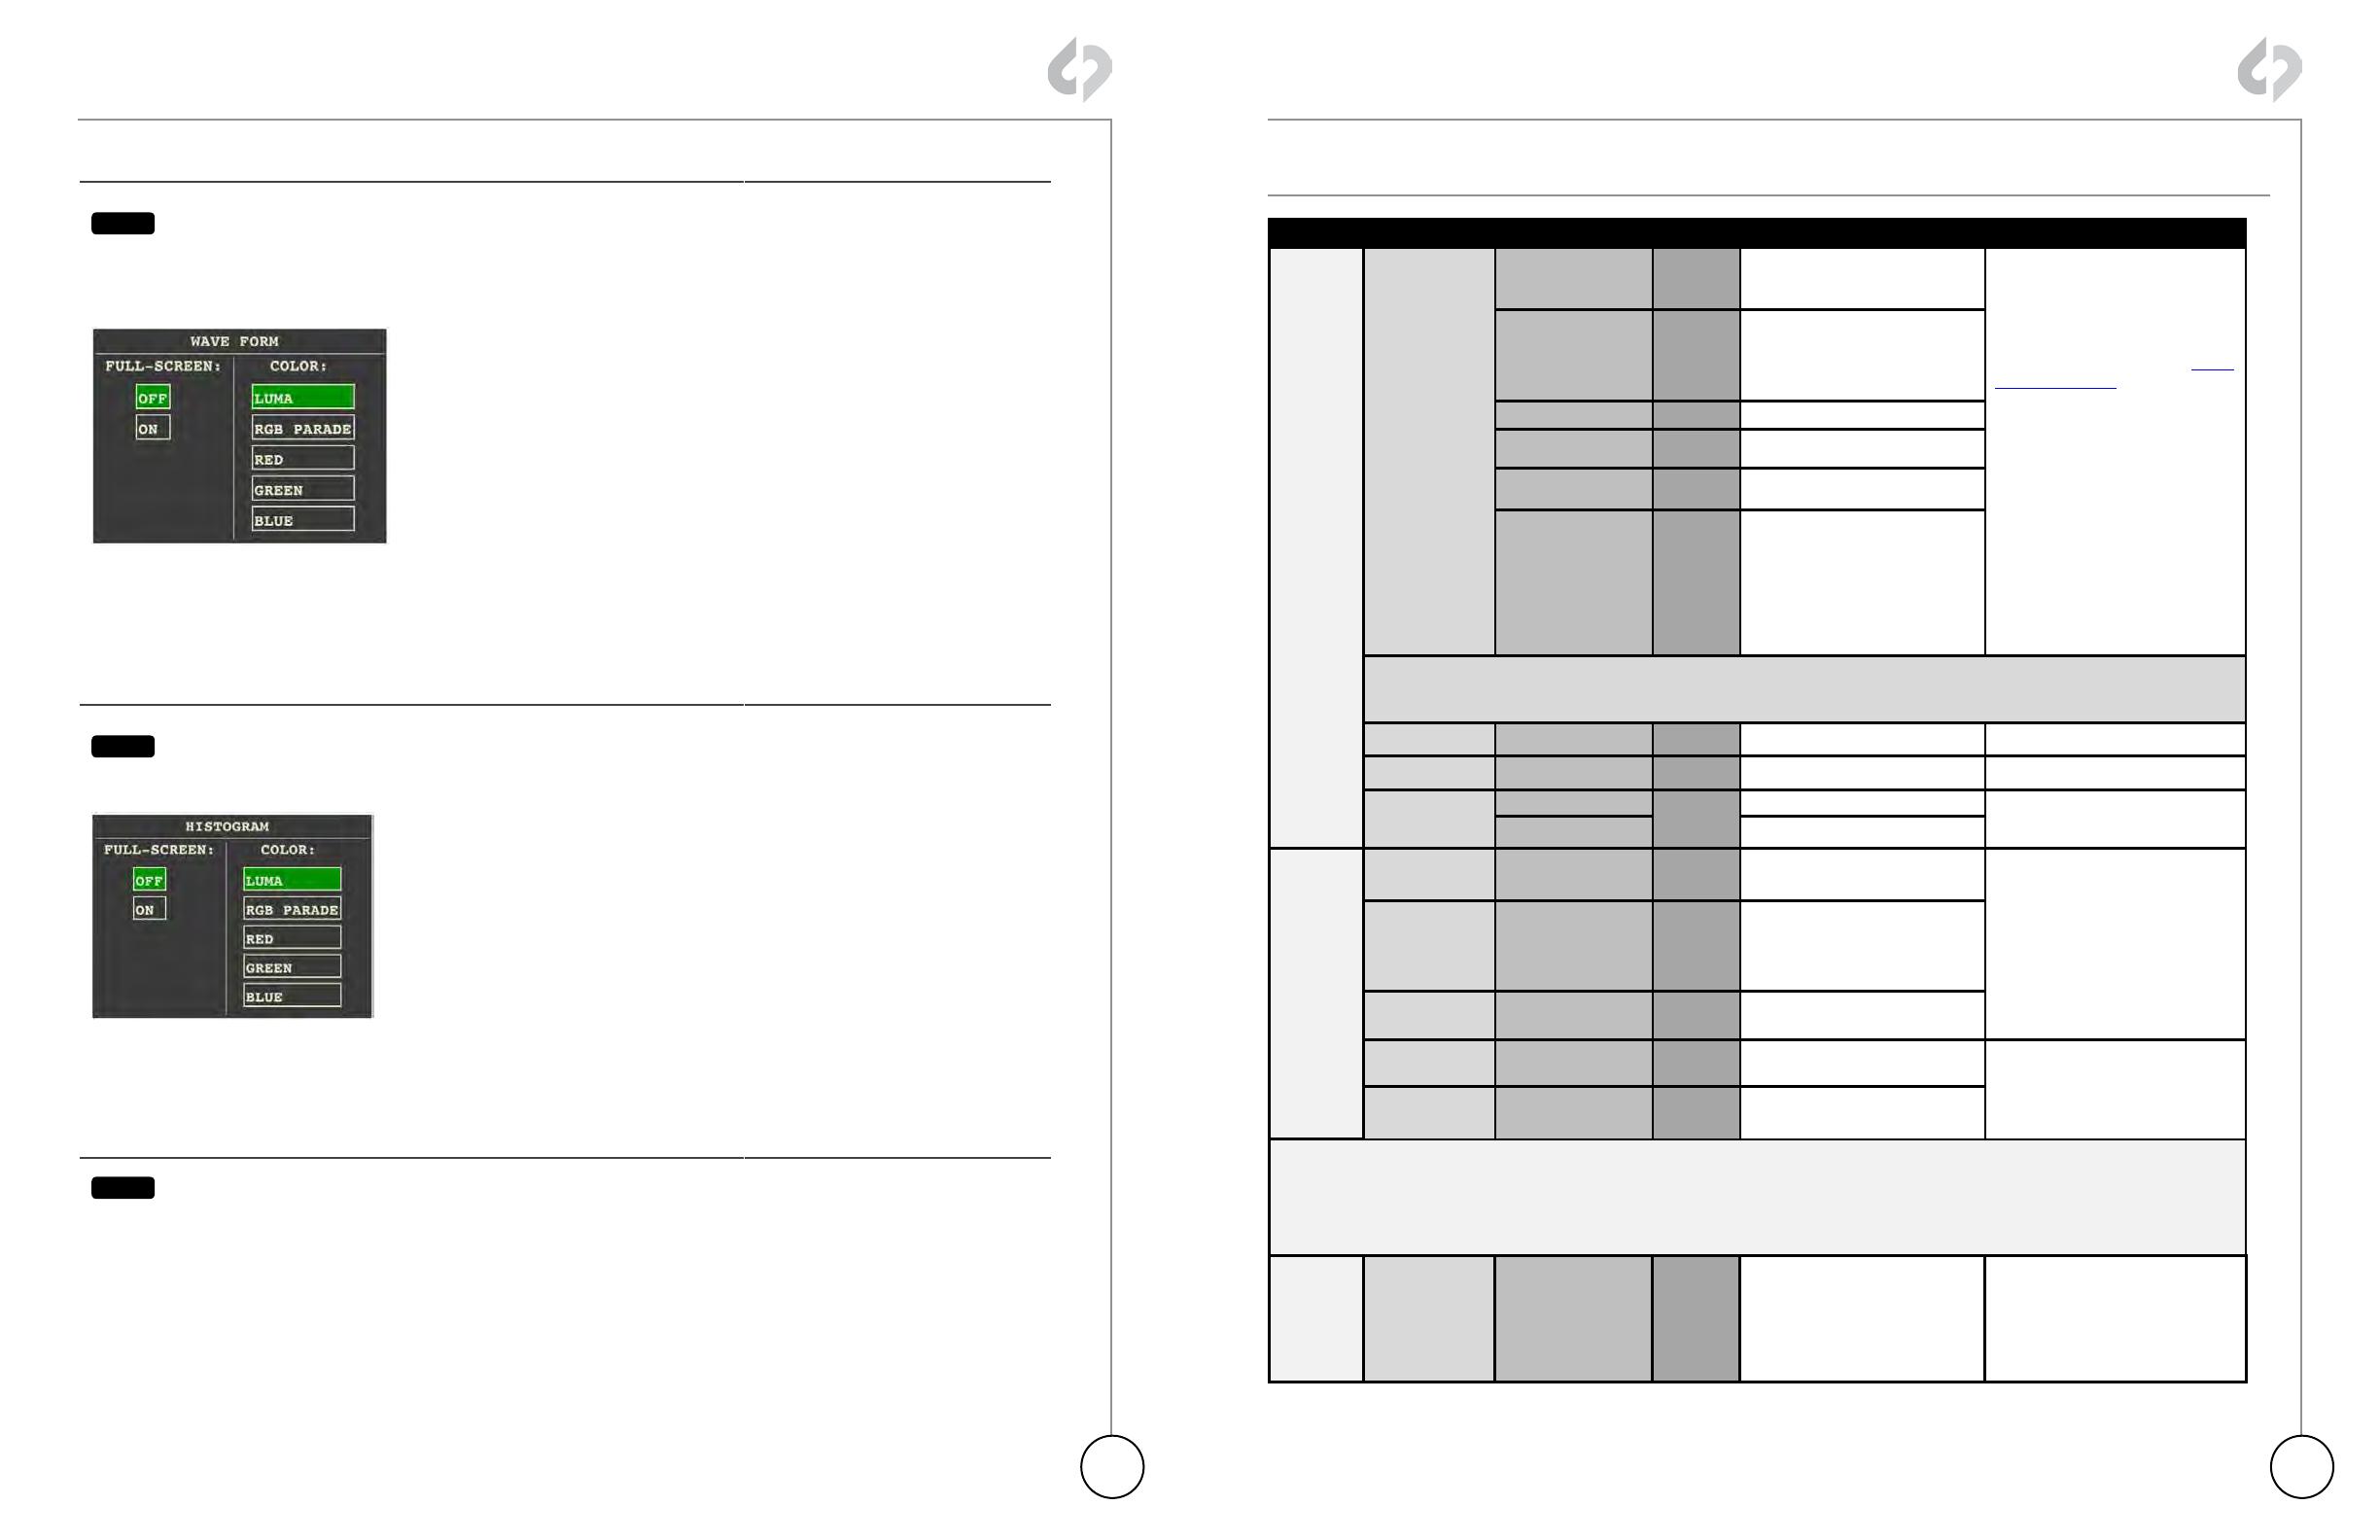
WFM (WAVEFORM)
2FC
Tapping button activates Waveform. The Waveform is based
on the signal shown on the Odyssey7Q OLED. When in Multi-
Stream mode, if two signals are selected then the Waveform
can be used to compare two side-by-side images.
Holding button brings up Waveform settings. A Waveform
is an exposure tool used for measuring the brightness of
the image throughout the frame. It can be set for overall
brightness [LUMA], with the three primary colors separated
and displayed individually [RGB PARADE], or as the individual
primary colors only [RED] [GREEN] [BLUE]. The Waveform
can be displayed across the full width of the image display
or in the lower right corner. With the large display, the RGB
PARADE shows three individual Waveforms side by side in
the appropriate colors, while in the small display mode they
are overlapped. The HD video image is visible behind the
Waveform at all times for image reference. A graticule overlay
indicates exposure value references in 20% increments from
0%-100%, with an additional reference at 109%.
HIST (HISTOGRAM)
?+$&
Tapping button activates Histogram. Holding button brings up
Histogram settings. A Histogram is an exposure tool indicating
brightness by volume of image across a horizontal plane. The
brighter the image the farther it is to the right. The more of an
image registering at a particular brightness the taller the line
graph at that brightness. It can be set for overall brightness
[LUMA], with the three primary colors separated and displayed
individually [RGB PARADE], or as the individual primary colors
only [RED] [GREEN] [BLUE].
The Histogram can be displayed across the full width of the
image display or in the lower right corner. With the large
display, the RGB PARADE shows three individual Histograms
one above another in the appropriate colors, while in the small
display mode they are overlapped. The HD video image is
visible behind the Histogram at all times for image reference.
HIDE (HIDE MENUS & SCREEN OVERLAYS)
?+"%
When using a RAW record option ARRIRAW, Canon RAW
and Sony FS700 RAW display as debayered Log images.
Odyssey7Q uses manufacturers’ LUT (image Look Up Table)
to properly adjust signal to REC709 standard. A future free
firmware update will allow various viewing LUTs to be applied
to the image on the OLED panel, to the HD video outputs, and/
or to the recorded files.
ODYSSEY
Sub-Menu 1 Sub-Menu 2 Sub-Menu 3
Option
Description Additional Information
SET
Activation
Unit
Enter Key
or ‘OK’
For registering Odyssey7Q
(required)
Tap to reveal a key code
prompt.
To Activate the Odyssey7Q af-
ter initial purchase, go to www.
Odyssey7Q.info to register the
unit. Once this is completed,
anytime one wishes to purchase
a recording option, return to
the Convergent Design website
and follow the prompts. The
website will present a code
which can then be entered into
the Odyssey7Q on the [ACTI-
VATION] menu page. To see
if a selection has already been
enabled, tap on that option’s
button to see if [ACTIVE] ap-
pears.
FS700 Raw
Enter Key
or ‘AC-
TIVE’
Raw output of Sony FS700
Canon Raw
On
Raw output of Canon C500
ARRIRAW Raw output of ARRI ALEXA
HD/2K Raw
Raw output of various indus-
trial cameras
Multi-Stream
Record up to four HD signals
simultaneously
DEMO MODE: ALL AVAILABLE RECORD OPTIONS ARE FUNCTIONAL IN A DEMO MODE, BUT IF THE OPTION HAS NOT BEEN ACTIVATED THE IMAGE
FOR THAT OPTION WILL APPEAR WITH A LARGE BLUE BAR “WATERMARK” ON SCREEN WHEN RECORDING. THIS BAR IS RECORDED IN THE IM-
AGE FILE.
Time Set the appropriate time.
Date Set the appropriate date.
Reset
Menu Restore all default settings.
Metadata Resets metadata fields
SSD’s
Format
SSD 1
Permanently erases every-
thing on SSD1.
FORMATTING IS A DESTRUC-
TIVE PROCESS AND WILL
ERASE ANY FILES CURRENTLY
ON THE SSD. BE SURE TO
DOWNLOAD ALL FILES BE-
FORE FORMATTING.
Format
SSD 2
Permanently erases every-
thing on SSD2.
Format Both
Permanently erases every-
thing from both cards.
Recover SSD1
Non-destructively recovers /
rebuilds file system of SSD1
Use only in extreme cases
(such as if a computer corrupts
the SSD’s file system).
Recover SSD2
Non-destructively recovers /
rebuilds file system of SSD2
Formatting should be performed at the start of use of any new SSDs and the start of any new project. Recovery is for when
the SSD was not properly dismounted from the Odyssey7Q. This includes physically removing the SSD without running the
eject sequence, sudden loss of power to the Odyssey7Q or improper powering down of the Odyssey7Q. The Recover pro-
cess accesses any incomplete files on the SSD and, when possible, properly closes them.
NOTE: FORMATTING OF SSDS SHOULD ALWAYS BE PERFORMED ON THE ODYSSEY7Q.
ABOUT
Displays the firmware ver-
sion, serial number, warranty
status, and which Options are
activated.
Check the website regularly
to ensure you are running the
current firmware.
Odyssey7Q Menus (Continued)