Page is loading ...

TR170531
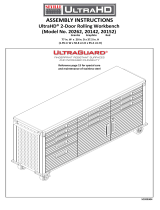
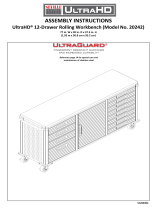
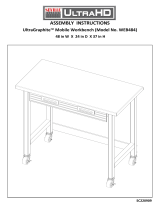
ASSEMBLY INSTRUCTIONS
UltraHD Rolling Workbench (Model No. 20142)
77 in. W X 20 in. D X 37.5 in. H
(1.95m W x 50.8cm D x 95.2cm H)
Reference page 14 for special care and
maintenance of stainless steel

(pg 1 of 15)
Large
Drawer
Medium
Drawer
Small
Drawers
#24
#26
#12
#13
#20-A #18 #20-B #19 #3 #17
#13-B
#42
#57
#2
#9
#4
#40
#8
#6
#11
#27
#5
#23
#15
#1
#27-B
#41
#12-B

Small Drawer
(pg 2 of 15)
Medium Drawer
Large Drawer
#13-4
#13-2
#15
#13-1
#12-1
#12-5
#12-2
#15
#26-1
#26-2
#15

PARTS LIST (pg 3 of 15)
(#1) LEFT SIDE PANEL x 1 PC
(#2) RIGHT SIDE PANEL x 1PC
Please check the parts carefully according to the parts list. If you are missing any parts, please contact
our customer service department (please refer to page 15 of 15).
(#4) BACK FRAME x 1 PC
(#3) FRONT FRAME x 1 PC
(#8) SOLID HARDWOOD TOP x 1 PC
(#9) PUSH BAR x 2 PCS
(#5) BASE PANEL x 1 PC
(#6) SHELF x 1 PC

(#12-5) MEDIUM-SIZE DRAWER BACK PANEL x 1 PC
(#12-2) MEDIUM-SIZE DRAWER BOTTOM PANEL x 1 PC
(#13-1) LARGE DRAWER FRONT PANEL x 1 PC
(#13-2) LARGE DRAWER BOTTOM PANEL x 1 PC
(#12-B) WHEEL WITH BRAKE x 2 PCS
(#13-B) WHEEL W/O BRAKE x 2 PCS
PARTS LIST (pg 4 of 15)
(#11) LEFT SIDE SLIDER SUPPORT x 1PC
(#12-1) MEDIUM-SIZE DRAWER FRONT x 1 PC
Please check the parts carefully according to the parts list. If you are missing any parts, please contact
our customer service department (please refer to page 15 of 15).

PARTS LIST (pg 5 of 15)
(#13-4) LARGE DRAWER BACK PANEL x 1 PC
(#15) SCREW B (M4 x 8L) x 195 PCS
Please check the parts carefully according to the parts list. If you are missing any parts, please contact
our customer service department (please refer to page 15 of 15).
(#20-B) RIGHT DOOR x 1PC
(#21) SCREW DRIVER x 1 PC
(#18) LEFT DOOR HINGE x 2PCS
(#17) SCREW D ( M8 x 18L) x 16 PCS
(#19) RIGHT DOOR HINGE x 2PCS
(#20-A) LEFT DOOR x 1PC

(#27-B) WASHER (M8) x 6 PCS
(#40) SCREW E (M8 x 18L) x 6 PCS
PARTS LIST (pg 6 of 15)
Please check the parts carefully according to the parts list. If you are missing any parts, please contact
our customer service department (please refer to page 15 of 15).
(#22) KEY x 6 PCS
(#24) DRAWER MAT x 11 PCS
(#25) WRENCH x 1 PC
(#26-1) SMALL DRAWER FRONT x 9 PCS
(#26-2) SMALL DRAWER CASE x 9 PCS
(#27) RIGHT SIDE SLIDER SUPPORT x 1 PC
M8X20 pcs

PARTS LIST (pg 7 of 15)
(#41) SCREW F (M4 x 8L) x 32 PCS
(#42) SCREW G (M4 x 30L) x 16 PCS
our customer service department (please refer to page 15 of 15).
Please check the parts carefully according to the parts list. If you are missing any parts, please contact
(#57) BUMPER x 4 PCS
(#23) MAGNET x 1 PC

TIP:
Step 1.
Step 2.
Step 3.
ASSEMBLY INSTRUCTIONS (pg 8 of 15)
Install Back Frame (#4) to Solid Hardwood Top
(#8).
Attach Left Side Panel (#1) to Back Frame (#4) ,
making sure the "Top" of Left Side Panel (#1) is on
the Solid Hardwood Top (#8). Use 3 pcs of Screw B
(#15) and Screw Driver (#21) to fasten.
Tip: Once the Left Side Panel (#1) is securely fastened,
check to make sure the slider motion is operating in the
correct direction (Away from the Back Frame (#4)).
UItraHD Rolling Workbench (Model No. 20142)
Open both boxes, locate and remove the
cardboard box containing the Solid Hardwood
Top (#8). Set the other parts to the side.
When assembling this item, place the Solid
Hardwood Top up side down on the cardboard
to avoid scratching the top surface.
A magnetic screwdriver is included for your
convenience. If a power screwdriver is used,
keep on a low torque setting.
Install Left Side Panel (#1).
[Use the Wrench (#25) for this step]
Place the Back Frame (#4) as the left picture
shows and use 3 pcs Screw E (#40) and Washers
(#27-B) to fasten. Attach the "Top" of the Back
Frame (#4), as indicated by the attached sticker,
to the Solid Hardwood Top (#8) (The Solid
Hardwood Top has no set front or back end).
Note: Ensure the back and side are flush with
the Solid Hardwood Top. When assembling a
part, do not tighten any screws completely until
all screws for that part have been partially
screwed in.
#8

Step 4.
Step 5.
Step 6.
Step 7.
ASSEMBLY INSTRUCTIONS (pg 9 of 15)
Install the Front Frame (#3).
Install Right Side Slider Support (#27)
Install the Right Side Panel (#2).
A: Attach the "Top" of the Front Frame (#3) to the Solid
Hardwood Top (#8). The other screw holes will align with
the Left and Right Side Panels (#1 and #2),
Left Side Slider Support (#11) and Right Side Slider Support
(#27).
B: Use 11 pcs of Screw B (#15) and Screw Driver (#21) to
fasten the Front Frame (#3) on the Left and Right Side
Panels (#1 and #2), Left Side Slider Support (#11) and Right
Side Slider Support (#27).
C: Make sure the four edges of the Cabinet are aligned, then
fasten the Front Frame (#3) on the Solid Hardwood Top(#8)
by using 3 pcs of Washer(#27-B) and Screw E (#40) with
Wrench (#25).
Note: The ball bearing track will have to be pulled out 1"
to expose the screw holes used for fastening to the Front
Frame #3.
UItraHD Rolling Workbench (Model No. 20142)
Attach the Left Side Slider Support (#11) to the Back
Frame (#4), make sure the "Top" of Left Side Slider
Support (#11) is close to the Solid Hardwood Top (#8).
Again, the “Top” is indicated by a sticker on one of the
vertical columns. Use 3 pcs of Screw B (#15) and Screw
Driver (#21) to fasten.
Install Left Side Slider Support (#11)
Note: the Drawer Slides will face those on the Left Side
Panel (#1) .
Attach the Right Side Slider Support (#27) to the Back
Frame (#4), make sure the "Top" of Right Side Slider
Support (#27) is close to the Solid Hardwood Top(#8).
Again, the “Top” is indicated by a sticker on one of the
vertical columns. Use 2 pcs of Screw B (#15) and Screw
Driver (#21) to fasten.
Note: the Drawer Slide will face those on the Right Side
Panel (#2).
Attach the Right Side Panel (#2) to the Back Frame (#4),
make sure the "Top" of Right Side Panel (#2) is close to
the Solid Hardwood Top(#8). Again, the “Top” is
indicated by a sticker on one of the vertical columns. Use
3 pcs of Screw B (#15) and Screw Driver (#21) to fasten.
Front
Back
#11 #15
#15
#27
#15
#2
#3
#15
#27-B
#40

Step 9.
ASSEMBLY INSTRUCTIONS (pg 10 of 15)
Step 11.
Attach Bumpers (#57) to the bottom four corners of Workbench.
Use 16 pcs of Screw G (#42) to fasten. Then, rotate/stand the
Workbench upright.
Step 12.
A: Attach Push Bars (#9) on both the Left and Right Side Panels
(#1 and #2). Use 24 pcs of Screw F (#41) to fasten.
B: Use 2 pcs of Screw B (#15) to fasten the Magnet (#23) on the
Front Frame (#3)
UItraHD Rolling Workbench (Model No. 20142)
Attach Wheels (#12-B and #13-B)using 16 pcs of
Screw D (#17). Make sure that the Wheels w/o
Brakes (#13-B) are on the same end (right or left
side) of the Workbench. Also, there is some
tolerance in the holes of the wheel frame, so
make sure that the two wheels w/o brakes are
parallel to each other and to the frame of the unit.
Step10.
Install Wheels (#12-B and #13-B) .
Install Base Panel (#5)
Attach Base Panel (#5) to the rest of the unit as the
left picture shows. Use 14 pcs of Screw B (#15) and
Screw Driver (#21) to fasten.
#5
#15
#17
#12-B
#13-B
#57
#42
#41
#9
#23
#15

Step 13.
Step 14.
Repeat Step 13 and Step 14, but using Large Drawer
Front Panel (#13-1), Large Drawer Bottom Panel (#13-2)
and Large Drawer Back Panel (#13-4).
ASSEMBLY INSTRUCTIONS (pg 11 of 15)
From above, align the folded Drawer Panel with the
Medium Drawer Front (#12-1) as detail picture shows,
use 7pcs Screw B (#15) to tighten.
Assemble Large Drawer (#13) the same way.
A. Fold the Left and Right panel of the Medium Drawer
Bottom Panel (#12-2) up so that the ball bearing track
will attached to the outside of the drawer.
B. Attach the Medium-size Drawer Back Panel (#12-5) to
the folded drawer panel, use 7pcs Screw B (#15) to
tighten.
lnstall Medium Drawer Front (#12-1) .
UItraHD Rolling Workbench (Model No. 20142)
lnstall Medium Drawer Bottom Panel (#12-2) and
Medium Drawer Back Panel (#12-5).
NOTE: Do not fully tighten the screws. This will help
you make any adjustments to alignment later.
#12-2
#15
#12-5
#15
#12-1
#13-4
#13-2
#13-1

Step 15.
.
ASSEMBLY INSTRUCTIONS (pg 12 of 15)
Note: Do not tighten the screws all the way, until
part C is completed.
NOTE: Once all the drawer panels are aligned,
tighten all the drawer screws.
B. Slide the Left and Right Drawer Panel into Small
Drawer Front (#26-1) as the detail picture shows.
Use 7pcs Screw B (#15) to tighten.
A. Fold up all three panels of the Small Drawer
Body (#26-2), use Screw B (#15) to tighten the
back panel to the left and right panel.
UItraHD Rolling Workbench (Model No. 20142)
#26-2
#26-2
#15
#26-1
#15

Step 16.
ASSEMBLY INSTRUCTIONS (pg 13 of 15)
A. Pull out the sliders completely, then attach the
drawer to the sliders. Make sure the square holes
on the drawer side panels are line up, and the
drawer is hooked onto the sliders completely.
B. Use 4pcs Screw B (#15) to tighten the drawer,
and put the Drawer Mat (#24) into the drawer.
Repeat above steps to place other drawers.
Note: Do not tighten any screws completely
until all the drawers are adjusted well.
Only open one drawer at a
time to avoid tipping. 40 lbs.
maximum loading for each
drawer.
UItraHD Rolling Workbench (Model No. 20142)
Place the Drawers.
Note: Pull out the ball
bearing track completely
before you attach drawer.
Hook cutaway view
The oval hole at the front of the
slider allows for the gaps between
the drawers to be adjusted. Make
the adjustments once all the
drawers are installed.
CAUTION
#15
#24
#13

Step 17.
Step 18.
ASSEMBLY INSTRUCTIONS (pg 14 of 15)
Install the Left Door (#20-A) and Right Door
(#20-B).
A. Insert 2 pcs of Left Door Hinge (#18) on to the
Left Door (#20-A). Insert 2 pcs of Right Door Hinge
(#19) on to the Right Door (#20-B).
B. Attach the Left Door (#20-A) to the left side of
the door frame and Right Door (#20-B) to the right
side of the door frame. Use 8 pcs Screw F (#41) to
fasten.
Note: The door hinge screw holes have tolerance,
enabling the doors to be adjusted and centered in
the frame.
Stainless Steel Maintenance:
These parts have an UltraGuard® fingerprint resistant finish. Do not use traditional stainless steel cleaners on this unit. Lightly wipe off
once a month with clean warm water and a soft cloth (preferably a microfiber cloth). This is the safest formula to prevent new stains
from appearing over time and manage unwanted fingerprints or grease marks. Remember to always wipe in the direction of the
surface grain (NEVER ACROSS) and always use a lint-free cloth. Once the surface is clean,thoroughly wipe dry with a soft absorbent
cloth.
UltraHD Wood Top
Although great care is taken to hand select consistent wood top color and grain for UltraHD products, there can and will be natural
variations in color and graining between finished products. These variations contribute to the beauty of using a natural material as a
workbench and are considered standard quality. Variations of color within these standards and minor scratches in the clear coat finish
will not be a reason for replacement. If the wood top is received with excessive damage or splitting, Seville Classics will guarantee
replacement of the wood top.
Restore Shallow Scratches or Chips
If the wood top becomes scratched and chipped over time or during assembly, a Polyurethane finish can be applied to help restore
the wood's natural texture, as well as protect the surface from future damage.
Applying a Polyurethane Coating
Please follow the manufacturer's instruction on the product for application.
UItraHD Rolling Workbench (Model No. 20142)
Install the Shelf (#6).
Place the Shelf (#6) in the unit at the desired
height and ensure that all four corners are
secured on the hooks on the front and back
frame.
#6
#18
#20-A
#19
#20-B
#41

(pg 15 of 15)
customer service department at:
***Please visit our website or call and inquire about our additional UltraHD Line***
E-mail: support@sevilleclassics.com
Website & Online Store: www.sevilleclassics.com
*If you are missing any parts, have any questions, or need additional assistance in assembly,
please contact our bilingual (English/Spanish)
Seville Classics, Inc.
19401 South Harborgate Way
Torrance, CA 90501
USA
Hours: 9:00am - 4:30pm (Pacific Standard Time)
Telephone: (800) 323-5565 within USA
Fax: (310) 533-3899

Model No. 20140
UltraHD Wall Cabinet
Model No. 20146
UltraHD Workbench
Model No. 20142
UltraHD Rolling Workbench
Model No. 20148
UltraHD Storage Cabinet
Model No. 20143
UltraHD Storage Cabinet
UltraHD Line
/