Remove old gutters and inspect fascia board and metal drip edge, repair or replace the
fascia/drip edge if needed. Tack a string to the fascia board 4 or 5 inches below the rooine
so that it is straight, level and taut. Drop one end of the string 1/4 inch per 10 ft., sloping
toward downspout.
DOWNSPOUT
DOWNSPOUT
1. Preparation: Measure and mark with a chalk line
Begin assembling your gutter system on the ground starting at end furthest from the down-
spout. Adhere an end cap to the rst piece of gutter, then join gutter sections using slip connec-
tors secured with screws or pop rivets.
Waterproof all joins with sealant, and secure with screws or pop rivets.
2. Assemble Gutter Sections
3. Hang Gutters onto the Fascia
4. Attach Mitres, Drop Outlets and Downspouts
Spike & Ferrule Insert ferrule into gutter lined
up with a rafter, hammer spike through gutter
and drip edge into the fascia.
Hidden Hanger Hook the hanger under the
front lip of the gutter. Drive a nail or screw
through the hole in the hanger into the fascia.
Strap Hanger Hook the hanger under the front
lip of the gutter. Carefully lift shingles then nail
into the roof deck.
Locate and mark the end of each rafter on the fascia board (Typically 24 inches). Use one of the following methods to hang your
gutter. Be sure that the drip edge hangs into the gutter and not behind it.
Attach mitres to fascia board at the corners. Connect mitres to gutter with slip connectors. Secure
with screws or pop rivets. Apply sealant to the inside seams to protect against leaks.
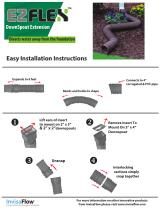
Connect elbows (a) and downspout (b) with the crimped ends pointing down. Secure the joints
with screws (c). Attach the downspout to the outlet then attach an elbow at the bottom to direct
rainwater away from the foundation.
Fasten downspout snugly to the wall with downspout bands.
Use 2 downspout bands for each 8-10 foot section of downspout.
SEALANT
HANGERS
a
a
b
b
c
Gutter material has sharp edges. Always use leather gloves and eye protection.
Working above grade is inherently dangerous, observe OSHA Regulations, Fall
Protection Systems Criteria and Practices (1926.502).
SECURE
AND SEAL
CONNECTOR
#RJ3FHA-SP
STEEL FASCIA GUTTER
INSTALLATION GUIDELINES
These basic installation guidelines are for use with typical or standard applications. It is always recommended to seek advice from a licensed
professional, and to check with your local building inspector or building permit office for approvals and possible variations that may apply.


