Installation Sheet
www.ronbow.com
Step 1 :
Step 4 :
Ronbow Corporation, All Rights Reserved.
EVIN
Model:
216624
216632
216637
Step 3 :
Step 5 :
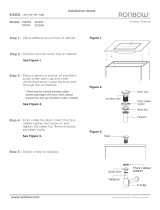
Position countertop opening to ensure
clearance between the lavatory , faucet
and backsplash. Cut 21”w x 17”h (max)
opening in countertop. Position and set
sink and seal with silicone adhesives or
caulking
See Figure 1.
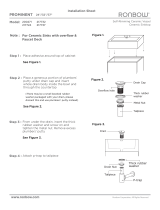
Place a generous portion of plumbers’
putty under drain cap and insert
whole drain body inside the bowl and
through the countertop.
(There may be a small beveled rubber
washer packaged with your drain, please
discard this and use plumbers’ putty instead)
See Figure 2.
From under the drain, insert the thick
rubber washer and screw on and
tighten the metal nut. Remove excess
plumbers’ putty
See Figure 3.
Attach p-trap to tailpiece.
Self-Rimming Ceramic Vessel
Ceramic Sinktop
Drain Cap
Overflow hole
Metal Nut
Thick rubber
washer
Tailpiece
Figure 1.
Figure 2.
Figure 3.
countertop
Drain
Drain Nut
Tailpiece
Thick rubber
washer
P-trap
24”/32”/37”
/


