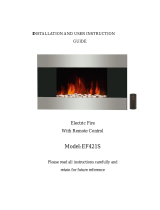
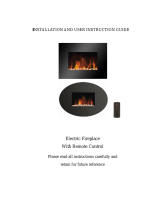
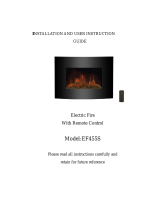
AMBION FLAME EF-1510 SBP series Installation And User Instructions Manual

Category
Fireplaces
Type
Installation And User Instructions Manual

This manual is also suitable for

AMBION FLAME
Electric fireplace with remote control
Models: EF-1510 BGL series
EF-1510 SBP series
EF-1510 SL series
EF-1510 BP series
Please read all instructions
carefully and retain for future
reference!
INSTALLATION AND USER
INSTRUCTIONS
Thank you ! for choosing AMBION FLAME
Electric fireplace for any additional information not
covered in this manual please consult website:
www.homemarketdeals.com
Content
Important Safety Instructions 2
Getting Started 3
Contents of Carton (fig. A) 3
Helpful Advice Before Fitting 4
Installation 6
Placing pebbles 6
Instructions for Use 6
Safety Cut-Off 6
Troubleshooting 7
Replacing the Lamp 7
Cleaning 7
Technical Specification 7
Disposal 7
Important Safety Instructions
When using this electrical appliance, basic precautions should be followed to reduce the risk of fire,
electric shock, and injury to person, including the following:
a) This heater must be used on an AC supply only and the voltage marked on the heater must
correspond to the supply voltage.
b) Do not switch the appliance on until it properly installed as described in this manual.
c) The heater must not be located immediately below a socket outlet.
d) Keep furniture, curtains and other flammable material at least 1 meter away from the appliance.
e) Do not leave the appliance unattended during use.
f) Do not leave the appliance unattended while connected to the mains supply.
g) This appliance is intended for household use and should not be used for industrial purposes.
h) From time to time, check the cord for damage. Never use the appliance if the cord or any part
of the appliance shows signs of damage.
i) Do not operate this appliance with a damaged plug or cord, after a malfunction or after being
dropped or damaged in any way.
j) Repairs to electrical appliances should only be performed by a qualified electrician. Improper
repairs may place the user at serious risk.
k) Do not run the mains cable under carpets, rugs etc.
l) Do not allow the mains cable to hang over sharp edges or come into contact with hot surfaces.
m) Never immerse the product in water or any other liquids.
n) Do not use the appliance outdoors.
o) Do not use if you have wet hands.
p) Never use the appliance on or near hot surfaces.
q) Do not operate with a damaged cord.
r) Before cleaning the appliance, ensure it is unplugged from the power and that it is completely
cooled.
s) Do not clean the appliance with abrasive chemicals.
t) Never use accessories that are not recommended or supplied by the manufacturer. It could
cause danger to the user or damage to the appliance.
u) Do not lift the appliance by the front panel.
v) Make sure that the wall is capable of supporting the combined weight of the appliance. If
necessary have a qualified technician to reinforce the wall.
w) Examine the wall you want to install the mount to before you start installation. Make sure that
there are not hidden power supply cables, water pipes or other objects hidden in the wall that
might be hit by the drill.
x) At least two people with technical knowledge and experience are needed to install this product.
Contact a qualified technician if you do not understand these instructions or parts of it, if you
have doubts and if you do not have required tools in hand.
WARNINGS:
a) Do not use the heater in reach of a shower, bath or a swimming pool.
b) Heater is not located immediately below a socket-outlet
c) If the supply cord is damaged, it must be replaced by the manufacturer, its service agent or a
similarly qualified person in order to avoid a hazard.
d) In order to avoid overheating, do not cover the heater
e) This appliance is not intended for use by persons (including children) with reduced physical,
sensory or mental capabilities, or lack of experience and knowledge, unless they have been
given supervision or instruction concerning use of appliance by a person responsible for they
safely.
f) Children should be supervised to ensure that they do not play with the appliance.
Getting Started
a) Remove the appliance from the box.
b) Remove any packaging from the product.
c) Place the packaging inside the box and either store or dispose properly.
d If want to use the appliance as table type heater need remove the plastic base and screw nuts
from small box.
Contents of Carton (fig. A)
 
 
 
 
 
 "#
Helpful Advice Before Fitting
a) Please retain all packaging until you have checked and counted all the parts and the contents of
the fixing pack against the parts list.
b) The fixing pack contains small items which should be kept away from young children.
c) We suggest that you open the fixing pack and place all the contents into a container, therefore
reducing the risk of losing any small pieces.
Installation Wall mounting
a) Do not connect the appliance until properly fixed to the wall and the instructions is read fully.
b) The minimum distances must be observed.
c) For installation of the appliance, care must be taken not to damage concealed cables.
d) Please be careful while drilling the holes.
e) This appliance is designed to be permanently fixed to a wall at a minimum height of 18”. The
wall bracket must be fitted horizontally and the cable routed to the bottom right of the heater.
f) A height of 36” from bottom of heater to floor is recommended for optimum viewing of fuel
bed see fig.1 for recommend fixing dimensions .
g) Use the bracket as table template and mark five drill positions on the wall. Make sure that these
holes are level. Observe the recommended fixing dimensions (Fig. 2).
h) Put the bracket aside and drill holes with a depth of 1” using an 8 mm drill bit.
i) Clean the holes from dust and insert one plug in each hole. Make sure the edge is flush with the
surface.
serial
number
name quantity
001 Carton 1
002 Screws ($4 x 8 mm) 2
003 Screws ($4 x 35mm) 2
004 Fixed Angle 1
005 Plastic plug($ 8 mm) 2
006 Packing left bubble 1
007 fireplace 1
008 bracket 1
009 Plastic plug($8 mm) 5
010 Screws ($4x35 mm) 5
011 remote control 1
012 Packing right bubble 1
013 Power cord 1
j) Hold the bracket in position and fix it with screws.
k) Attach the fixing angle to the bottom of the appliance using the short screws.
l) Carefully lift the appliance and hook it to the wall bracket (Fig. 2, circle). Do not let the
appliance go until you are sure it is safely engaged to the bracket.
m) Now mark the hole position for fixing the angle, see Fig. 3. Carefully remove the appliance
from the bracket and drill holes with a depth of 1” using an 8 mm drill bit.
n) Clean the holes from dust and insert one plug in each hole. Make sure the edge is flush with the
surface.
o) Then lift up the appliance again, engage it to the bracket and finally fix the angle with screws.
Placing pebbles
The steps are only for the models with pebbles:
a) Bring down the front-panel (fig. 4)
b) Take pebbles out from package and put on the plastic board even (fig. 5)
c) Put front-panel up (fig. 6)
Instructions for Use
The appliance can be operated either by the switches are located on the top right hand side of the
fire or by supplied remote control.
Manual Operation
a) The switches are located at the top right hand side of the fire .The standby switch must be first
switch on.
b) Press once the button to turn on the appliance and fire effect.. A red indicator light will
appear to indicate that the function is ON. Press the button for 3 seconds this will operate the
dimmer mode.
c) Press once the 750W button for the low heat setting: press twice to switch off the heat setting.
d) Press once the 1500W button for the high heat setting: press twice to switch off the heat
setting.
Remote Operation
a) The standby switch located at the top right hand side of the fire must be first switch on.
b) It takes some time for the receiver to respond to the transmitter. Do not PRESS the buttons
more than once within two seconds for correct operation.
c) Press once the button on the remote control this turns the appliance and fire effect.
d) Press once the 750W button for the low heat settings: press twice to switch off the heat setting.
e) Press once the 1500W button for the high heat settings: press twice to switch off the heat
setting.
f) Press the DIMMER button for operate the dimmer mode.
Safety Cut-Off
This appliance is fitted with a safety cut-off which will operate if the fire overheats (e.g. due to
blocked air vents). For safety reasons, the fire will NOT automatically reset.
Replacing the Lamp
Warning-Always disconnect from the power supply before removing lamp.
Only a qualified engineer can replace the fault lamp.
Cleaning
Warning-Always disconnect from the power supply before cleaning heater
For general cleaning use a soft clean duster-never use abrasive cleaners. The glass viewing screen
should be cleaned carefully with a soft cloth. DO NOT use proprietary glass cleaners.
Technical Specification
Supply: 110-130V~ 60Hz
Rated power: 750W-1500W
Lighting: 40W G9 Clear Halogen Lamp
Disposal
Environmental Protection
Waste electrical production should not be disposed of with household waste. Please
recycle where facilities exist. Check with your Local Authority or retailer for
recycling advice.
To reset the appliance, disconnect the appliance from the mains supply for at least 15 minutes.
Reconnect the supply to the mains and switch on the appliance.
Troubleshooting
Symptom
Solution
No operation/ no fan. Check fuse by replacement.
Check for safety cut-off operation.
No fire effect light.
Check the bulb by replacement.
  • Page 1 1
  • Page 2 2
  • Page 3 3
  • Page 4 4
  • Page 5 5
  • Page 6 6

AMBION FLAME EF-1510 SBP series Installation And User Instructions Manual

Category
Fireplaces
Type
Installation And User Instructions Manual
This manual is also suitable for

Ask a question and I''ll find the answer in the document

Finding information in a document is now easier with AI