Page is loading ...

©
2000 RadioShack Corporation.
All Rights Reserved.
RadioShack and RadioShack.com are trademarks used by RadioShack Corporation.
OWNER’S MANUAL — Please read before using this equipment.
Antenna Rotator
Your RadioShack Antenna Rotator lets you turn and accurately posi-
tion even the largest TV antenna from inside your home to ensure the
best possible TV reception. When you turn the control’s dial to select a
direction, the drive motor turns the antenna. When the antenna reach-
es the desired direction, the motor automatically turns off.
Important:
For your safety, read “Important Safety Instructions” and
all safety, installation, and operating instructions supplied with your an-
tenna. Keep this manual for future reference.
IMPORTANT SAFETY INSTRUCTIONS
Your antenna rotator, consisting of a control and a drive, has been en-
gineered and manufactured to assure your personal safety. Improper
installation or abuse of the rotator, or the antenna connected to it, can
result in potential electrical shock hazards. In order not to defeat the
safeguards incorporated into the rotator, observe the following basic
rules for its installation, use, and servicing.
1. An outside antenna system should not be located in the vicinity of
overhead power lines or other electric light or power circuits, or
where it can fall into such power lines or circuits. When installing
an outside antenna system, extreme care should be taken to keep
from touching such power lines or circuits, as contact with them
might be fatal.
2. If the drive unit is installed on an outdoor antenna, be sure the
antenna system is grounded so as to provide some protection
against voltage surges and built-up static charges. Section 810 of
the National Electrical Code, ANSI/NFPA70, provides information
with respect to proper grounding of the mast and supporting struc-
ture, grounding of the antenna lead-in wire and drive unit to con-
trol unit interconnecting cables to an antenna discharge unit, size
of grounding conductors, location of antenna discharge unit, con-
nection to grounding electrodes, and requirements for the ground-
ing electrode.
3. Your control is provided with ventilation openings to allow heat
generated during operation to be released. If these openings are
blocked, heat build-up can cause failure of the control and exter-
nal damage. Therefore:
• Never block the ventilation slots by placing the control on a soft
surface, such as a bed, sofa, or rug.
• Never place the control in a built-in enclosure unless proper
ventilation is provided.
• Never cover the control’s openings with cloth or other material.
• Never place the control near or over radiators, heat registers,
amplifiers, or other heat sources.
4. Your control might be equipped with a polarized AC line plug (one
blade of the plug is wider than the other). This safety feature
allows the plug to fit into the power outlet only one way. Should
you be unable to insert the plug fully into the outlet, try reversing
the plug. Should it still fail to fit, contact your electrician to replace
the obsolete outlet. Do not defeat the safety purpose of the polar-
ized plug.
5. Operate the control only from an AC power source as indicated on
the bottom of the control. Do not use DC.
6. Overloaded AC outlets and extension cords are dangerous, and
so are frayed power cords and broken plugs. They may result in a
shock or fire hazard. Unplug the control and call your service tech-
nician for replacement.
7. Do not allow anything to rest on or roll over the power cord, and
do not place the control where the power cord is subject to traffic
or abuse. Pay particular attention to the cord at the plug and the
point where it exits from the control unit. This may result in a
shock or fire hazard.
8. All individuals, especially children, should be cautioned about
dropping or pushing objects into any openings. Some internal
parts carry hazardous voltages and contact can result in electrical
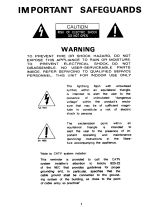
WARNING:
To reduce the risk of fire or shock hazard, do not expose this
product to rain or moisture.
CAUTION
RISK OF ELECTRIC SHOCK. DO NOT OPEN.
CAUTION:
TO REDUCE THE RISK OF ELECTRIC SHOCK, DO NOT
REMOVE COVER OR BACK. NO USER-SERVICEABLE PARTS
INSIDE. REFER SERVICING TO QUALIFIED PERSONNEL.
This symbol is intended to alert you to the presence of
uninsulated dangerous voltage within the product’s
enclosure that might be of sufficient magnitude to con-
stitute a risk of electric shock. Do not open the prod-
uct’s case.
This symbol is intended to inform you that important
operating and maintenance instructions are included
in the literature accompanying this product.
!
!
Ground Clamp
Electric
Service
Equipment
NEC — National Electrical Code
Antenna
Lead-In
Wire
Antenna Discharge Unit
(NEC Section 810-20)
Grounding Conductors
(NEC Section 810-21)
Grounding Clamps
Power Service Grounding
Electrode System
(NEC Article 250, Part H)

2
shock. Objects dropped into the control may also result in a fire
hazard.
9. Never expose the control to rain or water. If it becomes damp or
wet, or if liquids are spilled into it, unplug the control and have it
inspected by a service technician before further use. Liquids, rain,
or excessive moisture may cause electrical shorts which can
result in fire or shock hazards. Never operate the control near
water (such as a swimming pool, bathtub, sink, or washing
machine) or in a wet basement.
10. Unplug the control before cleaning it. Use a slightly damp (not
wet) cloth. Do not use an aerosol directly on the control, since it
may overspray and cause electrical shock.
11. Whenever the rotator exhibits a distinct change in performance,
unplug the control and call your dealer or service technician.
12. Any attempt to disassemble the control or drive portions of the
rotator may expose you to high voltage or other hazards. Observe
all cautionary labels, warnings, and safeguards.
13. If the control has been dropped or the case has been damaged,
fire and shock hazards may exist. Unplug the control and have it
checked by a service technician before use.
14. When replacement parts are required, have the service technician
verify that the replacement parts have the same safety character-
istics as the original parts. Unauthorized substitutions may result
in a risk of fire or electric shock, or other risks.
15. Upon completion of any service or repairs to the rotator, please
ask the service technician to perform routine safety checks to
determine that the rotator is in a safe operating condition.
16. For added protection of the control during a lightning storm or
when the control is to be left unattended for an extended period of
time, unplug it from the wall outlet and disconnect the drive cable.
This will prevent possible shock, fire hazard, and damage to the
control due to lightning storms or power line surges.
17. Always use extreme caution when installing a rooftop antenna
and drive system to reduce the risk of falls. Wear rubber-soled
shoes and use a sturdy ladder. Do not install the antenna or drive
system on a windy day or when the roof is wet or covered with ice
or snow.
PRELIMINARY TESTING
Before you install the antenna rotator, do the following:
• In your home, temporarily connect the drive motor to the control
(see “Wiring the Drive Motor” and “Wiring the Control”).
• Test the antenna rotator (see “Synchronizing and Testing” on
Page 3).
INSTALLATION
Use 20-gauge three-wire rotator cable, available at your local Ra-
dioShack store, to connect the drive motor to the control. The instruc-
tions in the following two sections include specific references to this
RadioShack rotator cable. It has a silver-colored ground (or neutral)
wire, while the cable’s other two wires are copper. If you use another
brand of cable to connect your antenna rotator, one of the three wires
in the cable should be different in some way — this is the ground (or
neutral) wire. Be sure to connect this wire as described for the silver-
colored wire in the RadioShack cable.
Wirin
g
the Drive Motor
Follow these steps to wire the drive motor.
1. Use a screwdriver to remove the screw from the drive motor’s
cover and open the cover.
2. Separate the cable’s three wires about 1
1
/2 inches down the cable
and strip off about
1
/2 inch of insulation from each wire.
3. Remove the cable grommet, then insert the rotator cable’s three
wires through the grommet’s slot.
4. Loosen the three terminal screws, then connect the silver-colored
wire to Terminal 1, the center wire (copper) to Terminal 2, and the
third wire (copper) to Terminal 3.
5. Recheck the wiring order, then tighten all three terminal screws.
6. Slide the grommet back up the wire, then place the grommet back
into its slot in the housing.
7. Close the cover, then secure it with the screw.
Wirin
g
the Control
Follow these steps to wire the control.
1. On the other end of the rotator cable, separate the cable’s three
wires about 1
1
/2 inches down the cable and strip off about
1
/2 inch
of insulation from each wire.
Grommet
Slot
3-Wire
Rotator Cable
Terminal 1
Terminal 2
Terminal 3
Strain Relief Slot
3-Wire
Rotator Cable
Terminal 1
Terminal 2
Terminal 3

3
2. Insert the tip of a pen or pencil into the clear cover’s notch, lift up
the cover’s edge, then remove the cover.
3. Run the cable through the strain relief slot on the bottom of the
control.
4. Loosen the three terminal screws, then connect the silver-colored
wire to Terminal 1, the center wire (copper) to Terminal 2, and the
third wire (copper) to Terminal 3.
5. Recheck the wiring order, then tighten all three terminal screws.
6. Replace the clear cover.
Caution:
Be sure there are no loose strands of wire that could short
between the terminals.
Synchronizing and Testing
Follow these steps to synchronize and test the antenna rotator.
1. After you wire the drive motor and the control, plug the control’s
power cord into a standard AC outlet (120 volts, 60 Hz).
2. Turn the control's dial fully clockwise. You can hear the control’s
motor running as the red dot on the control’s dial slowly moves
clockwise and the top of the drive motor turns. When the rotator
reaches the end of rotation, the top of the drive motor stops turn-
ing, the control’s motor turns off, and the dot stops moving.
Note:
Depending on the original setting of the drive motor, it might
stop turning before the control motor turns off. If this happens,
wait for the control’s red dot to stop moving before you proceed to
Step 3.
3. Turn the control’s dial fully counterclockwise. When the control’s
motor turns off and the dot stops moving, the control and the drive
motor are synchronized. Setting the control’s dial to
N
(north)
should align the two arrows on the side of the drive motor — one
on the side of the base and one on the side of the rotating top.
Note:
If the arrows do not align, try Steps 2 and 3 again. If the
drive motor’s arrows still do not align when you set the control’s
dial to
N
, take the antenna rotator to your local RadioShack store
for assistance.
4. Disconnect the rotator cable from the control so that you can
mount the drive motor.
Preparing the Antenna Mast
To install the antenna rotator, you need two separate masts — a sup-
port mast for the drive motor and an antenna mast for the antenna it-
self. The support mast can be whatever length is appropriate (see
“Mounting the Drive Motor”). However, before you mount the antenna,
cut the antenna mast using the following guidelines. If the antenna is:
• up to 5 feet long, the mast length should not exceed 5 feet
• between 5 and 8 feet long, the mast length should not exceed 3
feet
• over 8 feet long, the mast length should not exceed 2 feet
• over 8 feet long with braces, cut the antenna mast 12 inches
below the point where you attach the braces to the mast
If you mount two antennas to the mast, the mast length should not ex-
ceed 4 feet. Mount the small antenna on top of the mast and the larger
antenna 12 inches from the bottom of the mast.
Mounting the Drive Motor
You can mount the drive motor on a support mast 1
1
/8 to 1
3
/4 inches in
diameter. If the mast is over 5 feet long, we recommend that you use
guy wires to secure the mast.
Warning:
Select a mounting location where the antenna cannot come
in contact with power lines while you install it, and where the installa-
tion cannot fall across power lines if a guy wire should fail.
Use the supplied hardware to mount the drive motor on a support
mast.
1. Thread a plain nut over the unslot-
ted end of one of the studs until it is
about 1 inch from the unslotted
end. Screw the stud’s unslotted
end as far as it will go into one of
the drive motor housing’s holes.
Firmly tighten the nut against the
housing to secure the stud.
Repeat this step with each of the
other three studs.
2. One of the supplied clamps is
longer than the other three. Slide
this longer clamp over the lower
pair of studs and one of the other
clamps over the upper pair of studs. Then, with the toothed side
facing the housing, thread a lock nut onto each stud. Leave the
clamps loose so you can easily slide the mast behind the clamps.
3. Slide the drive motor onto the support mast until the drive motor’s
protrusion rests on top of the mast.
4. Use a
7
/16-inch wrench to tighten the lock nuts.
Caution:
Overtightening can deform and weaken the mast.
5. If you use guy wires to secure the mast, guide the wires through
the lower clamp’s two outer holes.
Mounting the Antenna
Follow these steps to mount the antenna.
1. Insert the two U-bolts into the
holes in the top portion of the
drive motor, as shown. Slide a
clamp over the ends of each U-
bolt.
2. With the toothed side facing the
housing, thread a lock nut onto
each U-bolt end. Leave the
clamps loose so you can easily
insert the mast.
3. Slide the antenna mast behind
the clamps, then rotate the mast
until the antenna points north.
Tighten the lock nuts.
Caution:
Overtightening can deform and weaken the mast.
Note:
When most stations are south of your antenna, point the
antenna south. If you do this, remember that the antenna points in
the opposite direction from that indicated on the control. Use
Guy Wire
Plain
Nut
Stud
Clamp
Lock
Nut
Protrusion
Support
Mast
U-Bolt
Clamp
Lock
Nut
Antenna
Mast

15-1245
06A00
Printed in China
RadioShack Corporation
Fort Worth, Texas 76102
direction markers (not supplied) to clearly identify the antenna’s
direction (see “Channel and Direction Markers” on Page 4).
4. Attach the antenna cable to the antenna as described in your
antenna’s owner’s manual.
Routing the Cables
• If you have 75-ohm coaxial antenna cable, tape the cable directly
to the support mast.
• If you have 300 ohm twin-lead
antenna cable, attach it to the
antenna and support mast using
stand-off insulators (not included)
about every 4 feet. Twist the
cable about four times between
each insulator.
For either type of antenna cable,
make a generous loop near the drive
motor to allow full rotation of the an-
tenna.
Tape the rotator cable directly to the
support mast.
Route the antenna cable to your TV and connect it according to the in-
structions in your antenna’s owner’s manual. Route the rotator cable
from the drive motor to the control, then connect it (see “Wiring the
Control” on Page 2).
OPERATION
To rotate the antenna, turn the control’s dial to the desired direction.
While the antenna rotates, the control’s red dot moves, indicating the
direction of antenna rotation.
When the antenna reaches the selected direction, it stops.
Caution:
Do not force the control’s dial past
N
in either direction. Do-
ing so might damage the control.
You can look at the control’s dial at any time to confirm the antenna’s
current direction.
Channel and Direction Markers
Rotate the antenna to find out which position provides the best signal
for each station. Use the supplied channel markers to mark these
channels on the control. Then when you want to watch a particular
channel, set the antenna rotator control to the marked setting.
Sometimes heavy winds can move the antenna, thus affecting the re-
ception of the marked channels. If this happens, loosen the clamps’
lock nuts, reposition the antenna so it points in the proper direction,
then tighten the lock nuts to secure the antenna.
Use direction markers (not supplied) to relabel the control’s direction
indicators if you pointed your antenna south instead of north. For ex-
ample, place a “North” marker over the control’s
S
(south) direction in-
dicator.
Loop in
Antenna
Cable
Stand-Off
Insulators
Drive
Motor
Rotator
Cable
Taped to
Mast
Limited Ninety-Day Warranty
This product is warranted by RadioShack against manufacturing defects in material and workman-
ship under normal use for ninety (90) days from the date of purchase from RadioShack company-
owned stores and authorized RadioShack franchisees and dealers. EXCEPT AS PROVIDED
HEREIN, RadioShack MAKES NO EXPRESS WARRANTIES AND ANY IMPLIED WARRANTIES,
INCLUDING THOSE OF MERCHANTABILITY AND FITNESS FOR A PARTICULAR PURPOSE,
ARE LIMITED IN DURATION TO THE DURATION OF THE WRITTEN LIMITED WARRANTIES
CONTAINED HEREIN. EXCEPT AS PROVIDED HEREIN, RadioShack SHALL HAVE NO LIABIL-
ITY OR RESPONSIBILITY TO CUSTOMER OR ANY OTHER PERSON OR ENTITY WITH RE-
SPECT TO ANY LIABILITY, LOSS OR DAMAGE CAUSED DIRECTLY OR INDIRECTLY BY USE
OR PERFORMANCE OF THE PRODUCT OR ARISING OUT OF ANY BREACH OF THIS WAR-
RANTY, INCLUDING, BUT NOT LIMITED TO, ANY DAMAGES RESULTING FROM INCONVE-
NIENCE, LOSS OF TIME, DATA, PROPERTY, REVENUE, OR PROFIT OR ANY INDIRECT,
SPECIAL, INCIDENTAL, OR CONSEQUENTIAL DAMAGES, EVEN IF RadioShack HAS BEEN AD-
VISED OF THE POSSIBILITY OF SUCH DAMAGES.
Some states do not allow limitations on how long an implied warranty lasts or the exclusion or limita-
tion of incidental or consequential damages, so the above limitations or exclusions may not apply to
you.
In the event of a product defect during the warranty period, take the product and the RadioShack
sales receipt as proof of purchase date to any RadioShack store. RadioShack will, at its option, un-
less otherwise provided by law: (a) correct the defect by product repair without charge for parts and
labor; (b) replace the product with one of the same or similar design; or (c) refund the purchase
price. All replaced parts and products, and products on which a refund is made, become the prop-
erty of RadioShack. New or reconditioned parts and products may be used in the performance of
warranty service. Repaired or replaced parts and products are warranted for the remainder of the
original warranty period. You will be charged for repair or replacement of the product made after the
expiration of the warranty period.
This warranty does not cover: (a) damage or failure caused by or attributable to acts of God, abuse,
accident, misuse, improper or abnormal usage, failure to follow instructions, improper installation or
maintenance, alteration, lightning or other incidence of excess voltage or current; (b) any repairs
other than those provided by a RadioShack Authorized Service Facility; (c) consumables such as
fuses or batteries; (d) cosmetic damage; (e) transportation, shipping or insurance costs; or (f) costs
of product removal, installation, set-up service adjustment or reinstallation.
This warranty gives you specific legal rights, and you may also have other rights which vary from
state to state.
RadioShack Customer Relations, 200 Taylor Street, 6th Floor, Fort Worth, TX 76102
We Service What We Sell
12/99
/