Page is loading ...

ETN-M100-Zone-Rev1-letter.doc
Rev. 1
15/03/07 1
Meitav-tec Ltd (Contel group)
Tel: +972-3-9626462 Fax: +972-3-9626620
www.meitavtec.com - support@meitavtec.com
ETN-M100
Owner’s Manual – Installation and Operating Instructions
Please read this manual carefully before installation and use.
1. Installation Instructions
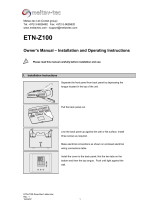
Separate the front panel from back panel by depressing the
tongue located in the top of the unit.
Pull the back panel out.
Line the back panel up against the wall or flat surface. Install
three screws as required.
Make electrical connections as shown on enclosed electrical
wiring connections table.
Install the cover to the back panel; first the two tabs on the
bottom and then the top tongue. Push until tight against the
wall.

2
2. Operating Manual
2.1 On/Off
• Press the On/Off button to turn the thermostat ON or OFF – “ON” or “OFF” will appear on
display.
On/Off
ON
OC
On/Off
OC
OFF
2.2 Temperature set-points
• Press the “+” or “-“ buttons – “Cool” and the set-point temperature for cooling will flash.
• Using the “+” and “-“ buttons adjust the set-point temperature for cooling.
• Wait until “Heat” and the set-point temperature for heating will flash.
• Using the “+” and “-“ buttons adjust the set-point temperature for heating.
• The display will automatically return to normal mode after a few seconds.
2.3 Fan ON / Auto Fan
• Press the Fan/Setting button to switch between FAN ON and AUTO FAN.
In AUTO FAN, the damper of the zone will close when there is no demand for cooling or
heating in the zone.
In FAN ON mode, the damper of the zone will remain open even when there is no
demand for cooling or heating in the zone and while there is no demand for cooling or
heating by any other zone.
Fan
OC
ON
Auto Fan
Fan
Auto Fan Fan on
OC
ON
Setting Setting

3
2.4 Modes
• Press the Mode button to switch between modes:
Heating – “Heat” will appear on display.
Cooling – “Cool” will appear on display.
Fan only – “Fan” will appear on display.
Auto change over – both “Cool” and “Heat” will appear on display.
Mode
OC
ON
Auto Fan
Mode
Heating Cooling
OC
ON
Heat
Cool
Mode
Fan
Fan only
Mode
Auto change
over
Heat
Cool
2.5 Economy mode
• Press and hold the On/Off button (10 sec.) to turn the economy mode ON – “EC” will
appear on display.
In economy mode the thermostat will work according to preset set-point temperatures (see
technician settings)
• Press and hold the On/Off button again (10 sec.) to turn the economy mode OFF – the
display will return to normal.
On/Off
OC
ON
Auto Fan
On/Off
Economy ON Economy OFF
OC
ON
Press
and
Hold
Press
and
Hold
3. Technician Settings
3.1 Set point temperatures for economy mode, fresh air damper configuration and temperature
scale.
• Press and hold the Fan/Setting button (10 seconds) until “Cool” and the set-point temperature
for cooling in economy mode will appear on display.
• Using the “+” and “-‘” buttons, adjust the set-point temperature for cooling in economy mode.
(Range: 21ºC÷30ºC, 70ºF÷86ºF).

4
• Press the Fan/Setting button again – “Heat” and the set-point temperature for heating in
economy mode will appear on display.
• Using the “+” and “-‘” buttons, adjust the set-point temperature for heating in economy mode.
(Range: 10ºC÷20ºC, 50ºF÷68ºF).
• Press the Fan/Setting button again – “F1” or “F2” will appear on display.
• Using the “+” and “-‘” buttons select between:
F1 – Open fresh air damper by time
If selected:
Press the Fan/Setting button again – “00” will appear on display.
Using the “+” and “-“ buttons adjust the numbers of minutes for the fresh air
damper to be open (within a hour). Example: “00” – the fresh air damper
will be close all time, “60” – the fresh air damper will be open all the time.
F2 – Open fresh air damper by temperature (T1 and T2 sensors must be connected to
the main board).
If selected:
The fresh air damper will open according to the temperatures measured
In Cooling:
When T1-T2>5.5ºC (10ºF) the fresh air damper opens.
When T1-T2<1.5ºC (3ºF) the fresh air damper closes.
In Heating:
When T2-T1>5.5ºC (10ºF) the fresh air damper opens.
When T2-T1<1.5ºC (3ºF) the fresh air damper closes.
• Press the Fan/Setting button again – “F” or “C” will appear on display.
• Using the “+” and “-“ buttons select temperature scale – Fahrenheit or Celsius.
• Press the Fan/Setting button again to return to normal display.
/


