Page is loading ...

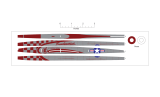
XS480 (axis)
By Stevens AeroModel
Length 41 inches | Span 47 inches | Area: 485 inches
2
| Flying Weight 24 oz.
Version 09/29/2009
© 2009 Stevens AeroModel all rights reserved. Page 1 of 30

Product Support
© 2009 Stevens AeroModel all rights reserved. Page 2 of 30
WARRANTY
Stevens AeroModel guarantees this kit to be free from defects in both material and workmanship at the
date of purchase. This warranty does not cover any component parts damaged by use or modification.
In no case shall Stevens AeroModel’s liability exceed the original cost of the purchased kit. Further,
Stevens AeroModel reserves the right to change or modify this warranty without notice.
LIABILITY RELEASE
In that Stevens AeroModel has no control over the final assembly or material used for final assembly,
no liability shall be assumed nor accepted for any damage resulting from the use by the user of the final
user-assembled product. By the act of using the user-assembled product, the user accepts all resulting
liability.
If the buyer is not prepared to accept the liability associated with the use of this product, the buyer is
advised to return this kit immediately in new and unused condition to the place of purchase.
THIS PRODUCT IS NOT INTENDED FOR CHILDREN 12 YEARS OF AGE OR YOUNGER
WARNING: This product may contain chemicals known to the State of California to cause cancer and
or birth defects or other reproductive harm.
PRODUCT SUPPORT
This product has been engineered to function properly and perform as advertised with the suggested
power system and supporting electronics as outlined within this product manual. Product support
cannot be provided nor can Stevens AeroModel assist in determining the suitability or use of
electronics, hardware, or power systems not explicitly recommended by Stevens AeroModel.
For product assembly support, replacement parts, hardware, and electronics to complete this model
please contact Stevens AeroModel on-line at www.stevensaero.com.
Stevens AeroModel
PO Box 15347 - Colorado Springs, CO 80935 - USA
719-387-4187 - www.stevensaero.com

Project Checklist
Kit Contents
☐
Laser cut wood (19 Sheets - See inventory on following pages)
☐
Illustrated instruction manual
☐
Rolled computer drawn plan set
☐
Vinyl windscreen decal
☐
1 - Pre-bent landing gear (1/8 in. dia.)
☐
2 - 1/4 in. square x 24 in. length balsa stock (Leading Edge)
☐
4 - 1/8 in. x 1/4 in. x 24 in. length balsa stock (Spar Cap)
☐
12 - 1/8 in. x 3/16 in. x 24 in. length balsa stock (Sub Spar and Turbulators)
☐
Du-Bro RC 30 in. Micro2 Pushrod System [DUB922]
Taped to back of wood brick:
☐
2 - 0.045 in. x 12 in. music wire
☐
4 - 24 in. lengths of carbon fiber bar stock.
☐
Large Hardware Bag (4 x 6 in.)
1 - Package rubber bands #33
1 - Laser cut basswood elevator joiner
2 - 2-1/4 in. Foam Wheels (pair)
2 - Du-Bro RC EZ Connector [1 pkg. DUB845]
2 - Du-Bro RC Micro2 EZ-Link [1/2 pkg. DUB920]
4 - Du-Bro RC Micro2 Control Horns [2 pkg. DUB919]
3 - 3/16 in. x 4-1/2 in. hardwood dowel (user will cut to final length)
☐
Small Hardware Bag (2 x 3 in.)
1 - 1 in. length of fuel tubing (EZ link retainer)
2 - Wheel retention washers (press on wheel collar)
2 - 3/16 in. Neo. Magnet
2 - 4-40 x 3/8 in. nylon machine screw
4 - 4-40 x 3/8 in. Machine Screw (steel for motor mount)
6 - 4-40 blind nuts
Required Electronics (Available at StevensAero.com)
☐
4-6 Channel radio and micro receiver. We suggest the Spektrum DX6i and AR500 receiver.
☐
4 - Hitec HS-65HB servos + two each 9 in. servo extensions.
☐
Hacker A30-28S Brushless Motor w/10x5 APC E propeller.
☐
Castle Creations 25A brushless ESC
☐
1 pkg. 3.5mm gold bullet connectors [EFLA241]
☐
11.1V 1600-2100mAh LiPo capable of 30A continuous
© 2009 Stevens AeroModel all rights reserved. Page 3 of 30
Required Building Supplies and Tools
☐
1 oz. Medium CA Glue
☐
1/2 oz. Thick CA Glue
☐
1/2 oz. Thin CA Glue
☐
CA glue accelerator (kicker)
☐
Balsa filler
☐
Hobby Knife with ample supply of #11 blades
☐
Sanding block with 400 and 600 grit paper
☐
Heat Gun and Covering Iron
☐
Small Needle Nose Pliers
☐
1 in. x 12 in. length sticky back velcro
☐
3/4 in. wide clear tape
Optional Building Supplies and Tools
☐
CA glue de-bonder
☐
Long sanding bar
☐
Masking Tape (Low tack painters tape)
☐
Soldering Iron

General Assembly Instructions
Thank you, for purchasing this Stevens AeroModel XS480 [axis]™. A design inspired by our SHAFT™
line of model aircraft. This product has been developed and manufactured using state of the art CAD/
CAM systems and features a unique interlocking construction process that, when compared to traditional
methods found in other model aircraft kits, save countless hours of measuring, cutting, sanding, and
fitting. We are certain that you’ll find our kit to offer a truly exceptional build experience. As this kit is
recommended for the novice model builder and pilot; we invite beginners who have purchased this kit to
seek the help of a seasoned builder and pilot. At any time should one run across a term or technique that
is foreign please don’t hesitate to contact our staff with your questions.
Read This!
Please READ and RE-READ these instructions along with any other included documentation prior to
starting your build and/or contacting our staff for builder support.
Pre-sanding
Do not skip this step. Prior to removing any parts from the laser cut sheet wood use a sanding block
loaded with 250-400 grit paper and lightly sand the back side of each sheet of wood. This step removes
any residue produced as a result of the laser cutting process and, as we have found that most stock wood
sizes run several thousandths of an inch over sized, slightly reduces the thickness of each sheet.
Leave your pre-sanded parts in the sheet until required in the assembly process.
Protecting your worktable
Use the poly tube that this kit was shipped in as a non-stick barrier between your worktable and the
product assembly. Promptly clean up any epoxy spills with rubbing alcohol and a disposable towel.
Bonding the assembly
As this product tabs, notches, and otherwise interlocks like a 3D puzzle we suggest that when fitting parts
you dry fit (use no glue) the parts together first. It’s advised to work 1-2 steps ahead in the instructions
using this dry-fit technique which allows ample opportunity to inspect the fit and location of assembled
components and realizes a benefit as each successive part contributes to pulling the entire assembly
square. Once you arrive at the end of a major assembly step(s) square your work on top of a flat building
table and revisit the dry fit joints with glue. Using the dry-fit process you’ll be able to recover from a minor
build mistake and will ultimately end up with a more square and true assembly.
Unless otherwise noted in the instructions, always use medium CA glue for bonding parts.
Never force the fit!
Remember this is a precision cut kit our machines cut to within 1 thousandth of an inch in accuracy. Yet
the wood stock supplied by the mill may vary in thickness by up to 20 thousandths. This variance in the
wood stock can cause some tabs/notches to fit very tight. Hey, dad always said it was easier to take
away material than add it back. With this in mind, should you find a joint or two to fit rather snug consider
lightly sanding a tight fitting tab rather than crushing and forcing your parts together. You’ll break fewer
parts in assembly and will end up with a more square and true assembly.
Manual Updates
A full-color manual is available for download on the corresponding product page for this model aircraft at
www.stevensaero.com
© 2009 Stevens AeroModel all rights reserved. Page 8 of 30

Begin Fuselage Construction
☐
Dry fit formers F2, F00, and F3 to center
crutch F0. Parts are etched “top” install
so that etching faces forward and top.
☐
Install G1 to notches provided in F0 center
crutch and former F2.
☐
Drive four of the provided 4-40 blind nuts to
into one side of the F1 firewall. Retain with
thick CA glue around edge of nut.
☐
Key F1 firewall to the front of F0 center
crutch, with flange portion of blind nut facing
aft.
☐
Assemble each of the two fuselage sides from
FSa and FSb. Align parts with straight edge
along fuselage bottom and glue.
☐
With straight edge providing an alignment
aide, install trussed components within
fuselage side, matching A to A and B to B.
© 2009 Stevens AeroModel all rights reserved. Page 9 of 30

Fuselage Continued
☐
Key completed fuselage sides to completed
center crutch assembly. Tack glue sides at
tab and notch locations to retain parts.
☐
Using thick CA glue, install the cross-grain
doubler F10a forward of former F2. (F10a fits
flush against F2 and F0 center crutch)
☐
Assemble the top (F7) and bottom (F8)
fuselage formers from sub-assemblies F7a/
F7b and F8a/F8b respectively.
☐
Fillet interior joints along fuselage sides and
former F1/F0 with medium CA glue then
install/glue top former F7 to assembly.
☐
Again, fillet interior joints along fuselage sides
and former F1/F0 medium CA glue then
install/glue bottom former F8 to assembly.
☐
Glue G2 into position spanning fuselage sides
as indicated below.
© 2009 Stevens AeroModel all rights reserved. Page 10 of 30

Fuselage Continued
☐
Use thick CA glue to bond F15 to interior
surface of right and left fuselage sides
forward of F1 firewall. Radius of F15 locates
3/32 in. short of radius on fuselage sides.
☐
Install F16 between fuselage sides forward of
F1 and along lower edge of F15.
☐
Build / bond together former F11 from sub-
assemblies F11a/F11b.
☐
Install blind nuts to completed F11 former and
retain with medium CA glue.
☐
Study photo below then install F11 and F6
together between fuselage sides at tail. Note
that the flange of installed blind nuts must
face inside fuselage assembly. Tack glue.
☐
Invert fuselage and install F12 to underside of
F11.
© 2009 Stevens AeroModel all rights reserved. Page 11 of 30

Fuselage Continued
☐
Install F13 to span fuselage sides and former
F3. Retain by tack gluing at tab and notches.
☐
Bond the of plywood hardpoint F17 with
“FRONT” flush against aft side of former F3
and spanning fuselage sides.
☐
Bond cross-grain doublers F10b within
fuselage assembly as illustrated.
☐
Install formers F4 and F5 within fuselage
assembly. Square fuselage to worktable and
tack glue at tab and notch locations.
☐
Install optional servo pocket ply doublers F3
to right and left side of fuselage forward of F6.
☐
Complete fuselage assembly by installing
former F9 spanning fuselage sides and F3.
Now, square fuselage to worktable and
bond all joints with thin CA glue.
© 2009 Stevens AeroModel all rights reserved. Page 12 of 30

Fuselage Hatch Assembly
☐
Assemble H1 from parts H1a/H1b/H1c and
bond using thin CA glue along dove-tail joints.
☐
Dry fit H1d doublers to right and left side of
H1 hatch assembly. The tabs in H1d should
extend proud of underside of H1d by 1/16 in.
☐
Using thick CA glue, bond H1 on top of H2
using tabs from H1d to locate H1 atop H2.
☐
Glue one 3/16 in. diameter magnet within
locating hole in H1.
☐
Dry fit H3 to notches in former F3.
☐
Fit H4 to former F3 on top of H3 square to
former then bond using thin CA glue.
© 2009 Stevens AeroModel all rights reserved. Page 13 of 30

Hatch Assembly Continued
☐
Install second magnet within H3/H4.
Important! Magnets are polarized thus,
prior to securing magnet with glue check
to see that it is attracted to magnet in
hatch. If not, reverse magnet poles and
check again. Once satisfied that your
magnets will, indeed, attract (acting as the
retention method for the hatch) bond with
thin CA glue.
Pushrod Housing Installation
☐
Locate the push-rod sleeves included in your
DUB922 pushrod system and pass through
holes in formers F3 and F4.
☐
Route pushrod sleeves through former F5
then cross then pass through F6 as
illustrated.
☐
Pushrod sleeves should exit on both right and
left side of fuselage. Retain sleeves using
medium CA at exit points and former pass-
through locations.
☐
Trim pushrod sleeves so that only 1/4 in. of
sleeve remains forward of former F3.
☐
Trim pushrod sleeves flush with fuselage
sides using a sharp razor.
© 2009 Stevens AeroModel all rights reserved. Page 14 of 30

Assemble Tail Skid
☐
Gather parts F14a, F14b, and F14c. Cut a 4
in. length of .045 in. wire from 12 in. stock and
make 90 degree bend in one end (use the
plan sheet to match length of bend).
☐
Using thick CA glue, laminate F14b on top of
F14a. Nest “bent end” of wire in channel of
F14b and retain with medium CA glue.
☐
Using thick CA glue, laminate F14c on top of
F14b.
☐
Once glue has cured, straighten wire where it
exits plywood then bend down at 45 degree
angle (use plan set to gauge bend and angle)
complete tail skid by making an upward “U”
shape bend at end of skid.
☐
Paint or cover tail skid to match covering job.
© 2009 Stevens AeroModel all rights reserved. Page 15 of 30

Sand Completed Fuselage
☐
Completed fuselage assembly is now ready
for sanding. Use small amounts of balsa
colored wood filler to fill any imperfections
and gaps.
☐
With battery hatch installed, lightly sand entire
fuselage assembly with 400 grit sanding block
in preparation for covering.
Assemble Tail Feathers
☐
Assemble vertical stabilizer, rudder, horizontal
stabilizer, and elevator halves. Using the plan
set as a guide assemble each component
beginning with the outer framework and
finishing with the internal truss. Bond with
thin CA glue.
Vertical Stabilizer and Rudder
Horizontal Stabilizer
Elevator (Make Two)
© 2009 Stevens AeroModel all rights reserved. Page 16 of 30

Tail Feathers Continued
☐
Join elevator halves with basswood joiner.
Use a straight edge to align assembly.
☐
Using the “Carbon Bar Stock Cutting Guide”,
located on the plan sheet, cut each of the four
lengths of stock to proper lengths. Use
medium CA glue to bond carbon stock, in
lengths specified by plan set, to rudder,
elevator, and horizontal stabilizer assemblies.
Aileron Assembly
☐
Assemble a right and left aileron using the
plan set as a guide. Assemble each
component beginning with the outer
framework and finishing with the internal
truss. Bond using thin CA glue.
☐
Complete aileron assembly by cutting to
length and bonding carbon fiber bar stock in
locations indicated on the plan set. Use
medium CA glue to bond carbon stock to
aileron assembly.
© 2009 Stevens AeroModel all rights reserved. Page 17 of 30

Begin Wing Construction
☐
Bond S1a and S1b together to create bottom
spar jig S1. Bond S2a and S2b together to
create top spar jig S2. Use straight edge to
align parts when bonding.
☐
Bond, with thin CA, T1a and T1b together to
create T1 trailing edge. Use straight edge to
align parts when bonding.
☐
Make spars from provided balsa stock.
Use a scarf joint to join together two lengths
of 1/8 in. x 1/4 in. x 24 in. balsa sticks to
create one upper spar. Scarf together two
more 1/8 in. x 1/4 in. x 24 in. balsa sticks to
create one lower spar.
Tip: Use straight edge to align lengths of
wood to be joined to insure accurate
alignment.
See the detail on the plan sheet “How to
make a scarf joint” for tips on creating a
proper scarf joint.
☐
Key one each right and left rib R5 to trailing
edge in position indicated by plan set. Install
so that rib riser tabs face down.
☐
Next, key R5 to end notch in S1 spar jig over
top of lower spar (Joined from 1/8 x 1/4 x 24
in. balsa) Tack glue to retain.
☐
Repeat process described in previous two
assembly steps for right and left ribs R4 and
R3.
© 2009 Stevens AeroModel all rights reserved. Page 18 of 30

Wing Construction Continued
☐
Cut to length (13 in.) and install the lower
carbon fiber spar doubler, then install central
ribs R1 and R2. Refer back to the plan sheet
“Carbon Bar Stock Cutting Guide” to cut
length of carbon for lower spar.
Carbon fits into recess cut into S1 lower spar
jig and spans between R2 ribs across center
of wing section.
Carbon is captured by S1 jig and R1/R2 ribs.
☐
Flatten wing against work surface, inspect all
parts to ensure proper fit, then tack glue
assembly together where ribs meet trailing
edge and lower spar assembly.
Use only enough glue to keep parts from
shifting.
☐
Bond parts W2 to trailing edge of wing and
left and right ribs R1.
☐
Fit S2 upper spar jig to wing assembly.
© 2009 Stevens AeroModel all rights reserved. Page 19 of 30

Wing Construction Continued
☐
Cut carbon flat stock to length (16 in.) and fit
to recess in S2 spar jig, spanning right and
left ribs R2. Tack glue carbon to S2 jig.
☐
Install previously assembled 1/8 in. x 1/4 in.
top spar spanning left and right ribs R5.
Flatten wing on work surface then tack glue
top spar where it intersects wing ribs.
☐
Bond SW1 shear web between R1 ribs, top
and bottom spar, forward of spar jigs.
☐
Align R1a with notches in R1 then use thick
CA glue to laminate R1a to inside surface of
ribs R1.
☐
Install left and right sub ribs SR to notches in
spar jigs. Tack glue with thin CA to retain.
☐
Create W1 turbulator by joining W1a and W1b
along scarf joint. Use straight edge to align
parts while bonding.
© 2009 Stevens AeroModel all rights reserved. Page 20 of 30

Wing Construction Continued
☐
Fit W1 to forward most notch in ribs spanning
left and right ribs R5. Tip: Invert wing and
use a gentle rocking motion against a hard
flat surface to seat W1.
W1 fits flush with ribs R1 and R5 but sits 3/32
proud of the top surface of ribs R2-R4 and all
sub ribs SR.
☐
Bond RIGHT SIDE wing tip W4 to wing
assembly at R5 and trailing edge.
☐
Install ply “staple” W5 to strengthen joint of
RIGHT wing tip to trailing edge.
☐
Create and install sub spar. Use a scarf
joint to join together two 1/8 in. x 3/16 in. x 24
in. balsa sticks. Cut joined sticks to 43 in.
length and install spanning wing assembly.
Note that sub spar will seat against notch in
wing wing tip as indicated below.
☐
Bond sub spar at wing tip. DO NOT BOND at
interior ribs.
☐
Bond LEFT SIDE wing tip W4 to left rib R5m,
sub spar, and trailing edge in similar manner
to right side.
☐
Install ply “staple” W5 to strengthen joint of
LEFT wing tip to trailing edge in same
manner as right side.
☐
Inspect interior ribs over plan sheet to verify
that they are not being pushed out of
alignment by sub spar. Correct if necessary,
then bond ribs at sub spar with thin CA glue.
© 2009 Stevens AeroModel all rights reserved. Page 21 of 30

Wing Construction Continued
☐
Bond W6 to underside of wing assembly
spanning notches in ribs R1.
☐
Bond right and left servo pocket ply doublers
SR1a to notch in spar jig S1 and rib R3.
☐
Using thick CA, laminate SR1b balsa doubler
to top of SR1a.
☐
Using thick CA glue, laminate W4 to recess in
T1 at wing trailing edge.
☐
Fit and tack glue all SW2 vertical grain shear
webbing in-between ribs and sub ribs
spanning R1 through R4. Webbing is
notched on one side where it partially extends
into lightening hole gap at each sub rib SR.
☐
Using thick CA glue, laminate together both
LE1 center section leading edge parts, then
install spanning ribs R1.
© 2009 Stevens AeroModel all rights reserved. Page 22 of 30

Wing Construction Continued
☐
Use plan sheet as a guide to locate and
install X rib trussing in leading edge of wing.
Trussing fits between top and bottom spar,
against spar web, and centered with leading
edge notch in rib/sub-rib. Tack glue to retain.
☐
Cut 1/4 in. square stock to fit leading edge
and bond to wing using medium CA glue.
☐
Dry fit 1/8 in. x 3/16 in. x 24 in. turbulator
stock staggered at wing center as illustrated.
☐
Fit remainder of turbulator stock for both top
and bottom of wing. Remember turbulators
sit 3/32 in proud of interior ribs and flush with
ribs R1 and R5. Flatten wing against your
building surface then glue turbulator stock at
each contact point with ribs.
☐
With wing held flat against your work surface
proceed to thoroughly glue all mating
surfaces paying particular attention to spar,
webbing, and rib intersections.
☐
Use thick CA glue to fillet each X rib trussing
at spar and leading edge joints.
☐
With wing assembly complete use a sharp
razor blade to remove the riser tabs from the
underside of each rib.
☐
Framing is now complete relax with a good
cup of coffee and rub the dog’s ears.
© 2009 Stevens AeroModel all rights reserved. Page 23 of 30

☐
Use a razor plane or sanding bar to knock the
point off of the leading edge square stock.
Remove only enough material from the point
to bring it flush with the center section LE1.
☐
Use a long sanding bar loaded with 250 and
400 grit paper to round out leading edge to
match wing saddle of fuselage.
☐
Use sanding block to taper SR1b to match rib.
Carefully remove material. Tip: protect
surrounding spar and ribs from sanding block
action with masking tape.
Properly tapered servo pocket.
☐
Sand remainder of wing surface with 400 grit
paper on a large sanding block in preparation
for covering. Remove only enough material
to eliminate the light brown “laser burn” and
smooth out any raised grain.
© 2009 Stevens AeroModel all rights reserved. Page 24 of 30
/