Dell PowerEdge 1300 User guide

Type
User guide
Dell
®
PowerEdge
®
1300 Systems Installation and Troubleshooting Guide
Safety Instructions
Preface
Introduction
Checking the Basics
Messages and Codes
Finding Software Solutions
Running the Dell Diagnostics
Checking the Equipment
Checking Inside the Computer
Installing System Board Options
Installing Drives
Getting Help
Diagnostic Video Tests
Jumpers, Switches, and Connectors
Abbreviations and Acronyms
Information in this document is subject to change without notice.
© 1998 Dell Computer Corporation. All rights reserved.
Reproduction in any manner whatsoever without the written permission of Dell Computer Corporation is strictly forbidden.
Trademarks used in this text: Dell, the DELL logo, Dell Dimension, and PowerEdge are registered trademarks, Dell OpenManage is a trademark,
and DellWare is a registered service mark of Dell Computer Corporation; Microsoft, MS-DOS, and Windows NT are registered trademarks of
Microsoft Corporation; Intel and Pentium are registered trademarks of Intel Corporation; OS/2 is a registered trademark of International Business
Machines Corporation; VESA is a registered trademark of Video Electronics Standards Association.
Other trademarks and trade names may be used in this document to refer to either the entities claiming the marks and names or their products. Dell
Computer Corporation disclaims any proprietary interest in trademarks and trade names other than its own.
Model MMP
Initial release: 30 Nov 1998
Back to Contents Page
Safety Instructions: Dell
®
PowerEdge
®
1300 Systems Installation and
Troubleshooting Guide
Overview | When Using Your Computer System | Ergonomic Computing Habits | When Working Inside Your
Computer | Protecting Against Electrostatic Discharge
Overview
Use the following safety guidelines to help protect your computer system from potential damage and to ensure your own
personal safety.
Observe the following warnings while servicing this system:
WARNING: The power supplies in this computer system produce high voltages and energy hazards, which
can cause bodily harm. Only trained service technicians are authorized to remove the computer covers and
access any of the components inside the computer.
WARNING: This system may have more than one power supply cable. To reduce the risk of electrical
shock, a trained service technician must disconnect all power supply cables before servicing the system.
When Using Your Computer System
As you use your computer system, observe the following safety guidelines:
Be sure your computer, monitor, and attached peripherals are electrically rated to operate with the AC power
available in your location.
To help avoid possible damage to the system board, wait 5 seconds after turning off the system before removing a
component from the system board or disconnecting a peripheral device from the computer.
To help prevent electric shock, plug the computer and peripheral power cables into properly grounded electrical
outlets. These cables are equipped with three-prong plugs to help ensure proper grounding. Do not use adapter
plugs or remove the grounding prong from a cable. If you must use an extension cable, use a three-wire cable
with properly grounded plugs.
To help protect your computer system from sudden, transient increases and decreases in electrical power, use a
surge suppressor, line conditioner, or un-interruptible power supply (UPS).
Be sure nothing rests on your computer system's cables and that the cables are not located where they can be
stepped on or tripped over.
Do not spill food or liquids on your computer. If the computer gets wet, consult Checking Inside the Computer.
Do not push any objects into the openings of your computer. Doing so can cause fire or electric shock by shorting
out interior components.
Keep your computer away from radiators and heat sources. Also, do not block cooling vents.
Ergonomic Computing Habits
WARNING: Improper or prolonged keyboard use may result in injury.
For comfort and efficiency, observe the following ergonomic guidelines when setting up and using your computer
system:
Position your system so that the monitor and keyboard are directly in front of you as you work. Special shelves
are available (from Dell and other sources) to help you correctly position your keyboard.
Set the monitor at a comfortable viewing distance (usually 510 to 610 millimeters [20 to 24 inches] from your
eyes).
Make sure the monitor screen is at eye level or slightly lower when you are sitting in front of the monitor.
Adjust the tilt of the monitor, its contrast and brightness settings, and the lighting around you (such as overhead
lights, desk lamps, and the curtains or blinds on nearby windows) to minimize reflections and glare on the
monitor screen.
Use a chair that provides good lower back support.
Keep your forearms horizontal with your wrists in a neutral, comfortable position while using the keyboard or
mouse.
Always leave space to rest your hands while using the keyboard or mouse.
Let your upper arms hang naturally at your sides.
Sit erect, with your feet resting on the floor and your thighs level.
When sitting, make sure the weight of your legs is on your feet and not on the front of your chair seat. Adjust your
chair's height or use a footrest, if necessary, to maintain proper posture.
Vary your work activities. Try to organize your work so that you do not have to type for extended periods of time.
When you stop typing, try to do things that use both hands.
When Working Inside Your Computer
Before you remove the computer covers, perform the following steps in the sequence indicated.
CAUTION: Do not attempt to service the computer system yourself, except as explained in this guide and
elsewhere in Dell documentation. Always follow installation and service instructions closely.
CAUTION: To help avoid possible damage to the system board, wait 5 seconds after turning off the system
before removing a component from the system board or disconnecting a peripheral device from the
computer.
1. Touch an unpainted metal surface on the chassis, such as the metal around the card-slot openings at the back of
the computer, before touching anything inside your computer.
While you work, periodically touch an unpainted metal surface on the computer chassis to dissipate any static
electricity that might harm internal components.
2. Turn off your computer and any peripherals.
3. Disconnect your computer and peripherals from their power sources. Also, disconnect any telephone or
telecommunication lines from the computer.
Doing so reduces the potential for personal injury or shock.
In addition, take note of these safety guidelines when appropriate:
When you disconnect a cable, pull on its connector or on its strain-relief loop, not on the cable itself. Some cables
have a connector with locking tabs; if you are disconnecting this type of cable, press in on the locking tabs before
disconnecting the cable. As you pull connectors apart, keep them evenly aligned to avoid bending any connector
pins. Also, before you connect a cable, make sure both connectors are correctly oriented and aligned.
Handle components and cards with care. Don’t touch the components or contacts on a card. Hold a card by its
edges or by its metal mounting bracket. Hold a component such as a microprocessor chip by its edges, not by its
pins
WARNING
There is a danger of a new battery exploding if it is incorrectly installed. Replace the
battery only with the same or equivalent type recommended by the manufacturer.
Discard used batteries according to the manufacturer's instructions.
Protecting Against Electrostatic Discharge
Static electricity can harm delicate components inside your computer. To prevent static damage, discharge static
electricity from your body before you touch any of your computer's electronic components, such as the microprocessor.
You can do so by touching an unpainted metal surface on the computer chassis.
As you continue to work inside the computer, periodically touch an unpainted metal surface to remove any static charge
your body may have accumulated.
You can also take the following steps to prevent damage from electrostatic discharge (ESD):
When unpacking a static-sensitive component from its shipping carton, do not remove the component from the
antistatic packing material until you are ready to install the component in your computer. Just before unwrapping
the antistatic packaging, be sure to discharge static electricity from your body.
When transporting a sensitive component, first place it in an antistatic container or packaging.
Handle all sensitive components in a static-safe area. If possible, use antistatic floor pads and workbench pads.
The following caution may appear throughout this document to remind you of these precautions:
CAUTION: See Protecting Against Electrostatic Discharge.
Back to Contents Page
Preface: Dell
®
PowerEdge
®
1300 Systems Installation and Troubleshooting
Guide
About This Guide | Other Documentation You May Need | Notational Conventions | Typographical Conventions |
About This Guide
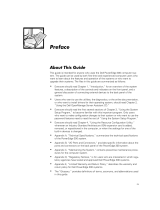
This guide is intended for anyone who wants to upgrade or troubleshoot a Dell PowerEdge 1300 computer system.
Before calling Dell for technical assistance, follow the recommended procedure(s) in this guide to solve most hardware
and software problems yourself. The files are summarized as follows:
Introduction provides a brief overview of the system's service features.
Everyone should read Checking the Basics for some initial checks and procedures that you can use to solve basic
computer problems. It also directs you to the appropriate file in this guide for more detailed troubleshooting
information and procedures to solve more complex problems.
Whenever you receive an error message or code, you should read Messages and Codes. This file discusses system
messages, system beep codes, warning messages, diagnostics messages, alert log messages, and small computer
system interface (SCSI) hard-disk drive indicator codes.
If you suspect that the problems are software-related, or you are still having problems after testing the computer's
hardware, read Finding Software Solutions.
For hardware-related problems, read Running the Dell Diagnostics. Checking the Equipment and Checking Inside
the Computer provide troubleshooting procedures for equipment connected to the input/output (I/O) panel of the
computer and components inside the computer, respectively. Checking Inside the Computer also provides
information on removing the computer covers.
Installing System Board Options and Installing Drives and are intended for anyone who wants to install or remove
internal components, such as dual in-line memory modules (DIMMs), expansion cards, and SCSI devices.
Getting Help describes the help tools Dell provides to assist you should you have a problem with the computer. It
also explains how and when to call Dell for technical assistance. Getting Help also includes a Diagnostics
Checklist that you can copy and fill out as you perform the troubleshooting procedures. If you need to call Dell
for technical assistance, use the completed checklist to tell the Dell technical support representative what
procedures you performed to better help the representative give you assistance. If you must return a piece of
hardware to Dell, include a completed checklist.
Diagnostic Video Tests discusses the tests for the Video Test Group in the Dell Diagnostics to help you test the
monitor.
Jumpers, Switches, and Connectors is intended for anyone who is troubleshooting the system or is adding internal
options and needs to change jumper or switch settings.
Reference Abbreviations and Acronyms for a table of the abbreviations and acronyms used throughout this guide
and in other Dell documentation.
Other Documentation You May Need
Besides this Installation and Troubleshooting Guide, the following documentation is included with your system:
The Dell PowerEdge 1300 Systems User's Guide, which describes system features and technical specifications,
video and SCSI device drivers, the System Setup program, software support utilities, and the Resource
Configuration Utility.
The HP OpenView Network Node Manager Special Edition x.x With Dell OpenManage
â„¢
HIP x.x User's Guide,
which describes the features, requirements, installation, and basic operation of the server management software.
Refer to the software's online help for information about the alert messages issued by the software.
You may also have one or more of the following documents.
NOTE: Documentation updates are sometimes included with the system to describe changes to the system or
software. Always read these updates before consulting any other documentation because the updates often
contain information that supersedes the information in the other documents.
Operating system documentation is included with the system if you ordered the operating system software from
Dell. This documentation describes how to install (if necessary), configure, and use the operating system
software.
Documentation is included with any options you purchase separately from the system. This documentation
includes information that you need to configure and install these options in your Dell computer.
Technical information files—sometimes called "readme" files—may be installed on the hard-disk drive to provide
last-minute updates about technical changes to the system or advanced technical reference material intended for
experienced users or technicians.
Notational Conventions
The following subsections describe notational conventions used in this document.
Warnings, Cautions, and Notes
Throughout this guide, there may be blocks of text printed in bold type or in italic type. These blocks are warnings,
cautions, and notes, and they are used as follows:
WARNING: A WARNING indicates the potential for bodily harm and tells you how to avoid the problem.
CAUTION: A CAUTION indicates either potential damage to hardware or loss of data and tells you how to
avoid the problem.
NOTE: A NOTE indicates important information that helps you make better use of your computer system.
Typographical Conventions
The following list defines (where appropriate) specific elements of text and illustrates the typographical conventions
used throughout this document as visual cues for those elements:
Interface components are window titles, button and icon names, menu names and selections, and other options
that appear on the monitor screen or display. They are presented in bold.
Example: Click OK.
Keycaps, the labeling that appears on the keys on a keyboard, are enclosed in angle brackets.
Example: <Enter>
Key combinations are series of keys to be pressed simultaneously (unless otherwise indicated) to perform a single
function.
Example: <Ctrl> <Alt> <Enter>
Commands presented in lowercase bold are for reference purposes only and are not intended to be typed when
referenced.
Example: "Use the format command to . . . ."
In contrast, commands presented in the Courier New font are part of an instruction and intended to be
typed.
Example: "Type format a: to format the diskette in drive A."
Filenames and directory names are presented in lowercase bold.
Examples: autoexec.bat and c:\windows
Syntax lines consist of a command and all its possible parameters. Commands are presented in lowercase bold;
variable parameters (those for which you substitute a value) are presented in lowercase italics; constant
parameters are presented in lowercase bold. The brackets indicate items that are optional.
Example: del [drive:] [path] filename [/p]
Command lines consist of a command and may include one or more of the command's possible parameters.
Command lines are presented in the Courier New font.
Example: del c:\myfile.doc
Screen text is a message or text that you are instructed to type as part of a command (referred to as a command
line). Screen text is presented in the Courier New font.
Example: The following message appears on your screen:
No boot device available
Example: "Type md c:\dos and press < Enter >."
Variables are placeholders for which you substitute a value. They are presented in italics.
Example: DIMM x (where x represents the DIMM socket designation)
Back to Contents Page
Introduction: Dell
®
PowerEdge
®
1300 Systems Installation and
Troubleshooting Guide
Dell
®
PowerEdge
®
1300 computer systems are high-speed servers that offer significant service and upgrade features.
These systems include the following service features to make troubleshooting easy and effective:
Dell Diagnostics, which checks for hardware problems (if the system can boot)
Embedded server management hardware, which monitors temperatures and voltages throughout the system and
notifies you if the system overheats or if a system cooling fan malfunctions
The Dell PowerEdge 1300 system chassis simplifies removing and replacing computer components. The power supply
enclosure rotates up out of the way to allow access to the upper system board, and the drive cage can easily be removed
from the system to facilitate drive replacement.
The following upgrade options are offered for the Dell PowerEdge 1300 systems:
An additional microprocessor
Additional memory
A variety of expansion-card options (including redundant arrays of independent disks [RAID] controller host
adapter cards)
Optional IDE CD-ROM drive, SCSI tape drive, and additional SCSI hard-disk drives
A Dell Remote Assistant Card for system management
Back to Contents Page
Checking the Basics: Dell
®
PowerEdge
®
1300 Systems Installation and
Troubleshooting Guide
Overview | Backing Up Files | Basic Checks | Checking Connections and Switches | Look and Listen | The System
Setup Program | The Resource Configuration Utility
Overview
If your Dell PowerEdge 1300 computer system is not working as expected, begin troubleshooting using the procedures
in this file. This file guides you through some initial checks and procedures that can solve basic computer problems. It
can also direct you to the appropriate section in this guide for detailed troubleshooting information and procedures to
solve more complex problems.
NOTE: When you see the question "Is the problem resolved?" in a troubleshooting procedure, perform the
operation that caused the problem.
Backing Up Files
If the system is behaving erratically, back up the files immediately. See the documentation that came with the operating
system for instructions on how to back up the files.
Basic Checks
The following procedure leads you through the checks necessary to solve some basic computer problems:
1. Was an alert message issued by the Dell OpenManageâ„¢ Hardware Instrumentation Package (HIP) server
management application?
Yes. Refer to your Dell OpenManage HIP documentation for information on the message.
No. Go to step 2.
2. Is the computer wet or damaged?
Yes. Go to Checking Inside the Computer.
No. Go to step 3.
3. Perform the steps in Checking Connections and Switches.
Is the problem resolved?
Yes. The power to the computer system was faulty, or the connections to the computer system were loose. You
have fixed the problem.
No. Go to step 4.
4. Follow the procedures described in Look and Listen.
Did the computer system complete the boot routine?
Yes. Go to step 5.
No. A serious malfunction may have occurred. Go to Getting Help.
5. Did you receive a system message or beep code?
Yes. Go to Messages and Codes.
No. Go to step 6.
6. Verify the settings in the System Setup program.
Is the problem resolved?
Yes. The system configuration information was incorrect. You have fixed the problem.
No. Go to step 7.
7. Run the Dell Diagnostics as described Running the Dell Diagnostics.
Checking Connections and Switches
Improperly set switches and controls and loose or improperly connected cables are the most likely source of problems
for the computer, monitor, or other peripherals (such as a printer, keyboard, mouse, or other external equipment). A
quick check of all the switches, controls, and cable connections can easily solve these problems. Figure 1, Back-Panel
Features, shows the back-panel connections on the computer. Figure 2, Front-Panel Features, shows the front-panel
controls and indicators on the computer.
Figure 1. Back-Panel Features
Figure 2. Front-Panel Features
Complete the following procedure to check all the connections and switches:
1. Turn off the system, including any attached peripherals (such as the monitor, keyboard, printer, external drives,
scanners, and plotters). Disconnect all the AC power cables from their electrical outlets.
2. If the computer is connected to a power strip, turn the power strip off and then on again.
Is the power strip receiving power?
Yes. Go to step 5.
No. Go to step 3.
3. Plug the power strip into another electrical outlet.
Is the power strip receiving power?
Yes. The original electrical outlet probably does not function. Use a different electrical outlet.
No. Go to step 4.
4. Plug a lamp that you know works into the electrical outlet.
Does the lamp receive power?
Yes. The power strip is probably not functioning properly. Use another power strip.
No. Go to step 5.
5. Reconnect the system to the electrical outlet or power strip.
Make sure that all connections fit tightly together.
6. Turn on the system.
Is the problem resolved?
Yes. The connections were loose. You have fixed the problem.
No. Go to step 7.
7. Is the monitor operating properly?
Yes. Go to step 8.
No. Go to Troubleshooting the Monitor.
8. Is the keyboard operating properly?
Yes. Go to step 9.
No. Go to Troubleshooting the Keyboard.
9. Are the mouse and printer operating properly?
Yes. Continue with the next section, "Look and Listen."
No. Go to Troubleshooting I/O Ports.
Look and Listen
Looking at and listening to the system is important in determining the source of a problem. Look and listen for the
indications described in Table 1, Boot Routine Indications.
Table 1. Boot Routine Indications
Look/Listen for: Action
An error message See Messages and Codes
.
Alert messages
from the Dell
OpenManage HIP
software
The server management software has detected a problem inside the computer. See the information
on alert log message in your Dell OpenManage HIP documentation.
The monitor's
power indicator
Most monitors have a power indicator (usually on the front bezel). If the monitor's power indicator
does not come on, see Troubleshooting the Monitor.
The keyboard
indicators
Most keyboards have one or more indicators (usually in the upper-right corner). Press the <Num
Lock> key, the <Caps Lock> key, or the <Scroll Lock> key to toggle their respective keyboard
indicators on and off. If the indicators do not light up, see Troubleshooting the Keyboard.
The diskette-drive
access indicator
The diskette-drive access indicator should quickly flash on and off when you access data on the
diskette drive. If the diskette-drive access indicator does not light up, see Troubleshooting the
Diskette Drive Subsystem.
The hard-disk
drive activity
indicators
The hard-disk drive activity indicators should quickly flash on and off when you access data on
the hard-disk drives. On a system running the Microsoft
®
Windows NT
®
operating system, you
can test the drive by opening Windows Explorer and clicking the icon for drive C. If the hard-disk
drive access indicator does not come on, see Troubleshooting SCSI Hard-Disk Drives.
A series of beeps See Messages and Codes.
An unfamiliar
constant scraping
or grinding sound
when you access a
drive
Make sure the sound is not caused by the application program you are running. The sound could
be caused by a hardware malfunction. See Getting Help for instructions on obtaining technical
assistance from Dell.
The absence of a
familiar sound
When you turn on the system, you should hear the hard-disk drives spin up, and the system try to
access the start-up files from the hard-disk drive, the diskette drive, or the CD-ROM drive. See
Running the Dell Diagnostics. If the system does not boot, see Getting Help.
NOTE: For the full name of an abbreviation or acronym used in this table, see Abbreviations and Acronyms.
If you have not resolved the problem after looking at and listening to the computer, continue with the instructions The
System Setup Program.
The System Setup Program
You can easily correct certain system problems by verifying the correct settings in the System Setup program. When
you boot the system, the system checks the system configuration information and compares it with the current hardware
configuration. If the system hardware configuration does not match the information recorded by the System Setup
program, an error message may appear on the screen.
This problem can happen if you changed the system's hardware configuration and forgot to run the System Setup
program. To correct this problem, enter the System Setup program, correct the corresponding System Setup setting, and
reboot the system. See "Using the System Setup Program" in your User's Guide for detailed instructions on using the
System Setup program.
The Resource Configuration Utility
If you are experiencing problems with the system, you may have a conflict between the information stored by the
System Setup program and the Resource Configuration Utility (RCU). Although the RCU can read changes from the
System Setup program, changes are not recorded in configuration memory until you run the RCU and save the new
information. See "Using the Resource Configuration Utility" in your User's Guide for detailed instructions on using the
RCU and saving new information.
If after using the RCU you have not resolved the problem, see Running the Dell Diagnostics.
Back to Contents Page
Messages and Codes: Dell
®
PowerEdge
®
1300 Systems Installation and
Troubleshooting Guide
Overview | System Messages | System Beep Codes | Warning Messages | Diagnostics Messages | Alert Log Messages
From the Dell OpenManageâ„¢ HIP Application
Overview
Application programs, operating systems, and the computer itself are capable of identifying problems and alerting you
to them. When a problem occurs, a message may appear on the monitor screen or a beep code may sound.
Several different types of messages can indicate when the system is not functioning properly:
System messages
System beep codes
Warning messages
Diagnostics messages
Alert messages
This file describes each type of message and lists the possible causes and actions you can take to resolve any problems
indicated by a message. To determine what type of message you have received, read the following sections.
System Messages
System messages alert you to a possible operating system problem or to a conflict between the software and hardware.
Table 1, System Messages, lists the system messages that can occur and the probable cause for each message.
NOTE: If you receive a system message that is not listed in the following table, check the documentation for the
application program that is running when the message appears and/or the operating system documentation for
an explanation of the message and recommended action.
Table 1. System Messages
Message Definition Probable Causes
Address mark not
found
BIOS found faulty disk sector or could not
find particular disk sector.
Faulty diskette/tape drive subsystem or hard-
disk drive subsystem (defective system
board), faulty interface cable or connector.
Attachment failed to
respond
Diskette drive or hard-disk drive controller
cannot send data to associated drive.
Faulty diskette/tape drive subsystem or hard-
disk drive subsystem (defective system
board), faulty interface cable or connector.
Alert! Cover was
previously removed.
Cover was previously removed. Cover was previously removed.
Alert! Hard disk
drive thermal probe
Hard-disk drive thermal probe has failed. No hard-disk drive thermal probe installed,
failure detected.
defective thermal probe, or thermal cable
not connected to the control panel.
Alert! One or more
of the Memory DIMMs
are out of rev.
System detected that one or more of the
DIMMs are not the correct revision.
DIMMs do not meet Intel
®
SPD 1.2
specification or 66-MHz DIMMs are
installed.
Alert! Power supply
fan failure
detected.
Power supply fan has failed. The power supply or system board is
defective.
Alert! Previous fan
failure.
System fan failed during the previous
operating session.
No fan installed, defective fan, or fan cable
not connected.
Alert! Previous
hard-disk drive
thermal failure.
Hard-disk drive thermal probe failed during
previous operating session.
No hard-disk drive thermal probe installed,
defective thermal probe, or thermal cable
not connected to the control panel.
Alert! Previous
processor thermal
failure.
The microprocessor exceeded its
recommended operating temperature
during the previous operating session.
Operating environment is too hot (above
35°C). The system vents may be blocked,
causing the system to overheat.
Alert! Previous
voltage failure.
System voltage exceeded or fell below an
acceptable threshold.
Defective power supply.
Alert! Primary
processor is out of
rev.
System detected that the primary processor
is not the correct revision. If the system
contains more than 512 MB of RAM, this
message will be followed by a System
Halted message.
Processor is a type not supported by Dell.
Alert! Processor
thermal probe
failure detected.
Processor or system board has failed. Faulty processor or defective system board.
Alert! Secondary
processor is out of
rev.
System detected that the secondary
processor is not the correct revision. If the
system contains more than 512 MB of
RAM, this message will be followed by a
System Halted message.
Processor is a type not supported by Dell.
Alert! Single-bit
memory error
previously detected
in XXXXh.
Single-bit ECC error was detected during
the previous operating session.
Faulty or improperly seated DIMMs or
defective system board.
Alert! System fan
was not detected.
System fan was not detected. No fan installed, defective fan, or fan cable
not connected.
Alert! Unbuffered
and registered
SDRAM DIMMs cannot
be mixed.
Mixing of unbuffered and registered
SDRAM DIMMs is not supported.
Two different types (unbuffered and
registered) of SDRAM DIMMs have been
installed together and may not be
compatible.
Alert! Uncorrectable
memory error
previously detected
in XXXXh.
Multibit ECC error was detected during the
previous operating session.
Faulty or improperly seated DIMMs or
defective system board.
Auxiliary Device
failure. Verify
that mouse and
System detected a mouse failure. Faulty mouse, or faulty mouse controller or
keyboard is attached to the mouse
keyboard are
securely attached
to connectors.
connector.
Bad command or file
name
Command entered does not exist, is faulty,
or is not in pathname specified.
Faulty command and syntax, or incorrect
filename.
Bad error-correction
code(ECC)on disk
read
Diskette drive or hard-disk drive controller
detected uncorrectable read error.
Indicates a fatal error.
Faulty diskette/tape drive subsystem or hard-
disk drive subsystem (defective system
board).
Boot: Couldn't find
NTLDR
A nonbootable diskette formatted with
Windows NT was detected in the diskette
drive.
A nonbootable diskette is preventing the
system from booting. Remove the diskette
to boot the system from the hard-disk drive
or from a bootable diskette.
Controller has
failed
Hard-disk drive or associated controller is
defective. Indicates a fatal error.
Faulty hard-disk drive subsystem or
defective system board.
Data error
System received unrecoverable data-read
error from diskette or hard-disk drive.
Indicates a fatal error.
Faulty diskette, diskette drive, or hard-disk
drive.
Decreasing available
memory
Read/write failure during POST prevents
system from using available memory.
One or more DIMMs are faulty or
improperly seated.
Diskette drive 0
seek failure
Diskette drive 1
seek failure
Diskette/tape drive controller could not
locate specific sector or track.
Faulty or improperly inserted diskette,
incorrect settings in System Setup program,
loose diskette/tape drive interface cable, or
loose power cable.
Diskette read
failure
Failure occurred while system attempted to
read diskette.
Faulty diskette, faulty or improperly
connected diskette/tape drive interface
cable, or loose power cable.
Diskette subsystem
reset failed
System could not successfully issue reset
command to diskette controller.
Faulty diskette/tape drive controller
(defective system board).
Diskette write
protected
Diskette write-protect feature was
activated.
Diskette write-protected.
Drive not ready
Diskette is missing from or is improperly
inserted in diskette drive.
Missing, defective, unformatted, or
improperly inserted diskette.
ECC memory error
Uncorrectable multibit ECC memory error
is detected.
Faulty or improperly seated DIMMs or
defective system board.
Gate A20 failure
Gate A20 of the keyboard controller
malfunctioned. Indicates a fatal error.
Faulty keyboard controller (defective system
board).
General failure
Operating system cannot execute
command.
Corrupted or improperly installed operating
system.
Hard disk controller
failure
Hard disk drive read
failure
Hard disk failure
Hard-disk drive failed to initialize.
Indicates a fatal error.
Incorrect configuration settings in System
Setup program, improperly connected hard-
disk drive cable, faulty hard-disk controller
subsystem (defective system board), or
loose power cable.
Invalid
configuration
information -
please run SETUP
program
System Setup program contains incorrect
system configuration settings.
Incorrect configuration settings in System
Setup program or faulty battery.
Keyboard clock line
failure
Keyboard failure
Keyboard data line
failure
Keyboard stuck key
failure
System cannot communicate with
keyboard. Indicates a fatal error.
Keyboard cable connector loose or
improperly connected, defective keyboard,
or defective keyboard/mouse controller
(defective system board).
Keyboard controller
failure
Keyboard/mouse controller failed.
Indicates a fatal error.
Defective keyboard/mouse controller
(defective system board).
Memory address line
failure at address,
read value
expecting value
Memory data line
failure at address,
read value
expecting value
Memory double word
logic failure at
address, read value
expecting value
Memory odd/even
logic failure at
address, read value
expecting value
Memory write/read
failure at address,
read value
expecting value
During memory test, value read at
address was incorrect.
Faulty or improperly seated DIMMs or
defective system board.
Memory allocation
error
Software in use conflicts with operating
system, application program, or utility.
Faulty application program or utility.
Memory tests
terminated by
keystroke
Memory test did not complete. POST memory test terminated by user
pressing <Spacebar>.
Network card is not
present in the
system.
System does not detect NIC. Incorrect NIC drivers installed.
No boot device
available
System does not recognize diskette drive or
hard-disk drive from which it is trying to
boot.
Faulty diskette, diskette/tape drive
subsystem, hard-disk drive, hard-disk drive
subsystem, or no boot disk in drive A.
No boot sector on
hard-disk drive
Incorrect configuration settings in System
Setup program, or corrupted operating
system.
Incorrect configuration settings in System
Setup program, or no operating system on
hard-disk drive.
No timer tick
interrupt
Timer on system board malfunctioning.
Indicates a fatal error.
Defective system board.
Non-system disk or
disk error
Diskette in drive A or hard-disk drive does
not have bootable operating system
Faulty diskette, diskette/tape drive
subsystem, or hard-disk drive subsystem
installed on it. (defective system board).
Not a boot diskette
No operating system on diskette. No operating system on diskette.
Plug and Play
Configuration Error
System encountered a problem in trying to
configure one or more expansion cards.
System resource conflict.
Read fault
The MS-DOS
®
operating system cannot
read from diskette or hard-disk drive.
Faulty diskette, diskette/tape drive
subsystem, or hard-disk drive subsystem
(defective system board).
Requested sector not
found
System could not find particular sector on
disk, or requested sector defective.
Faulty diskette, diskette/tape drive
subsystem, or hard-disk drive subsystem
(defective system board).
Reset failed
Disk reset operation failed. Improperly connected diskette/tape drive,
hard-disk drive interface cable, or power
cable.
Sector not found
MS-DOS is unable to locate sector on
diskette or hard-disk drive.
Defective sectors on diskette or hard-disk
drive.
Seek error
MS-DOS is unable to locate specific track
on diskette or hard-disk drive.
Defective diskette or hard-disk drive.
Seek operation
failed
System could not find particular address
mark on disk.
Faulty diskette or hard-disk drive.
Shutdown failure
System board is faulty. Indicates a fatal
error.
Defective system board.
System halted
System locked up because the
microprocessor is not the correct revision.
System microprocessor is not a type
supported by Dell and more than 512 MB of
RAM is installed.
Terminator/processor
card not installed!
System halted!
System does not have terminator card or
secondary microprocessor. Indicates a
fatal error.
Terminator card or secondary
microprocessor is improperly installed or is
not installed.
Time-of-day clock
stopped
System battery low. Defective battery or faulty chip (defective
system board).
Time-of-day not set
Time or Date settings in System Setup
program are incorrect, or the system
battery does not work.
Incorrect Time or Date setting, or defective
system battery.
Timer chip counter 2
failed
Timer circuit on system board
malfunctioning. Indicates a fatal error.
Defective system board.
Unexpected interrupt
in protected mode
Keyboard/mouse controller
malfunctioning, or 1 or more DIMMs
improperly seated. Indicates a fatal error.
Improperly seated DIMMs or faulty
keyboard/mouse controller chip (defective
system board).
WARNING: Dell's Disk
Monitoring System
has detected that
drive [0/1] on the
[0/1] EIDE
controller is
POST queried EIDE drive for status. Drive
detected possible error conditions.
Unreliable or defective drive.
operating outside
of normal
specifications. It
is advisable to
immediately back up
your data and
replace your hard-
disk drive by
calling your
support desk or
Dell Computer
Corporation.
Write fault
Write fault on
selected drive
MS-DOS cannot write to diskette or hard-
disk drive.
Faulty diskette or hard-disk drive.
NOTE: For the full name of an abbreviation or acronym used in this table, see Abbreviations and Acronyms.
System Beep Codes
When an error that cannot be reported on the monitor occurs during a boot routine, the computer may emit a series of
beeps that identifies the problem. The beep code is a pattern of sounds; for example, one beep followed by a second
beep and then a burst of three beeps (code 1-1-3) means that the computer was unable to read the data in nonvolatile
random-access memory (NVRAM).This information is valuable to the Dell technical support representative if you need
to call for technical assistance.
When a beep code is emitted, write it down on a copy of the Diagnostics Checklist found in Getting Help, and then look
it up in Table 2, System Beep Codes. If you are unable to resolve the problem by looking up the meaning of the beep
code, use the Dell Diagnostics to identify a more serious cause (see Running the Dell Diagnostics). If you are still
unable to resolve the problem, see Getting Help for instructions on obtaining technical assistance.
Table 2. System Beep Codes
Beep Code Error Probable Causes
1-1-3 NVRAM write/read failure Defective system board
1-1-4 BIOS checksum failure Faulty BIOS or defective system board
1-2-1 Programmable interval-timer failure Defective system board
1-2-2 DMA initialization failure Defective system board
1-2-3 DMA page register write/read failure Defective system board
1-3-1 Main-memory refresh verification failure Faulty or improperly seated DIMM or defective
system board
1-3-2 No 100-MHz DIMM installed No 100-MHz DIMM installed or faulty or
improperly seated DIMM
1-3-3 Chip or data line failure in the first 64 KB of
main memory
Faulty or improperly seated DIMM
1-3-4 Odd/even logic failure in the first 64 KB of
main memory
Faulty or improperly seated DIMM
  • Page 1 1
  • Page 2 2
  • Page 3 3
  • Page 4 4
  • Page 5 5
  • Page 6 6
  • Page 7 7
  • Page 8 8
  • Page 9 9
  • Page 10 10
  • Page 11 11
  • Page 12 12
  • Page 13 13
  • Page 14 14
  • Page 15 15
  • Page 16 16
  • Page 17 17
  • Page 18 18
  • Page 19 19
  • Page 20 20
  • Page 21 21
  • Page 22 22
  • Page 23 23
  • Page 24 24
  • Page 25 25
  • Page 26 26
  • Page 27 27
  • Page 28 28
  • Page 29 29
  • Page 30 30
  • Page 31 31
  • Page 32 32
  • Page 33 33
  • Page 34 34
  • Page 35 35
  • Page 36 36
  • Page 37 37
  • Page 38 38
  • Page 39 39
  • Page 40 40
  • Page 41 41
  • Page 42 42
  • Page 43 43
  • Page 44 44
  • Page 45 45
  • Page 46 46
  • Page 47 47
  • Page 48 48
  • Page 49 49
  • Page 50 50
  • Page 51 51
  • Page 52 52
  • Page 53 53
  • Page 54 54
  • Page 55 55
  • Page 56 56
  • Page 57 57
  • Page 58 58
  • Page 59 59
  • Page 60 60
  • Page 61 61
  • Page 62 62
  • Page 63 63
  • Page 64 64
  • Page 65 65
  • Page 66 66
  • Page 67 67
  • Page 68 68
  • Page 69 69
  • Page 70 70
  • Page 71 71
  • Page 72 72
  • Page 73 73
  • Page 74 74
  • Page 75 75
  • Page 76 76
  • Page 77 77
  • Page 78 78
  • Page 79 79
  • Page 80 80
  • Page 81 81
  • Page 82 82
  • Page 83 83
  • Page 84 84
  • Page 85 85
  • Page 86 86
  • Page 87 87
  • Page 88 88
  • Page 89 89
  • Page 90 90
  • Page 91 91
  • Page 92 92
  • Page 93 93
  • Page 94 94
  • Page 95 95
  • Page 96 96
  • Page 97 97
  • Page 98 98
  • Page 99 99
  • Page 100 100
  • Page 101 101
  • Page 102 102
  • Page 103 103
  • Page 104 104
  • Page 105 105
  • Page 106 106
  • Page 107 107
  • Page 108 108
  • Page 109 109
  • Page 110 110
  • Page 111 111
  • Page 112 112
  • Page 113 113
  • Page 114 114
  • Page 115 115
  • Page 116 116
  • Page 117 117
  • Page 118 118
  • Page 119 119
  • Page 120 120
  • Page 121 121
  • Page 122 122
  • Page 123 123
  • Page 124 124
  • Page 125 125
  • Page 126 126
  • Page 127 127
  • Page 128 128

Dell PowerEdge 1300 User guide

Type
User guide

Ask a question and I''ll find the answer in the document

Finding information in a document is now easier with AI