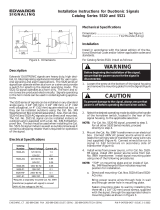
EDWARDS 102 Tone Module Installation guide
- Type
- Installation guide
EDWARDS 102 Tone Module is a unique audible-visual signaling device that can contain up to 5 light modules and either a single or multiple tone module in a single "stack." The tone module may be wired to sound independently or in conjunction with a light signal.
Here are some of the capabilities of the EDWARDS 102 Tone Module:
- Multiple tones: The tone module can produce a variety of tones, including a high/low tone, 3-pulse horn, continuous tone, stutter beep, yeow, fast whoop, rapid siren, and beep.
- Independent operation: The tone module can be wired to sound independently of the light modules, allowing you to use it to signal different events or conditions.


-
 1
1
-
 2
2
EDWARDS 102 Tone Module Installation guide
- Type
- Installation guide
EDWARDS 102 Tone Module is a unique audible-visual signaling device that can contain up to 5 light modules and either a single or multiple tone module in a single "stack." The tone module may be wired to sound independently or in conjunction with a light signal.
Here are some of the capabilities of the EDWARDS 102 Tone Module:
- Multiple tones: The tone module can produce a variety of tones, including a high/low tone, 3-pulse horn, continuous tone, stutter beep, yeow, fast whoop, rapid siren, and beep.
- Independent operation: The tone module can be wired to sound independently of the light modules, allowing you to use it to signal different events or conditions.
Ask a question and I''ll find the answer in the document
Finding information in a document is now easier with AI
Related papers
-
EDWARDS 102 Series Installation guide
-
EDWARDS 102 DeviceNet Installation guide
-
EDWARDS 102 Mounting Flange Installation guide
-
EDWARDS 102 Lens Module Installation guide
-
EDWARDS 100SB Series Installation guide
-
EDWARDS HSL Series Installation guide
-
EDWARDS 108 Series Installation guide
-
EDWARDS 101 series Installation guide
-
EDWARDS 108-DN Series Installation guide
-
 Edwards Signaling 5520 series Installation guide
Other documents
-
Legrand Selective Call Intercom System Installation guide
-
 GarrettCom P62 User manual
-
 GarrettCom P62-Series User manual
-
 GarrettCom Magnum P62-Series User manual
-
Kingston Technology KNE8TX/RS User manual
-
Trane Building Automation System User manual
-
Legrand IC5002AB Installation guide
-
Fluke 754 Documenting Process Calibrator-HART User manual
-
Lucent Technologies MERLIN LEGEND Release 6.0 Installation guide
-
Lucent Technologies MERLIN LEGEND Release 5.0 User manual


