Page is loading ...

TB-9006 Page 1 of 4
© 2016 DESCO INDUSTRIES, INC.
Employee Owned
Overhead Air Ionizer 991A
Installation, Operation and Maintenance
Description
The SCS Overhead Air Ionizer 991A is designed for use
with sensitive electronic components where electrostatic
discharge (ESD) is a problem. The Overhead Air Ionizer
991A provides fast static charge decay efficiency over
an entire work surface area. Equipped with task lighting,
an ionization indicator light, and an integrated heater, it
offers user-friendly operation while helping protect even
the most sensitive components from ESD damage. The
SCS 991A Overhead Ionizer meets the required limits
of ANSI/ESD S20.20 tested per ANSI/ESD STM3.1 or
ESD TR53.
• Rapidly neutralizes static charges
• Covers an extended area with ionized air
• Inherently balanced to 6V
• Integrated heater and task lights
• Ionization indicator light
• AC technology for stable performance
• Built-in emitter cleaner for easy maintenance
The Overhead Air Ionizer 991A produces an air flow
that is rich in positive and negative ions. Directing the
air flow on an object that has a static electricity charge
will neutralize the charge. If the object has a positive
static charge, it will draw negative ions from the air flow.
If the object has a negative static charge, it will draw
positive ions from the air flow. The ions are attracted
to the oppositely charged object and will neutralize the
electrostatic charge on the object.
The SCS Overhead Air Ionizer 991A features both
inherent self balance technology and a built-in
emitter point cleaner. The Overhead Air Ionizer 991A
operates on AC technology to provide stable balance
performance over long periods of use. The Overhead
Air Ionizer 991A provides fast charge decay directly
under the unit for targeted work surface coverage.
The Overhead Air Ionizer 991A requires very little
maintenance to ensure electrostatic charge is controlled
within the work surface area.
January 2016
SCS offers the following parts and accessories for the
Overhead Air Ionizer:
Item Description
991A Overhead Air Ionizer with 120V
North American Power Cord
991A-U Overhead Air Ionizer with 230V
UK Power Cord
991A-E Overhead Air Ionizer with 230V
European Power Cord
991A-F Overhead Air Ionizer Replaceable
Filters, 6 lters/box
991A AIR FILTER Overhead Air Ionizer Air Filters Retainer
(1 per fan)
991A LIGHT Overhead Air Ionizer Task Light
Fluorescent Lamp (2 per blower)
Installation
Unpacking: Carefully remove the equipment from the
carton and inspect contents. Empty the carton to insure
that small parts are not discarded.
Installing: The Overhead Air Ionizer 991A should
be located 18 to 30 inches above the work surface
with center fan directly above the critical area. There
should be no crossflow of air between unit and the work
surface. Drafts from air conditioning and heating air
outlets can affect ionization performance.
Mounting: The Overhead Air Ionizer 991A may be
mounted using adjustable mounting brackets or “S”
hooks provided. The mounting brackets are designed
for use on a variety of surfaces such as: perforated
steel angle, metal framing, and on wire shelving (see
diagrams on next page).
Place a lock washer and flat washer on the lock knobs
and secure the unit using center holes on mounting
tab. Be sure to install a fiber washer as shown in the
diagrams. The “S” hooks provide for chain mounting or
mounting on wire shelving. Install the overhead ionizer
unit as shown below using outer holes on mounting
tabs. Chain and additional mounting hardware (not
supplied) must have a minimum safe working load rating
of 20 pounds.
Note: Prior to installing the Overhead Air Ionizer 991A,
the compact fluorescent bulbs must be installed. The
bulbs are placed inside the packaging material to
prevent breakage during shipment. Remove both (2" x
11") lamp access panels on rear of unit with a ¼" nut
driver or flat blade screwdriver. Unpack the bulbs and
install by inserting the bulb into the socket and press
until it “clicks” into place. Replace the lamp access
panels.
Made in the
United States of America
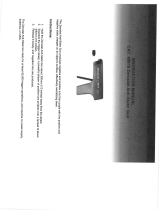
USER GUIDE TB-9006
Figure 1. SCS
991A
Overhead Air Ionizer
www.GlobalTestSupply.com
Find Quality Products Online at: sales@GlobalTestSupply.com

TB-9006 Page 2 of 4
© 2016 DESCO INDUSTRIES, INC.
Employee Owned
Figure 2. Mounting the SCS Overhead Air Ionizer 991A
Electrical: With the SCS Overhead Air Ionizer 991A
mounted in place over the intended work surface, plug
the male end of the IEC power cord into a properly
grounded 120-240 VAC 50/60 Hz receptacle. If an
extension cord is necessary, use only a 3 wire properly
grounded one that matches the plug type that comes
with the blower.
Operation
Adjustments
Activate the Overhead Air Ionizer 991A by turning FAN
SPEED knob clockwise, out of the OFF position. The
IONIZATION INDICATOR will illuminate to indicate
the presence of ionized air. Set air flow as desired by
rotating the FAN SPEED knob. If warm air is desired
for operator comfort, set WARM AIR switch to the
ON (|) position. If light is desired, turn on task lights
by setting LIGHTS switch to the ON (|) position. To
clean ion emitter points, rotate the POINT CLEANER
knob at each air outlet clockwise to the OFF position
(approximately one turn) and release.
The time required to neutralize a static charge on an
item in the air stream depends on fan speed. Setting a
higher fan speed reduces time required to neutralize a
static charge.
When using the SCS Overhead Air Ionizer 991A unit
in an electronics assembly area, the ionized air stream
should cover as much of the work area as possible. The
constant flow of ionized air will help prevent items such
as work surfaces, tools, materials and components from
developing a static charge. Charged items introduced
into a work area will be neutralized and will remain
neutral while in the ionized air stream.
Performance - Discharge Times Performance
Discharge time in seconds under fan (18") is typically
under 6 seconds.
Troubleshooting
This information provides a quick troubleshooting
reference for the Overhead Air Ionizer 991A. Should
any of these possible solutions not solve the problem,
contact SCS.
Problem Cause Solution
Unit fails to operate Power cord not
connected
Plug in to specied
voltage source
Unit fails to operate Faulty AC ground Replace line cord
Flashing fault light Power incorrectly
supplied to unit
Cycle power to the
unit using the unit’s
key switch
Flashing fault light Power incorrectly
supplied to unit
Ensure that properly
grounded recepticle
is used
Fault light on
steady
Dirty or damaged
emitter tips,
incorrectly calibrated
Clean tips using
integrated brush
Excessively long
discharge times
Dirty or damaged
emitter tips,
incorrectly calibrated
Clean tips using
integrated brush
Excessively long
discharge times
Slow fan speed or
ionizer is located too
far from target
Increase the fan speed
or move the ionizer
closer to the target
Unit fails to hold
setpoint
Dirty or damaged
emitter tips
Clean tips using
integrated brush
Fan is slow Fan speed is set slow Adjust fan control
clockwise
Maintenance
General Maintenance
The SCS Overhead Air Ionizer 991A has been designed
with low maintenance in mind. The only regular
maintenance suggested is emitter point cleaning, ion
balance checking and ion output checking. Emitter point
cleaning takes only seconds. The Overhead Air Ionizer
991A contains a balancing circuit that is inherently self
balancing. This circuit compensates for dirt build-up on
emitters, emitter point wear, line voltage fluctuations
and variations in air velocity. Scheduled checking of the
ion output and balance should be considered to assure
quality audit requirements.
Emitter Cleaning
To clean the ion emitters, simply rotate the point cleaner
knob located at center of each outlet clockwise to the
OFF position (approximately one turn) and release.
The spring-loaded point cleaning brush will return to its
parking spot. Recommended frequency of cleaning is
once a week.
“S” Hooks Wire Shelving
Link Chain
(Not Provided)
“S” Hook
Hex Screw
Fender Washer
Wire Shelving
(Not Provided)
Lock Washer
Hex Nut
Mounting Bracket
Flat Washer
Lock Washer
Lock Knob
Metal Frame Perforated Steel Angle
Metal Frame and Nut
(Not Provided)
Mounting Bracket
Lock Washer
Hex Screw
Flat Washer
Lock Washer
Lock Knob
Flat Washer
Lock Washer
Lock Knob
Hex Nut
Lock Washer
Perforated Steel Angle
(Not Provided)
Hex Screw
Mounting Bracket
www.GlobalTestSupply.com
Find Quality Products Online at: sales@GlobalTestSupply.com

TB-9006 Page 3 of 4
© 2016 DESCO INDUSTRIES, INC.
Employee Owned
Air Inlet and Outlet Cleaning
The air inlet grill on the top of the unit and the ionized
air outlets should remain clean to prevent restriction
of air flow. They can be cleaned with a soft brush or
vacuum. Clean the air inlet grill and ionized air outlets
once every three months or more often if needed.
Remove the air filter element from the top of the unit
by unsnapping the filter retainer. Rinse the filter in plain
water while gently squeezing. If the dirt is stubborn,
wash the filter in mild soap and water then rinse. Blot
the filter dry with paper towels and allow to dry. Reinstall
filter on air inlet and secure by snapping the filter
retainer in place.
Optional Air Filter Cleaning
Remove the air filter element from the top of the unit
by unsnapping the filter retainer. Rinse the filter in plain
water while gently squeezing. If the dirt is stubborn,
wash the filter in mild soap and water then rinse. Blot
the filter dry with paper towels and allow to dry. Reinstall
filter on air inlet and secure by snapping the filter
retainer in place.
Note: If an air filter is used, clean the air filter once
every three months or more frequently if needed.
Ion Output Check
To test the unit for ion output, the use of a charge
plate monitor such as SCS Charge Analyzer/Charge
Plate Monitor 711 is recommended. If a charge plate
monitor is not available, use a static meter, such as a
SCS Static Sensor 718 and a SCS Air Ionizer Test Kit
718A to check ion output with the following procedure in
accordance with ANSI/ ESDSP 3.3-2006.
ELECTRICAL SHOCK HAZARD! Do not insert objects
through intake or outlet grill.
It is recommended that the user be familiar with ionizer
test standards ANSI/ESD S3.1 if the SCS Air Ionizer
Test Kit 718A is used to perform verification testing on
ionizer performance.
Assembly: slide the charge
plate over the SCS Static
Sensor 718 until it stops. The
charge plate slides onto the
lower groove, on the sides of
the Static Sensor 718.
Charging the plate: holding
the Static Sensor 718 (with
charge plate attached) in one
hand, use the other hand to
touch the probe of the SCS
Air Ionizer Test Kit 718A
charger to the charge plate.
Press either the + button
(for a positive voltage) or
the – button (for a negative
voltage), then remove the
probe from the charge plate.
Be sure to keep the button
pressed while removing the
probe from the charge plate.
The display on the Static
Sensor 718 will indicate a
positive or negative charging
voltage (1.1kV minimum). If a
voltage of less than ±1.1kV is
displayed, check to see if the
low battery indicator on the Air
Ionizer Test Kit 718A Charger
is illuminated. If illuminated,
replace the battery in the charger. If the unit continues
to supply an incorrect voltage to the charge plate,
please contact SCS for additional instructions.
Testing ionizer discharge time: after charging the
plate, hold the Static Sensor 718 approximately one foot
(30.5 cm) away from the ionizer. Monitor the display to
see how quickly the 1.1 kV charge is dissipated to 0.1
kV. The speed at which this occurs (the discharge time)
indicates how well the ionizer is operating. Repeat this
procedure for both a positively and a negatively charged
plate.
Testing ionizer offset balance: zero the charge plate
by touching it with a grounded object. This can either
be the finger of a grounded person or some other item
which is connected to electrical ground. In either case,
zeroing the charge plate should make the display on the
Static Sensor 718 read zero. Hold the Static Sensor 718
approximately one foot (30.5 cm) in front of the ionizer.
Monitor the display: The value displayed is the offset
balance of the SCS Overhead Air Ionizer, which is the
difference between the number of positive and negative
ions being emitted.
Ion Balance Check
To test the unit for ion balance, the use of a charge
plate monitor such as the SCS Charge Analyzer/Charge
Plate Monitor 711 is recommended.
Calibration
The SCS Overhead Air Ionizer 991A ion output
is inherently balanced by design, so there are no
calibration adjustments. If, after checking the ion
balance as outlined above, an unbalance or offset
voltage exists in excess of +/-6 volts, contact SCS
Technical Support: 1-919-718-0000.
Never open the case of the unit. This exposes
the operator to hazardous voltages. If repairs are
necessary, contact 1-919-718-0000 for a Return
Authorization Number prior to returning the unit to the
factory.
www.GlobalTestSupply.com
Find Quality Products Online at: sales@GlobalTestSupply.com

TB-9006 Page 4 of 4
© 2016 DESCO INDUSTRIES, INC.
Employee Owned
Task Light Replacement
If either task light does not light, dims appreciably,
or flickers, the compact fluorescent lamp should be
replaced as soon as possible. Access to the lamp is
provided by a removable panel on the rear of the unit.
Disconnect the unit by unplugging the line cord. Remove
the appropriate lamp access panel with a ¼" nut driver
and remove the lamp. Install a new lamp, replace lamp
access panel, and plug the unit back in.
Specifications
Input Voltage 120VAC, 60Hz, 0.5A (fan low,
heater/light o) 2.5A (fan high,
heater/light on); 230VAC,
50Hz, 0.2A (fan low, heater/
light o) 1.5A (fan high, heater/
light on)
Power Consumption 200W (heater)
Emitter Points Stainless Steel
Ion Emission AC Ionization
Balance Voltage ±6V @ 18" from blower face
Decay Time <4.0 sec @ 18" center blower
position; fan high-no diusers
Air Speed 200-240 ft./min. (low to high),
combined 3 fan output
Audible Noise 50 dBA fan low; 60 dBA fan
high
Indicator Orange light for Ionization
status
Ozone Level 0.02 ppm, measured @ 12" in
front of unit 2
Operating Env Temperature 32-122°F (0-
50°C): humidity 30-70% RH
non-condensing
Lamp 13W twin tube, compact
uorescent
Air Filter 30 ppi open cell polyurethane
foam (optional)
Dimensions 42.75" W x 4" H x 6.75" D
(108.6 x 10.2 x 17.1 cm)
AC Power Cable
Length
56 inches
Weight 16 lbs (7.3 kg)
Enclosure Powder-coated white enamel
aluminum
Mounting Adjustable brackets and
S-hooks provided
www.GlobalTestSupply.com
Find Quality Products Online at: sales@GlobalTestSupply.com
/