Page is loading ...

General How Tos
How do I use the Bondera tabs?
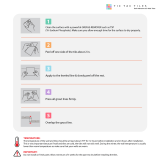
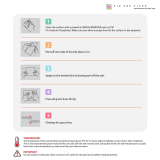
1. Grab the non-sticky end of the tabs with your fingers
2. Apply the sticky end to the liner corner diagonally
3. Pull the tab diagonally toward the opposite corner.
TIP :Do not pull the tab straight down as this may cause the liner to tear and impead removal.. The
Bondera tabs can be removed from the film and be reused. Do not remove all of the back liner at once
prior to installing, follow suggested installation instructions.
How do I cut Bondera?
There are two methods to cut Bondera for your applications.
1. Use a straight edge along with a utility knife on a safe cutting surface.
2. Teflon scissors or household scissors
TIP: Spray a light coat of oil such as cooking spray on the scissors to prevent the adhesive from
sticking to the scissors. Wipe off excess oil areas.
What side of the Bondera Tile MatSet should be applied to the substrate?
For optimal performance, dimensional stability and ease of use, there is a glass mesh embedded in
Bondera. The mesh looks like a grid and can be easily seen. Proper installation requires the non-mesh
side to be applied to the surface you wish to tile (wall, countertop etc.). Adhere tiles to the mesh side of
Bondera.
Can I apply Bondera Tile MatSet on uneven surfaces?
Bondera Tile MatSet requires a smooth level surface. Older existing walls can be leveled using a
leveling compound prior to applying Bondera. For new construction it is recommended to construct
level walls and surfaces for tiling projects.
TIP: Clean the wall surface prior to applying Bondera Tile MatSet.
What surfaces can Bondera be applied onto?
Bondera allows you to tile on most any substrate and will adhere to any surface as long as it is oil and
dust free. You must wipe the surface clean and towel dry before applying Bondera. Examples of
surfaces or substrates include: drywall, cement board, wood, laminates, coreanTM, formicaTM,
existing tile and metal.
In what direction should I install the Bondera Tile MatSet to walls and countertops?
Bondera Tile MatSet can be applied in either a vertical or horizontal direction.
Can Bondera Tile MatSet be applied directly onto wallpaper?
It is a requirement to remove the wallpaper and adhesive and repair all deficiencies in the wall prior to
applying Bondera.

Can Bondera Tile MatSet be applied directly onto a painted surface?
As long as the surface is dry, clean and smooth Bondera will adhere to painted surfaces. Bondera is
only as strong as the surface that it adheres to and should be inspected thoroughly before applying
Bondera.
How do I apply Bondera Tile MatSet onto a substrate
1. Use framing square and level to ensure level and square installation.
2. Unroll a manageable length of Bondera and cut to size.
3. Using Bondera tab diagonally peel back 2 to 3 inches at the corner of the release liner (the non-
mesh side).
4. Starting at one corner of area to be tiled, firmly press exposed corner of Bondera to the surface.
5. Steadily pull remaining release liner from underneath the Bondera and smooth it with your hand
or rectangular trowel for a wrinkle-free surface.
6. As outlined above, prepare the next strip of Bondera and carefully press the edges tightly
together, but do not overlap.
7. Repeat until area is covered.
How to apply Bondera Wet Area Seam Tape
1. Apply seam tape ONLY when you are ready to tile.
2. Remove top liner of the Bondera so that the adhesive is exposed
3. Adhere the Bondera Seam Tape to seal the seams
4. Remove the white paper liner to expose the seam tape adhesive.
5. Apply tile
Tip: Pre-folding a ¼” to 3/8” corner of the seam tape will make it easier to remove the paper liner after
installation.
What can I do to remove a Bondera Tile MatSet wrinkle on the wall or countertop?
Wrinkles will rarely occur as long as you follow the application instruction on the box. However, if
you do create a wrinkle, don’t worry, it can easily be fixed!
1. Press or squeeze the wrinkle together to make it as thin as possible
2. Use a utility knife to cut around the wrinkle
3. Pull the wrinkle up removing it from the surface then press cut edges tightly together 4. Seal or
cover the exposed area with Bondera Seam Tape.
TIP: Wrinkles can be avoided by cutting manageable sizes of Bondera, typically no more than the
length of your arm and not removing all of the back liner prior to applying Bondera to substrate.
What can I do to overcome an overlap of Bondera Tile MatSet?
The directions state to abutt Bondera as close as possible to the adjacent installed Bondera sheet.
However, if an overlap occurs simply cut it out with a utility knife and apply Bondera Seam Tape over
that area (see question about seam tape for proper installation).
Can I use tiles larger than 6x6 (36 sq inches) on the walls?
Do not use tiles larger than 6” X 6” (36 sq inches) with Bondera Wall Tile MatSet as it may result in an
impaired bond. You can use odd size tiles such as 3” x 6” (18” sq inches) or 3” x 9”(27 sq inches)

subway tiles which are ideal for use with Bondera.
How do I install tiles on Bondera Tile MatSet?
Before tiling a project such as a backsplash, countertop or wall plan the layout of tiles carefully by “pre
laying” several tiles on top of Bondera (with top liner ON) and find the locations where cuts will be
needed and how best to balance equal size tiles especially for each end section of a wall or countertop.
Pre laying tile is critical to a well thought out tile pattern and outcome that will be exceed your
expectations.
1. Using Bondera tab, diagonally peel off front liner (Peel only the amount you can tile and grout
within the day). Apply Bondera Wet Area Seam Tape to any seams that are not completely
pressed together or to all seams if the application is considered a wet environment.
2. Bottom row of wall tiles must be supported by molding, tub edge, countertop, metal strip or
similar edge.
3. Place first and second row of tile lightly in place. When tile is squarely in place, press each tile
firmly for 5 seconds to bond the tile in place. (see instructions for repositioning tile below).
4. If not using self-spacing tiles, place minimum 1/8” tile spacer at top corners of tiles to ensure
the following row of tiles is square and evenly spaced. Continue tile and spacer placement to
cover entire area.
5. Must grout within 8 hours. Mix and apply grout per instructions on grout packaging.
6. Allow grout to cure, then seal as directed.
Can I adjust or remove the tiles after I have installed them onto the Bondera Tile MatSet?
Unlike mastic or mortars you can adjust or remove tiles from Bondera during the tile project. To
remove tile that has been firmly pressed in place:
1. Protect the adjacent tile by covering it with a flat sturdy object such as a thin piece of wood
(for example a wooden paint stirrer).
2. Gently pry a putty knife under the tile you want to remove and apply slow even pressure.
3. Once the tile has been elevated grab the tile with your fingers and GENTLY pull the tile free.
The Bondera adhesive is still active and will re-bond to the tile once it has been re-adjusted or
replaced.
Tip: Do not twist and turn the tile while on the Bondera as it will return to its original position, it is
best to completely remove the tile and reapply to reposition.
Note: The bond strength of Bondera to the tile will increase with time. Tile will be more difficult to
adjust or remove the longer they are in place and in contact with Bondera. You will not be able to
adjust or remove tiles once the grout is applied.
How do I manage varying tile thicknesses with Bondera Tile MatSet?
When using tiles of varying thickness, simply layer strips of Bondera on top of each other to bring the
thinner tiles level with thicker tiles.
Can wet tiles be applied to Bondera Tile MatSet?
Many tile project will require that you cut the tiles with a wet saw. Factory-made tiles such as
porcelain or ceramic the tiles will absorb only a small amount of water and can simply be pat dry
before applying to Bondera. Some types of stone tiles will absorb as much as 10 –15% water and will
need to be thoroughly dried by allowing enough time to air dry.
What can I do if a wall surface is not quite level after installing Bondera onto the wall or if a tile
is warped (lippage)?

Prior to applying Bondera a new wall should be installed as smooth and level as possible. For an
existing wall it is recommended to ensure that the wall is level and make adjustments with a joint
compound. If the tile does not lay flat against the Bondera because it is warped or otherwise defective,
then it is recommended to discard the tile or apply a construction adhesive to the tile to fill any gaps to
ensure proper bond to Bondera.
What is the best method to remove Bondera Tile MatSet residue on a surface?
The best way to remove Bondera residue on objects/surfaces is by applying an adhesive remover such
as Goo Gone® or Goof Off® to the area. Bondera Tile MatSet is also prepackaged with a waxy paper
donut on each end that can be left on to eliminate sticking to objects when standing upright.
/


