Page is loading ...

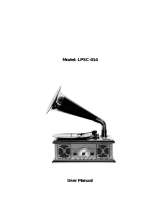
Record Player
Model: LPSC-027
Instruction Manual
PLEASE READ THIS MANUAL CAREFULLY BEFORE USE AND KEEP IT FOR
FUTURE REFERENCE

BEFORE USE
1. Choose a safe location and avoid placing the unit in direct sunlight or near any heat
source.
2. Avoid environments subject to vibration, excessive dust, cold or moisture.
3. Due to the risk of electrical shock, do not open the cabinet. Should a foreign object
accidentally find its way into the interior of the unit, contact your local dealer.
4. Do not attempt to clean the unit with chemical solvents as this might damage the
finishing. A clean, dry cloth is recommended for cleaning.
5. Keep this manual for future reference.
TURNTABLE PARTS:

1. Speakers hidden in the front feet
2. Turntable Platter
3. Slip Mat
4. Lift Lever
5. Turntable Arm Lock
6. Auto Stop Control Switch
7. Speed Selection Switch
8. Turntable Shaft
9. Turntable Arm
10. Indicator
11. Power ON/OFF Control and Volume Knob
12. Phono Stylus Cartridge
13. Removable Dust Cover
14. Hinge
15. RCA Output Jack
16. USB Jack
17. DC IN Jack
18. Function Mode Switch Button
PACKAGE INCLUDED:
The package includes below main unit and accessories. If anything missing, please feel free
1. LPSC-027 Vintage Turntable
2. Extra Stylus Replacement
3. Audacity Software CD
4. 12V 1A Power Supply Adapter
5. USB Cable
6. User Manual
7. Warrantee Card
8. 45RPM Adaptor

GETTING STARTED
Fix the dust cover onto the hinges.
Firmly and securely insert the DC plug of the adaptor to the DC IN Jack on the back of the
turntable.
Plug the adapter’s AC plugs into a power outlet.
PHONO MODE
1. Press down the Function Mode Switch Button and it is PHONO mode and the indicator
will become red color.
2. Raise the dust cover
3. Turn the Power ON/OFF Control and Volume Knob and the indicator will in red color.
4. Place a record on the turntable platter and set the player speed to match the record
speed.
NOTE: when playing a single (a 45 rpm record) and/or records with large centre holes,
use the 45 rpm adapter.
Remove the needle cartridge protective cover and unlock the tone arm lock from the tone arm
rest. Push the lift lever backward, the tone arm will gently rise up. Gently move the tone arm
to the desired position over the record and the turntable platter will begin to rotate when the
arm is moved towards it if Auto Stop Control Switch is ON. Release the tone arm onto the
turntable by pushing the lift lever forward and the vinyl record will begin to play.
If the Auto Stop Control Switch is turned ON, the record will stop automatically when finished.
If Auto Stop Control Switch is turned OFF, the record will NOT stop automatically when
finished.
Remark: AUTO STOP function applies to most 33RPM vinyl records. However, for very few
vinyl records, it will stop when it does not come to the end(in this case, turn the AUTO STOP
switch to OFF position and then it will continue playback), or it will not stop when it comes to
the end when AUTO STOP is ON.
5. Connect the RCA Output Jack to the external speaker system(with power amplifier built-in)
with the RCA cable (not provided) to enjoy vinyl records music on your speaker system.
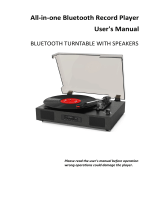
BLUETOOTH MODE
1. Press up the Function Mode Switch Button and it is BLUETOOTH mode. The indicator will
become blue color with flashing.
2. Turn on your Bluetooth function on your mobile phone or tablet PC and then search the
turntable player with its name LPSC-027 . After pairing and connection, the indicator will
become blue color without flashing, and you can play your music of your mobile phone or
tablet PC on this turntable player.
During paring and connecting process, if the mobile phone or tablet PC ask for password,

then type in 0000.
3. Turn the VOLUME CONTROL KNOB to adjust the volume.
Remark: the mobile phone or tablet PC's volume level also impact the overall volume; please
adjust that as well to have a satisfying sound
HOW TO REPLACE THE NEEDLE
To replace the needle, please refer to the instructions below.
Removing the needle from the cartridge
1. Place a screwdriver at the tip of the needle headshell and push downwards in the
direction shown in sketch “A”
2. Remove the needle headshell by pulling it forwards and pushing downwards.
Inserting the needle
1. Hold the tip of the needle headshell
and insert it by pressing in the
direction illustrated by”B”.
2. Push the needle headshell upwards
in the direction illustrated by “C”
until the needle locks into the tip
position.
RECORD YOUR VINYL TO YOUR APPLE COMPUTER
For MAC, please go to http://www.audacityteam.org and download the latest version of the
MAC software.
RECORD YOUR VINYL TO YOUR WINDOWS PC
1. Setup
Connect the USB cable with your turntable and your computer. No extra driver is
required.
2. Audacity Installation
Insert the installation CD. Your computer will auto-run the program. Follow the
instructions to complete installation.

If your computer does not auto run, click on the “Start” menu, select “Run” and choose the
CD located on your computer and run “Setup.exe”
3. Run Audacity Program
Double-click on the Audacity program and the Audacity interface window will be displayed
on your computer screen.
4. Playback Control Toolbar
Audacity will display a control toolbar for you to edit and manage your recordings.
5. Playing Your Record
Play the record you want to record by following the procedure described in the section
“LISTENING TO A RECORD”
6. Adjusting Input and Output
Adjust the output and input volume.

7. Recording
Select the RECORD button to start recording while your record is playing.
You will need to position the needle on the record for a few seconds before the track starts,
so that you select the RECORD button at the beginning of your track.
Start playback on the USB turntable. You will see the waveform of the audio on the screen
as it is recording. You will hear the audio coming from the output of your computers
soundcard.
No Audio? - go back to the preference menu and make sure you have “Software
Playthrough” selected and the speaker volume up on your computer.
Press Stop
SAVE YOUR FILE NOW by clicking on “File” followed by “Save Project”
Select the destination and file name for the project and click “Save”
Once finished recording, your screen should display your recording as below.

8. Editing your Recording
Audio Levels
Select your entire recording by selecting “Edit,” then “Select…” then click “All.”
Select the “Effect” menu and choose the desired effect. There are various types of effects
which are described further on Audacity’s website.
Selecting “Normalize” should be used to have Audacity auto-correct volume on the
recording.

Noise Reduction
Drag your cursor over a portion of the audio track which contains unwanted noise. We
recommend using the beginning or end of a track where there is no music and only
noise.

- Select “Effect” and then “Noise Removal” from the drop down menu to bring up the
“Noise Removal Window”
- Click “Get Noise Profile” and the window will close automatically.
- Select the entire track of audio you wish to remove noise from.
- Adjust the amount of audio that you would like to filter by moving the slider in the “Noise
Removal” window. We recommend using the minimum noise removal for optimum sound.
Note: you can preview the audio before removing the noise by clicking on ‘Preview’.

- Click on ‘Remove Noise’.
The Editing Toolbar
The Tools Toolbar

Before editing, you must make a selection of the recording you would like to cut or copy.
This will trim any music from the previous track, or any silence on the record between
tracks.
- To select the part you wish to cut, copy or paste, use the selection tool. If it is not
activated, do so by clicking on it in the toolbar.
- Press and hold the left mouse button while you drag the mouse to a marked area.
- This area is darker than the surrounding area of the clip. Note, even though you can
mark an area larger than or extending beyond the actual audio clip in the track, the
operations will only work on the actual clip. Playback however will work outside the
clip.
- Press the space bar to listen to the audio in the marked area.
- To extend or contract your selection, hold down the SHIFT button and click on the
area you wish your selection to extend or contract to.
- If you click at a spot that is on the right hand side from the middle of the current
selection, you will set the right hand boundary of your new selection.
Now you must cut your selection. Select “Cut” from the “Edit” menu.
Before the Cut After the Cut
Create a new file and paste your cut into the new file.

9. Exporting to MP3
To export your recording to mp3 format, select “Export As” from the “File” menu. You will
need to choose which format to export to. Choose “.mp3” as your file extension. When
exporting, do not choose your Desktop as the destination folder. You can only choose “My
Documents” folder. After export, you can move the files as desired.
For additional software information, please refer http://audacity.sourceforge.net for
detailed operating instructions.
TIPS FOR BETTER TURNTABLE PERFORMANCE
1. When opening or closing the turntable cover, handle it gently, gripping it either at the
centre or at each side.
2. Do not touch the needle tip with your fingers; avoid bumping the needle against the
turntable platter or record edge.
3. Frequently clean the needle tip-use a soft brush in a back-to-front motion only.
4. If you must use a needle cleaning fluid, use very sparingly.
5. Gently wipe the dust cover and turntable housing with a soft cloth. Use only a small
amount of mild detergent to clean the turntable and dust cover.
6. Never apply harsh chemicals or solvents to any part of the turntable system.

This device complies with part 15 of the FCC Rules. Operation is subject to the
following two conditions: (1) This device may not cause harmful interference, and (2)
this device must accept any interference received, including interference that may cause
undesired operation.
Any Changes or modifications not expressly approved by the party responsible for
compliance could void the user's authority to operate the equipment.
Note: This equipment has been tested and found to comply with the limits for a Class B
digital device, pursuant to part 15 of the FCC Rules. These limits are designed to
provide reasonable protection against harmful interference in a residential installation.
This equipment generates uses and can radiate radio frequency energy and, if not
installed and used in accordance with the instructions, may cause harmful interference
to radio communications. However, there is no guarantee that interference will not
occur in a particular installation. If this equipment does cause harmful interference to
radio or television reception, which can be determined by turning the equipment off and
on, the user is encouraged to try to correct the interference by one or more of the
following measures:
-Reorient or relocate the receiving antenna.
-Increase the separation between the equipment and receiver.
-Connect the equipment into an outlet on a circuit different from that to which the
receiver is connected.
-Consult the dealer or an experienced radio/TV technician for help.
/