Philips CID3282 User manual
- Category
- Car media receivers
- Type
- User manual
This manual is also suitable for
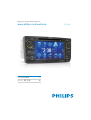
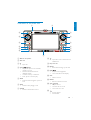
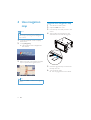
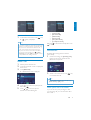
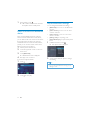
Philips CID3282 is an in-car entertainment system that can play audio and video from various sources, including DVDs, CDs, USB devices, and Bluetooth-enabled devices. It also has a built-in FM/AM radio and a navigation system. You can connect external devices, such as an iPod or MP3 player, to the AUX input. The system also supports hands-free calling and audio streaming from Bluetooth-enabled devices.
Philips CID3282 is an in-car entertainment system that can play audio and video from various sources, including DVDs, CDs, USB devices, and Bluetooth-enabled devices. It also has a built-in FM/AM radio and a navigation system. You can connect external devices, such as an iPod or MP3 player, to the AUX input. The system also supports hands-free calling and audio streaming from Bluetooth-enabled devices.


-
 1
1
-
 2
2
-
 3
3
-
 4
4
-
 5
5
-
 6
6
-
 7
7
-
 8
8
-
 9
9
-
 10
10
-
 11
11
-
 12
12
-
 13
13
-
 14
14
-
 15
15
-
 16
16
-
 17
17
-
 18
18
-
 19
19
-
 20
20
-
 21
21
-
 22
22
-
 23
23
-
 24
24
-
 25
25
-
 26
26
-
 27
27
-
 28
28
-
 29
29
-
 30
30
-
 31
31
-
 32
32
-
 33
33


Philips CID3282 User manual
- Category
- Car media receivers
- Type
- User manual
- This manual is also suitable for
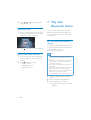
Philips CID3282 is an in-car entertainment system that can play audio and video from various sources, including DVDs, CDs, USB devices, and Bluetooth-enabled devices. It also has a built-in FM/AM radio and a navigation system. You can connect external devices, such as an iPod or MP3 player, to the AUX input. The system also supports hands-free calling and audio streaming from Bluetooth-enabled devices.
Ask a question and I''ll find the answer in the document
Finding information in a document is now easier with AI
Related papers
-
Philips CID3285 User manual
-
Philips CID3280 User manual
-
-
Philips CID3680 User manual
-
-
Philips CID3287/00 Quick start guide
-
-
-
Philips CID3283 Quick start guide
-
Philips CID3286/00 Quick start guide
Other documents
-
Cloud MX141M User manual
-
Bush CHT101DVD Quick Setup Manual
-
Doro PhoneEasy 623 Quick start guide
-
Pyramid TLM606NC User manual
-
HP V14 14-inch Portable Monitor Installation guide
-
Doro PhoneEasy 609 Quick start guide
-
LG SOUND 360 Owner's manual
-
Visual Land V-TOUCH PRO 905L Series User manual
-
Prima audison AP4.9 bit User manual
-