Page is loading ...

1
USER INSTRUCTIONS
ATLAS ADVANCE
P11437 Atlas Advance Transfer Aid
General Safety Warning
Please make sure that you read and follow these
instructions carefully. Keep these instructions in
a safe place for future reference.
Maximum User Weight
24st
155kg
1. INTENDED USE
To provide assistance when rising from and lowering into a seated position. It can also be used indoors to
complete short distance transfers and to ease manoeuvring of users in conned spaces.
The user must be able to support their own weight and maintain balance for prolonged periods of time. They
must also be able to grasp the handles and understand basic instructions.
2. SAFETY
Warning: The maximum user weight must not be
more than 155 kg (24 st).
• Always perform a risk assessment prior to use,
including safe moving distance.
• Do not use the product outdoors. Do not use in
shower or bathing rooms unless transferring from
the toilet.
• Only use on level surfaces and take care over
door thresholds. Do not use on deep pile carpets.
• Always plan the route to avoid obstacles prior
to use. The carer must have visibility around the
user when transporting.
• The carer must act as a counterbalance when
the user is rising and lowering. Ensure the carer’s
body weight is sucient to counterbalance the
user’s body weight.
• The brakes must be on at all times unless it is
being used to make a user transfer.
• Check the user’s feet are centrally located on the
platform.
• NRS recommend the user wears the optional
safety belt or safety strap at all times during
transfers.
• Do not leave the user unattended when using the
product.
• Not to be left in an area with unsupervised
children present.
3. UNPACKING
Remove the packaging and check all parts carefully.
Contact your supplier immediately if parts are
missing or damaged and do not try and assemble.
The product is packaged in three parts; the handle,
with knee pads attached, the standing platform and
two hand-wheels.
Contents:
1. Handle Assembly (with knee-pads) x 1
2. Base Assembly x 1
3. Hand-wheel x 2

2
4. ASSEMBLY/INSTALLATION
4.1 Rotate the Knee Pads:
Note: The knee pads must be rotated by 180
degrees before use.
1. Push the knee pad to rotate around the crossbar,
so that they are facing the front.
4.2 Attach the Handle to the Platform:
1. Position the handle over the standing platform
making sure the ‘FRONT’ label on the handle
assembly is facing the user side.
2. Slot the handle ends onto the metal pins on both
sides.
3. Insert the 2 x hand-wheels and saddle washers.
4. Tighten the hand-wheels by turning in a clockwise
direction.
Note: The hand-wheels will not tighten if the handle
has been inserted the wrong way around (refer to
Step 1).
5. With one foot on the platform, rock the handle to
check it is fully tight.
6. Re-tighten the hand-wheels if necessary.
Note: Check the handle and hand-wheel tension
before each use.
4.3 Adjust the Knee Pad Height:
Note: The top of the knee pads should sit just below
the users knees.
1. Pull the two plungers to release the knee pad
bracket.
2. Slide the knee pad bracket up or down the handle
frame to the required height.
3. Release the two plungers and move the bracket
until it locks into position.

3
4.4 To adjust the horizontal and angular position
of the knee pads:
1. Slide the pads left and right along the crossbar.
2. Push the knee pad to rotate around the crossbar.
5. USE
5.1 Operating the Brakes
Note: The brake levers are linked, only one side
needs to be pressed.
5.1.1 Locking the Brakes
1. Push down rmly on the red section of the brake
lever on either side.
5.1.2 Releasing the Brakes
1. Unlock the brakes by pushing forward on the
green section of the brake lever on either side.
5.2 Using the Transfer Aid to rise to a standing
position:
1. Position the transfer aid at the feet of the seated
user. Allow the user to place their feet on the
platform.
2. Slide the transfer aid forward until the knee pads
touch the users shins.
3. Position the knee supports so the top of the pads
sit just below the users knees. Refer to Section
4.3 for the adjustment of the knee pad bracket.
4. Lock the brakes (refer to Section 5.1.1).

4
5. Stand behind the aid, facing the user, with one
foot on the platform to counterbalance the user
and hold the handles with both hands.
6. The user should then grasp the lower horizontal
bar.
7. The user should use the horizontal bars to
progressively raise themselves to a standing
position.
Note: Make sure the user takes care to avoid
bumping their head against the handle.
8. Once the user is standing, check they are
comfortable and that their weight is centred over
the platform.
5.3 Using the Transfer Aid to transfer a user over
short distances:
1. Unlock the brakes (refer to Section 5.1.2).
2. Before moving the user make sure they are
holding the handle with both hands and standing
upright with their weight centred over the platform.
3. You must take care when pulling the transfer aid
backwards as there is a risk of hitting unseen
obstacles.
4. Ideally move the user to the required position by
pushing the transfer aid in the forward direction
as this enables the carer to see the route ahead.
5. When the new destination is reached lock the
brakes (refer to Section 5.1.1).
5.4 Using the Transfer Aid to lower to a seated
position:
1. Position the user in front of the seat.
Note: The user should be able to feel the edge of
the seat etc. against the back of their legs.
2. Lock the brakes (refer to Section 5.1.1).
3. Stand behind the aid, facing the user, with one
foot on the platform to counterbalance the user
and hold the handles with both hands.

5
4. The user should use the horizontal bars to
progressively lower themselves to a seated
position.
5. Once the user is seated, unlock the brakes (refer
to Section 5.1.2).
6. Wheel the transfer aid out of the way of the
seated user.
6. USING THE SAFETY BELT
The safety belts provide additional security to the
user during transfers. They can also be used to
assist in the raising and lowering of the user.
The safety belt fastens securely round the users hips
and hooks onto the Transfer Aid Handle.
Please refer to the user instructions supplied with
the safety belt.
P11449: Small 90cm to 105cm (35” to 41”)
P11450: Medium 100cm to 120cm (39” to 47”)
P11462: Large 115cm to 140cm (45” to 55”)
7. USING THE SAFETY STRAP
The safety straps provide additional security to the
user during transfers. They can also be used to
assist in raising and lowering the user.
The safety strap is specically recommended when
using the product to raise or lower the user onto a
toilet.
Please refer to the user instructions supplied with
the safety belt.
P64090: Small / Medium
P64107: Large / Extra Large
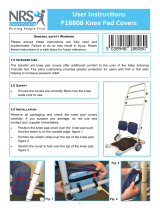
8. KNEE PAD COVERS
Note: Optional knee pad covers are available.
These t over the knee pads and provide additional
padding for users with frail skin.
P18808 : Knee Pad Covers
9. CLEANING
1. Clean regularly using a general purpose, neutral
detergent and warm water.
2. Please check the suitability of the cleaning
product before use. Do not use abrasive cleaners
or cloths as this will permanently damage the
surface and invalidate any warranty.
3. To disinfect, wipe with a dilute bleach solution
and rinse thoroughly with fresh water.
4. This product is suitable for thermal
decontamination and can be steam cleaned or
autoclaved on cleaning cycles up to 80°C.
5. Allow product to fully dry prior to use/storage.

6
10. MAINTENANCE
1. Check the handle frame xings are tight (refer to
section 4.2).
2. Check that the brakes are operational by applying
the brake lever and attempt to push the transfer
aid.
3. Check the knee pad bracket slides up and
down the handle smoothly and securely locks in
position. Check the knee pads are securely xed.
4. Carefully lower the transfer aid on its side.
5. Check the castors and wheels are securely tted
and are free to rotate. Remove any build-up of
dirt / debris.
6. Any suspected faults or damage should be
reported to the supplier immediately and the
product taken out of use.
7. Store the Transfer Aid on a at surface with the
brakes locked, out of reach of children.
11. SPARE PARTS
Full set of spares available to enable the product
to be repaired / refurbished:
P11539: Pair of Knee Pads
P11541: Pair of Harness Fixing Knobs
P11565: Set of Castors
P11577: Pair of Wheels
P11589: Brake Assembly
P11553: Plastic Bumpers
P11590: Handle Hand-wheels x 2
See our website for more details - see the end of this
document.
12. PRODUCT DISPOSAL
This product should be thoroughly cleaned prior to
disposal.
This product is manufactured from metal and plastic
and can be disposed of through Local Authority
Household Waste and Recycling Centres or through
Local Trade Waste Collectors.
13. PRODUCT GUARANTEE
NRS Healthcare guarantee this product for a period
of 24 months, from the date of purchase, against
faulty materials and workmanship.
This guarantee does not cover abuse, interference
or tampering with any part of the products. Issues
arising from fair wear & tear and customer misuse
are not covered.
This guarantee covers domestic use only. If the
product is used in commercial or semi-commercial
settings such as care homes, schools, rental or
communal accommodation etc, the guarantee is
valid for one year only. Consumable parts are also
guaranteed for one year only.
Any guarantee issued by NRS Healthcare does not
aect your statutory rights.
NRS HEALTHCARE Sherwood House,
Cartwright Way, Forest Business Park, Bardon
Hill, Coalville, Leicestershire, LE67 1UB, UK.
NRS HEALTHCARE 4C Altona Road, Blaris
Industrial Estate, Lisburn, Co Antrim,
Northern Ireland BT27 5QB
Tel: Customer Services: +44 (0)345 121 8111 Email: [email protected]
NRS Healthcare is a leading supplier of community equipment and daily living aids.
Please visit one of our websites to view our full range of products:
www.healthcarepro.co.uk or www.completecareshop.co.uk
P11437-UI-5 16-09-2023
/