ELETTRIC ANDELECTRONICEQUIPMENT FORCARAVANING ANDBOATING
INSTRUCTIONSD’EMPLOI
USER’SMANUAL
ISTRUZIONID’USO
BEDIENUNGSANLEITUNG
PC220
PC220
Ed.09/2010cod.000384Rev.02


ENGLISH
GB
GB
MAIN PARTS OF THE ELECTRICAL SYSTEM ........14
ADVICEAND CHECKS ..........................14
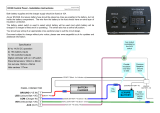
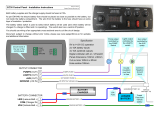
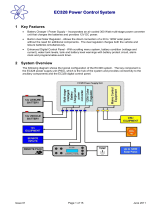
CONTROLPANEL “PC220” .......................15
15
16
17
................................18
DISTRIBUTION BOX “DS300” .....................20
20
21
22
INSTALLATION “PC220” .........................41
WIRING DIAGRAM “PC220” ......................42
Descriptions ................................
Main visualizations ...........................
Functions...................................
User’s setting
Protection fuses .............................
Connections ................................
Electrical system functions .....................
ELEMENTI PRINCIPALI DEL SISTEMAELETTRICO...5
CONSIGLI E VERIFICHE .........................5
QUADRO DISTRIBUZIONE “DS300” ...............11
PANNELLO COMANDO “PC220”...................6
6
7
8
9
11
12
13
SCHEMAD’INSTALLAZIONE “PC220” ..............41
SCHEMAELETTRICO “PC220”....................42
Descrizione .................................
Visualizzazione principale .....................
Funzioni....................................
Programmazione utente .......................
Fusibili di protezione .........................
Collegamenti . ..............................
Funzioni del sistema ..........................
ITALIANO
I
I

FRANÇAIS
F
F
ELEMENTS PRINCIPAUX DU SYSTEME ELECTRIQUE 32...
CONSEILS ET CONTROLES......................32
PANNEAU DE COMMANDE “PC220” ...............33
33
34
35
.....................36
TABLEAU DE DISTRIBUTION “DS300”..............38
38
39
40
INSTALLATION “PC220” .........................41
WIRING DIAGRAM “PC220” ......................42
Descriptions ................................
Visualization ................................
Fonctions...................................
Programmation utilisateur
Fusibles de protection ........................
Branchement ...............................
Fonctions...................................
HAUPTELEMENTE DER ELEKTRISCHENANLAGE
RATSCHLÄGE UND CONTROLLEN
KONTROLLPANEEL “PC220” .....................24
Beschreibung 24
25
26
27
VERTEILUNGSMODUL
29
30
31
EINBAUPLAN “PC220” ..........................41
ELEKTRISCHER PLAN “PC220” ...................42
...............................
Hauptanzeige ...............................
.................................
Kundenprogrammierung ......................
................................
Anschlüsse .................................
.................................
...23
................23
“DS300” ..................29
Funktionen
Sicherungen
Funktionen
DEUTSCH
D
D

ELEMENTIPRINCIPALIDEL SISTEMA ELETTRICO
PANNELLOCOMANDO
QUADRODIDISTRIBUZIONE12V“DS300”
SONDAELETTRONICA
SONDA CONVITI“SSP”
BATTERIA SERVIZI“B2”
BATTERIA MOTORE“B1”
-comandoutenze,testbatterie,testserbatoi,testtemperaturee
orologio.
-relègenerale,relèparallelobatterie(12V-70A),
relèfrigo,relèpompa,dispositivodiricaricabatteriamotore,fusibilidiprotezione.
- misura il contenuto del serbatoio acqua potabile, visualizzazione in “%”.
-segnalazionedipienodelserbatoiodell’acquadirecupero.
-alimentatutteleutenzedeiservizi.
.
IMPORTANTE: Ogni intervento sull’impianto elettrico deve essere eseguito solo da
personale specializzato. Prima di eseguire manutenzioni scollegare la batteria e la linea di
alimentazione 230V.
BATTERIE
CARICABATTERIE
SONDE SERBATOI
QUADRO DISTRIBUZIONE 230V
FUSIBILI
Osservare attentamente le istruzioni di manutenzione e d’uso del produttore delle batterie.
L’acido contenuto nelle batterie è velenoso e corrosivo. Evitare qualsiasi contatto con la pelle e con
gli occhi.
Se la batteria è completamente scarica deve essere ricaricata per almeno 10 ore. Nel caso sia
scarica da più di 8 settimane può subire danni.
Controllare periodicamente il livello del liquido della batteria (batterie con acido); le batterie al GEL
non richiedono manutenzione ma devono essere ricaricate costantemente.
Verificare il corretto serraggio dei morsetti di collegamento e togliere le incrostazioni di ossido.
Nel caso venga tolta la batteria servizi, isolare il polo positivo (questo per evitare corto-circuiti
durante una casuale messa in moto del motore).
In caso di soste prolungate la batteria dei servizi deve essere scollegata o ricaricata regolarmente.
Il carica batterie deve essere installato in luogo asciutto e aerato.
Non lasciare l’acqua nei serbatoi per lunghi periodi onde evitare incrostazioni, in particolar modo nel
serbatoio di recupero.
Prima di togliere il coperchio controllare che la spina della rete 230V sia scollegata.
Per evitare danni all’apparecchio assicurarsi che i connettori siano correttamente collegati.
Per togliere alimentazione a tutto l’impianto 230V posizionare l’interrutt. generale 230V su “0”
(OFF).
Collegare e scollegare la rete esterna 230V solamente con interruttore generale spento.
In caso di interruzione automatica dell’interruttore, individuare il guasto prima di riattivare
l’alimentazione dell’impianto.
Sostituire i fusibili difettosi solo dopo aver individuato e rimosso la causa del guasto.
In caso di sostituzione di fusibili rispettare il valore di amperaggio previsto.
L’installazione di questo apparecchio deve essere eseguita solamente da personale tecnico
specializzato.
In caso di un utilizzo improprio dell’apparecchiatura, ne decade la garanzia ed il produttore declina
ogni responsabilità per danni a cose o persone.
Non eseguire mai manutenzioni con la rete 230V collegata.
Non ostruire le prese d’aria poste sul coperchio ed assicurare un’adeguata ventilazione.
Prima di scollegare l’apparecchio dalla rete 230V spegnere l’interruttore di sicurezza.
CONSIGLIEVERIFICHE
I
I
5
ITALIANO

1)
2)
3)
4)
5)
6)
7)
Pulsante “TEMP/PROG” per il controllo delle temperature interna e esterna e per la programmazione del
sistema (vedi PROGRAMMAZIONE).
Pulsante per il controllo della tensione della batteria servizi (B2), della batteria motore (B1) e per la
regolazione dei parametri programmabili (vedi PROGRAMMAZIONE).
Pulsante per il controllo in “%” del livello del serbatoio dell’acqua potabile, per la funzione di carico del
serbatoio potabile (vedi funzione di CARICO SERBATOIO POTABILE) e per la regolazione dei parametri
programmabili (vedi PROGRAMMAZIONE).
Pulsante per l’accensione e lo spegnimento della pompa.
Pulsante generale on/off (per accendere o spegnere premere per 2 secondi): all'accensione il display
effettua un test di funzionamento visualizzando tutti i simboli (compresi quelli non utilizzati).
Il corrispondente led è verde quando il pannello di comando è acceso, è rosso in presenza di un'allarme
(batterie, serbatoi, ecc.).
Pulsante di comando luce esterna, si spegne automaticamente con il motore in moto.
Pulsante di comando delle luci e della stufa.
NB: L’orologio prende alimentazione dalla batteria servizi (B2).
Qualora la batteria B2 fosse disconnessa, l’orologio è in grado di proseguire il funzionamento, senza
visualizzazione, per circa 2 settimane.
DESCRIZIONE
I
I
6
ITALIANO
PANNELLOCOMANDO“PC220”
21 333 6 74 5

I
I
7
ITALIANO
1)
2)
3) .
4)
5)
6)
7)
8)
9) i
10)
11)
12)
Indica l’intervento del dispositivo di minima tensione.
Indica il collegamento della rete 230V.
Indica l’attivazione del parallelo delle batterie con motore in moto
Indica che il motore è in moto.
Visualizzazione a barra dello stato del serbatoio potabile.
Visualizzazione a barra dello stato della batteria servizi “B2”.
Indica il test del serbatoio dell’acqua potabile, il lampeggio indica l’allarme di serbatoio vuoto.
Indica il test della batteria servizi (B2), il lampeggio indica l’allarme di batteria scarica.
Indica l'allarme d serbatoio dell’acqua di recupero pieno (simbolo lampeggiante).
Indica il test della batteria motore (B1), il lampeggio indica l’allarme di batteria scarica.
Indicatore digitale dell’orologio e del test richiesto.
Indicatore dell’unità di misura e del tipo di visualizzazione.
2 3 4
6
5
7 8 9 10
11
12
1
VISUALIZZAZIONEPRINCIPALE

I
I
8
FUNZIONI
ALLARMEBATTERIA MOTORE(B1)
ALLARMIBATTERIA SERVIZI(B2)
CONTROLLOMINIMA TENSIONE(SALVA BATTERIA)
SERBATOI
a)
b)
CARICOSERBATOIOPOTABILE
ALLARMESERBATOIOPOTABILE
ALLARMESERBATOIORECUPERO
OROLOGIODIGITALE
SPEGNIMENTO AUTOMATICODELLA LUCEESTERNA
TEMPERATURE
Quandolabatteriamotoreraggiungeunatensioneinferiorea12Vsiattivaautomaticamentel’allarme
dibatteriaautoscaricaconilsimbolorif.10lampeggiante.
L'allarmesidisattivacontensionesuperiorea12.5V.
Quandolabatteriaserviziraggiungelatensionedi11.5Vsiattivaautomaticamentel’allarmedibatteria
serviziriserva,segnalatovisivamenteconilsimbolorif.8lampeggianteeacusticamenteconunsuono
breve.
Quandolabatteriaserviziraggiungelatensionedi10.5Vsiattivaautomaticamentel’allarmedibatteria
serviziscarica,segnalatovisivamenteconilsimbolorif.8lampeggianteeacusticamentecondue
suonibrevi.
Gliallarmisidisattivanocontensionesuperiorea12.5V.
Undispositivoelettronicodiprotezionestaccaleutenzea12Vquandolabatteriaservizisiscarica.
Intervienea10Vedisabilita:pompa,gruppoluci,luceesternaestufa
L’allarmevienesegnalatovisivamenteconilsimbolorif.1.
E'possibileripristinaretutteleutenzeperunminutopremendoilpulsanteON/OFF(rif.5pannello
comando).
Conunatensioneinferiorea9.5Vilpannellodicomandosispegneautomaticamente.
Leutenzevengonoripristinateautomaticamentequandolatensioneèmaggioredi13.5V.
Sonoesclusedaquestodispositivo,lefunzionifrigo,gradino,l'alimentazionedelgaseleutenze
alimentatedirettamentedaB2.
Serbatoiopotabileconsondaelettronica:lavisualizzazioneavvienesiain“%”conindicazione
numerica(stepdel10%)siagraficamenteconl'indicatorerif.5.
Serbatoiorecuperoconsondaavite.
Questafunzionevieneutilizzataduranteilcaricodell’acquadelserbatoiopotabileedindicaduranteil
riempimento,illivelloraggiuntodall’acqua.
Perattivarequestafunzionepremereperpiùdi2secondiiltastotestserbatoirif.3finoaquando
apparelavideata“caricoacqua”.
Ilpannelloemettedeisuoniperavvisarel’imminenteriempimentodelserbatoio:
unsuonobreveal75%,duesuonibreviall’85%eunsuonolungoal95%.
Perusciredaquestafunzionepremereunodeipulsantitestrif.2o3.
L’allarmeintervienequandoillivellodell’acquapotabilescendesottoillivellodel10%dellasua
capacitàesispegneautomaticamentequandoillivellosuperail20%.
L’allarmevienesegnalatoacusticamente(soloamotorespento)evisivamenteconilsimbolorif.7
lampeggiante.
L’allarmeintervienequandoillivellodell’acquadirecuperoraggiungeillivellodelsensoreavite
L’allarmevienesegnalatoacusticamente(soloamotorespento)evisivamenteconilsimbolorif.9
lampeggiante.
Perlaregolazionedell’orologiovedi“programmazione”.
Undispositivoelettronicospegneautomaticamentelaluceesternaconmotoreacceso.
-letemperatureint./est.sonomisuratetramitesensoripostiall’ internoedall’ esternodell’ abitacolo.
-laprecisionedelvaloreditemperaturaèdi±1°C.

I
I
9
ITALIANO
s
s
s
s
s
Premere per più di 2 secondi il pulsante “PROG” rif. 1 dalla videata principale orologio per entrare in
programmazione .
Selezionare, premendo i pulsanti frecce rif. 2 e 3, il menu desiderato e confermare con il pulsante “PROG”
rif. 1;
- Selezionando “TIME” si entra nel menu per modificare i soli parametri orologio.
- Selezionando “FULL” si entra nel menu completo.
Variare i parametri desiderati utilizzando i pulsanti frecce rif. 1 e 2.
Per uscire dalla programmazione salvando le modifiche effettuate premere ripetutamente il pulsante
“PROG” rif.1 fino all'uscita automatica “SAVE”.
Per uscire dalla programmazione senza salvare la modifica attendere per 20 secondi l’uscita automatica
senza premere alcun pulsante.
PROGRAMMAZIONEUTENTE
OROLOGIO
Regolazionedell'orologio.
-ORA (lampeggiante)
-MINUTI(lampeggiante)
“TIME”
OROLOGIO
Regolazionedell'orologio.
-ORA (lampeggiante)
-MINUTI(lampeggiante)
“FULL”
COLORERETROILLUMINAZIONE
Sceltacoloreretroilluminazione.

I
I
10
ITALIANO
ALLARMI ACUSTICI
Attivazione/disattivazionedegliallarmiacustici.
-ON(attivazione)
-OFF(disattivazione)
TEMPERATURE
Taraturadellatemperaturainternaconstepdi0.5°C.
Taraturadellatemperaturaesternaconstepdi0.5°C.
TARATURA VOLTMETRI
Taraturadellatensionedellabatteriaservizi"B2".
Ilvalorepuòessereregolatoperunmassimodi±0.5V,
constepdi0.1V.
Taraturadellatensionedellabatteriaauto"B1".
Ilvalorepuòessereregolatoperunmassimodi±0.5V,
constepdi0.1V.

1)
2)
3)
4)
5)
Fusibile5A perl'alimentazionedellaluceesterna.
Fusibile10A perl'alimentazionedellapompaacqua.
Fusibile10A perl'alimentazionedellastufa/boiler.
Fusibile20A perl'alimentazionedelgruppoluci“A”.
Fusibile20A perl'alimentazionedelgruppoluci“B”.
6) Fusibile30A perl'alimentazionedelfrigo12V AESetrivalente.Ilfrigotrivalentesispegne
automaticamenteconilmotorefermo.
7)
8)
9)
10)
11)
12)
Fusibile20A perl’alimentazioneausiliaria(regolatoresolare),collegatadirettamenteallabatteria
servizi(B2).
Fusibile25A perl’alimentazionedelgradinoelettrico,collegatadirettamenteallabatteriaservizi(B2).
Fusibile3A perl’alimentazionedelgas(frigo,cucina,valvolaboilerecc.),collegatadirettamentealla
batteriaservizi(B2).
Fusibile3A perlaprotezionedell’uscitaOUT D+simulata.
Collegamentofrigo AES-Ponteperl’esclusionedelrelèfrigotrivalente,servepercollegareilfrigo
AESdirettamenteallabatteriaservizi(B2).
UscitasimulataD+alternatoreperilcomandodi:gradinoelettrico,frigo AES,valvolascaricoelettrica,
rientroantennaelettrica.
5
10 20 30 25
10 20 20 3
AU X
B
A
1 3 5 7 9
2
4 6 8
-B2 +B2 +B1
1 2 3 4
1 2
1
4
7
10
2
5
8
11
3
6
9
12
1
9
8
16
1
4
2
5
3
6
1
4
7
2
5
8
3
6
9
1
2
19
16
17
11
18
14
15
13
22
21
20
12
3
10
QUADRODIDISTRIBUZIONE“DS300”
FUSIBILIDIPROTEZIONE
I
I
11
ITALIANO

COLLEGAMENTI
I
I
12
ITALIANO
SERBATOIORECUPERO
Dacollegareallasondaavitidelserbatoiorecupero.
1
2
NERO
13
SERBATOIOPOTABILE
Dacollegareallasondadelserbatoiopotabile.
1
2
3 4
NERO
14
1
9
8
16
PANNELLOCOMANDO
Dacollegarealconnettore16polidelpannellocomando.
NERO
15
SEGNALI
1) +entratasegnalecontattochiaveavviamentomotore
2) +entratasegnale“S”provenientedalcaricabatterie
1
2
BIANCO
16
FUSIBILE
7
6
8
9
1) +uscitaaux(regolatoresolare),direttain“B2”.
2-3)+uscitafrigotrivalente/ AES
4) +uscitagradinoelettrico,direttain“B2”.
5-6) +uscitautenzeagas(frigo,cucina,valvolaboiler,ecc..),
direttain“B2”.
UTENZE
1
4
2
5
3
6
BIANCO
17
FUSIBILE
3
2
1
4
5
1) +uscitastufa/boiler,dipendedalpulsanteluci/stufa.
2) +uscitapompaacqua,dipendedalpulsantepompa
3) +luceesterna,dipendedalpulsanteluceesterna
4-5-6) +uscitagruppoluci“A”,dipendedalpulsanteluci/stufa.
7-8-9) +uscitagruppoluci“B”,dipendedalpulsanteluci/stufa.
UTENZE
1
4
7
2
5
8
3
6
9
BIANCO
18
MASSE
Massedacollegarealnegativodelleutenze.
BIANCO
19
BATTERIA MOTORE
Dacollegarealpolopositivodellabatteriamotore.
MASSA
Dacollegarealpolonegativodellabatteriaservizi(B2)oaltelaiodelveicolo.
BATTERIA SERVIZI
Dacollegarealpolopositivodellabatteriaservizi.
22
20
21

RICARICA BATTERIA AUTO(B1)
RICARICA BATTERIA SERVIZI(B2)
a)
b)
c)
Concaricabatterieinfunzione,undispositivoelettronicoconsenteunaricarica(max2A)dellabatteria
motore(B1),ilsistemaprovvedeadareprioritàdicaricaallabatteriaservizi(B2).
conalternatore:tramiteilrelèseparatorequandoilmotoreèinmoto.
conrete230V:sistemaatamponetramiteilcaricabatterie.
conpannellosolare:tramiteregolatoresolare.
SEPARATOREELETTRONICODIBATTERIE
Undispositivoelettronicocomandatodal+chiaveavviamentomotore,inserisceilparallelobatteriecon
tensionebatteriaauto>di13.5Velodisinserisceconchiaveavviamentospentaocontensione<di
12.5V.QuestodispositivofunzionasoloselabatteriaserviziB2ècollegata.
Questodispositivocomandairelèdelleutenzedipendentidall’uscita+OUT D+(frigotrivalente,luce
esterna,rientroantenna,ecc...).
Incasodiinstallazionediapparecchichenecessitanoladisattivazioneinmodopermanentemente
delrelèparallelobatterie(rif.1)ènecessariorimuoverelaresistenzaR37(rif.2).Larimozionedella
resistenzapuòessereeffettuataconunaforbice/tronchesinoprestandolamassimaattenzioneanon
rovinarelepistesottostanti.
NB:
FUNZIONIDEL SISTEMA
I
I
13
ITALIANO
331
2

MAINPARTSOF THEELECTRICAL SYSTEM
CONTROL PANEL
12VDISTRIBUTIONBOX“DS300”
.
ELECTRONICTANKPROBE
TANKPROBEWITHSCREWS“SS/P”
LEISUREBATTERY “B2”
CARBATTERY “B1”
-mains’ control,batterytest,tanktest,temperaturetestandclockfunction.
-mainrelais,batteryparallelrelais(12V-70A),fridge
relais,pumprelais,carbatteryrechargingdevice,protectionfuses
-itmeasuresthecontentofthewatertanks,visualizationin“%”.
-signalizationoffullwastewatertank.
-itgivespowertoalltheusers.
.
IMPORTANT: Maintenance interventions on the electric implant must be carried out by
specialized personnel. Before carrying out maintenances disconnect the battery and the
230V alimentation line.
BATTERIES
BATTERY CHARGER
TANK PROBES
230V CUT-OUT BOX
FUSES
Read with care the instructions of use and maintenance of the batteries.
The acid kept in the batteries is poisoning and corrosive.Avoid any contact with skin and eyes.
If the battery is completely discharged it needs recharging for almost 10 hours. If discharged for
more than 8 weeks it may be damaged.
Check periodically the level of the liquid of the battery (with acid); the GELbattery does not need any
maintenance but a countinuous recharging.
Check the correct tightening of the connection binding screw and brush off the oxyde.
If the leisure battery is removed, isolate the positive pole (in order to avoid short-circuits during an
accidental car engine starting).
In case of a longer stop, the services battery has to be disconnected or recharged regularly.
The battery charger must be installed in a dry and ventilated place.
Never let water in the tanks for long time, in order to avoid foulings, especially in the waste water
tank.
Before taking away the cover, check that the 230V socket is disconnected.
In order to avoid damages to the box, check the correct tightening of the connections.
In order to cut power to the whole 230V system, please take care that the 230V main switch must be
on the “0” (OFF) position.
Connect and disconnect the external 230V net only when the main switch is off.
In case of automatic switch break, find the damage before giving power again to the electrical
system.
Replace the fuses after finding out the real cause of the damage only.
When the fuses are replaced respect the value of the amperage established.
The installation of this device must be carried out by specialized technicians.
In case of battery charger’s misuse, the guarantee falls off and the manufacturer declines all
responsibility for damages to people and things.
Do not carry out any maintenance when the battery charger is connected to the 230V power supply
net. Do not cover air intakes and assure an appropriate ventilation.
Before disconnecting the battery charger from 230V power supply, turn the security switch off.
ADVICE ANDCHECKS
GB
ENGLISH
GB
14

1)
2)
3)
4)
5)
6)
7)
“TEMP/PROG”buttontocheckbothinternalandexternaltemperatureandforsystemsetting(see
SETTING).
Buttontocheckthecarbattery(B1)andtheleisurebattery(B2)andfortheregolationofthe
programmableparameters’ setting(seeSETTING).
Buttonforthecontrolofdrinkwatertank(in%),fordrinkingwaterrefillingfunctionoperation(see
“DRINKWATER TANKREFILLING”function)andfortheregolationoftheprogrammableparameters’
setting(seeSETTING).
Buttontoswitchthepumponandoff.
On/offmainbutton(toturnon/offpressfor2seconds):atthestart-upthedisplaycarriesouta
functioningtestandshowsallsymbols(includingunusedsymbols).
Awninglightbutton;thisawninglightswitchesautomaticallyoffwhenyoustartuptheengine.
Buttontoswitchthelightsandtheheating/boileronandoff.
IftherelevantLEDisgreenthecontrolpanelison,ifitisredanalarmison(batteries,tanks,etc.).
NOTE: Thewatchissuppliedfromtheleisurebattery(B2).
ShouldB2bedisconnected,thewatchisabletokeepworking,withoutvisualization,forabout2
weeks.
CONTROL PANEL“PC220”
DESCRIPTIONS
GB
ENGLISH
GB
15
21 333 6 74 5

GB
ENGLISH
GB
16
1)
2)
3)
4) .
5)
6)
7)
8)
9)
10)
11)
12)
It shows that the minimal voltage device has switched on.
It displays that the 230V net is connected.
It displays the batteries’paralleling when engine is on.
Drink water tank status display.
“B2” leisure battery status display.
It shows the drink water tank test, the blinking indicates the empty tank alarm.
It shows the leisure battery (B2) test, the blinking indicates the discharged battery alarm
that
It shows the car battery (B1) test, the blinking indicates the discharged battery alarm.
It shows the unit of measure
It indicates that the engine is on
It shows the waste water tank test, the blinking indicates the waste water tank is full
Digital display of the clock and of the required test.
and display kind.
2 3 4
6
5
7 8 9 10
11
12
1
MAINVISUALIZATIONS

GB
ENGLISH
GB
17
FUNCTIONS
CARBATTERY ALARM(B1)
LEISUREBATTERY ALARM(B2)
Whencarbatteryvoltagegetsunder12V,MotorBatteryDischargealarmgoesonandthesymbolref.
10startsblinking. Alarmgoesoffwhenthevoltagegetsover12.5V.
Whenleisurebatteryvoltagegets11.5VtheLeisureBatteryReservealarmgoesautomaticallyon,the
symbolref.8startsblinkingandyouhearashortbeep.
Whentheleisurebatteryvoltagegets10.5V,theLeisureBatteryDischargealarmgoesautomatically
on,thesymbolref.8startsblinkingandyouheartwoshortbeeps. Alarmsgooffwhenthevoltagegets
over12.5V.
MINIMUMVOLTAGECONTROL (BATTERY PROTECTION)
TANKS
a)
b)
DRINKWATERTANKREFILLING
DRINKWATERTANK ALARM
WASTEWATERTANK ALARM
DIGITAL CLOCK
AWNINGLIGHT AUTOMATICTURNOFF
TEMPERATURE
Theelectronicbatteryprotectiondevicecutsoffthe12Vuserswhenleisurebatteryreaches10Vand
disables:pump,lights,awninglight,andstove.
Symbolref.1isthevisualalarmsignal.
Itispossibletoreactivateallusersforoneminutebypressingtheon/offbutton(ref.5oncontrol
panel).
Thecontrolpanelautomaticallyturnsoffwithavoltagelowerthan9.5V.
Usersareautomaticallyreactivatedwhenvoltageisbiggerthan13.5V.
Thisdevicedoesn’tcontrolthefunctions:fridge,stepandtheauxiliaryexit(directB2)
Drinkwatertankwithelectronicprobe:levelsaredisplayednumericallyin%(stepsof10%)and
graphicallybythelevelguageref.5
Wastewatertankwithscrewprobe.
Thisfunctionisusedduringthedrinkwaterrefillingandshowsthewaterlevelduringrefilling.
Toactivatethisfunctionpressthe“PROG”buttonref.1formorethan2seconds,untilthe“water
refilling”screenisdisplayed.
Thecontrolpanelbeepsinordertowarnthattankisgettingfilled:oneshortbeepat75%,twoshort
beepat85%andalongbeepat95%.
Toexitthisfunctionpressbuttonsref.2and3.
Alarmturnsonwhendrinkwaterlevelislowerthan10%ofthetankcapacityandautomaticallyturns
offwhenlevelexceeds20%.
Alarmisshownacoustically(whenengineisoff)andvisuallywiththesymbolref.7blinking.
Alarmturnsonwhenthewastewaterlevelexceedsthescrewsensorlevel.
Alarmisshownacoustically(whenengineisoff)andvisuallywiththesymbolref.9blinking.
Tosetclocksee“SETTING”.
Anelectronicdeviceswitchesofftheawninglightwhenengineisturnedon.
-Bothint.andext.temperatureshaveasensor,whichisplacedinsideoroutsideofthevehicle.
- Theprecisionofthetemperaturevalueis±1°C.

GB
ENGLISH
GB
18
s
To enter the set mode, press the button (ref.1) for more than 2 seconds from the main clock
screen.
1
1
“PROG”
Select, by pushing the arrow keys ref. 2 and 3, the setting menu you want to operate and then confirm by
pushing the “PROG” button ref. 1;
- by selecting “TIME” you operate the menu to set only the parameters clock.
- by selecting “FULL” you operate the menu to set all parameters.
By using the arrow keys ref. 2 and 3 you can modify the setting of the parameters.
Confirm the setting by pushing the “PROG” button (ref. ), you then go automatically to next parameter.
Press the “PROG” button (ref. ) more than once to save the settings and exit the setting mode.
To exit without saving wait 20 seconds without pressing any key.
s
s
s
s
s
USER SSETTING’
CLOCK
Clocksetting
HOURS(blinking)
MINUTES(blinking)
-
-
“TIME”
BACKLIGHTCOLOUR
Backlightcolourselection
CLOCK
Clocksetting
HOURS(blinking)
MINUTES(blinking)
-
-
“FULL”

GB
ENGLISH
GB
19
ACOUSTIC ALARMS
Activation/Deactivationofacousticalarms
ON(activation)
OFF(deactivation)
-
-
TEMPERATURES
Settinginternaltemperature,step0.5°C
Settingexternaltemperature,step0.5°C
VOLTMETERSSETTING
Settingoftheleisurebattery“B2”voltmeter.
Max.value+/-0.5V,step0.1V.
Settingofthecarbattery“B1”voltmeter.
Max.value+/-0.5V,step0.1V.

1)
2)
3)
4)
5)
6)
7)
8)
9)
10)
11)
12)
5A fusetogivepowertotheawninglight.
10A fusetogivepowertothewaterpump.
10A fusetogivepowertotheheating/boiler.
20A fusetogivepowertothelightsgroup“A”.
20A fusetogivepowertothelightsgroup“B”.
30A fusetogivepowerto12V AESor3-wayfunctionfridge. The3-wayfunctionfridgeswitches
automaticallyoffwhentheengineisoff.
20A fusefortheauxiliarypowersupply(solarregulator),whichisdirectlyconnectedtotheleisure(B2)
battery.
25A fusefortheelectricalsteppowersupply,connecteddirectlytotheleisure(B2)battery.
3A fuseforthegaspowersupply(fridge,kitchen,boilervalve,etc.),connecteddirectlytotheleisure
(B2)battery.
3A fuseforOUT D+simulatedexitprotection.
AESfridgeconnection;Itisabridge,whichexcludesthe3wayfunctionfridgeandisusedtoconnect
the AESfridgedirectlytotheB2.
tc.)
SimulatedoutputD+alternatortocontroltheelectricalstep, AESrefrigerator,electricaldrainingvalve,
coming-backoftheelectricalantenna,e .
DISTRIBUTIONBOX“DS300”
PROTECTIONFUSES
5
10 20 30 25
10 20 20 3
AU X
B
A
1 3 5 7 9
2
4 6 8
-B2 +B2 +B1
1 2 3 4
1 2
1
4
7
10
2
5
8
11
3
6
9
12
1
9
8
16
1
4
2
5
3
6
1
4
7
2
5
8
3
6
9
1
2
19
16
17
11
18
14
15
13
22
21
20
12
3
10
GB
ENGLISH
GB
20
Page is loading ...
Page is loading ...
Page is loading ...
Page is loading ...
Page is loading ...
Page is loading ...
Page is loading ...
Page is loading ...
Page is loading ...
Page is loading ...
Page is loading ...
Page is loading ...
Page is loading ...
Page is loading ...
Page is loading ...
Page is loading ...
Page is loading ...
Page is loading ...
Page is loading ...
Page is loading ...
Page is loading ...
Page is loading ...
Page is loading ...
Page is loading ...
-
 1
1
-
 2
2
-
 3
3
-
 4
4
-
 5
5
-
 6
6
-
 7
7
-
 8
8
-
 9
9
-
 10
10
-
 11
11
-
 12
12
-
 13
13
-
 14
14
-
 15
15
-
 16
16
-
 17
17
-
 18
18
-
 19
19
-
 20
20
-
 21
21
-
 22
22
-
 23
23
-
 24
24
-
 25
25
-
 26
26
-
 27
27
-
 28
28
-
 29
29
-
 30
30
-
 31
31
-
 32
32
-
 33
33
-
 34
34
-
 35
35
-
 36
36
-
 37
37
-
 38
38
-
 39
39
-
 40
40
-
 41
41
-
 42
42
-
 43
43
-
 44
44
Ask a question and I''ll find the answer in the document
Finding information in a document is now easier with AI
in other languages
- italiano: CBE pc220 Manuale utente
- français: CBE pc220 Manuel utilisateur
- Deutsch: CBE pc220 Benutzerhandbuch
Other documents
-
Creative Inspire T10 Quick start guide
-
 Sargent EC20 User Instructions
-
 Sargent EC30 User Instructions
-
 Profi-pumpe GRANIT-BLACK Operating Instructions Manual
-
Extraflame Automatic loading pellet stocking tank Owner's manual
-
 Sargent EC328 System User Instructions
-
DAB AQUATWIN TOP Operating instructions
-
CAMPAGNOLA 0310.0178 Forbice Tronic Star TX Owner's manual
-
Extraflame Automatic loading pellet stocking tank Owner's manual
-
 horntools HCDST01 Owner's manual


