Page is loading ...

AMB0302USZ / 410-0010-A01A
USER GUIDE
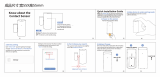
30
Visit our Website at www.targus.com
Features and specifications subject to
change without notice. © 2006 Targus
Group Inter national, Inc. and Targus, Inc.
Gateway®
Bluetooth
®
Laser
Rechargeable
Notebook Mouse
ID# B03158
Bluetooth Qualified Product

CAUTION
LASER RADIATION. DO NOT STARE INTO
THE BEAM OR VIEW DIRECTLY WITH
OPTICAL INSTRUMENTS. CLASS I LASER
PRODUCT.
NEVER POINT A LASER BEAM INTO A
PERSON’S EYES OR VIEW A LASER BEAM
DIRECTLY, AS PROLONGED EXPOSURE CAN
BE HAZARDOUS TO THE EYES.
MOMENTARY EXPOSURE FROM A LASER
POINTER, SUCH AS AN INADVERTENT
SWEEP OF THE LIGHT ACROSS A PERSON'S
EYES, MAY CAUSE TEMPORARY FLASH
BLINDNESS SIMILAR TO THE EFFECT OF A
CAMERA FLASH BULB. ALTHOUGH THIS
CONDITION IS TEMPORARY, IT CAN
BECOME MORE DANGEROUS IF THE
EXPOSED PERSON IS ENGAGED IN A
VISION-CRITICAL ACTIVITY SUCH AS
DRIVING.
2

TABLE OF CONTENTS
System requirements...........................................3
Installing the Batteries.........................................3
Using the Enhanced Resolution feature...............6
Bluetooth Software: WIDCOMM...........................6
Bluetooth Software: TOSHIBA............................11
Bluetooth Software: MICROSOFT......................16
Bluetooth Software: Mac OS X...........................20
Technical Support..............................................26
3

GATEWAY
®
BLUETOOTH
®
LASER
RECHARGEABLE
NOTEBOOK MOUSE
Introduction
Congratulations on your purchase of the Gateway Bluetooth®
Laser Rechargeable Notebook Mouse. This mouse has a
special EDR (Enhanced Data Rate) technology that provides
faster data transmission rate and allows multiple Bluetooth
devices running without conflict.
System Requirements
Hardware - Bluetooth-enabled notebook or desktop PC
Operating System - Windows® 98SE / 2000 / ME / XP
Mac OS X (10.x or greater)
Installing the Batteries (Supplied)
Use the two AAA-size rechargeable NIMH batteries
(supplied)
Remove the battery cover from the back of the mouse by
sliding off the cover while pressing the release button at the
bottom of the mouse.
Insert the batteries, making sure that the positive (+) and
negative (-) ends of each battery match the polarity
indicators inside the battery housing
•
•
•
4

OPEN
ID
on
off
connect
button
Battery cover
release button
slide the battery
cover in this direction
On/Off switch
GATEWAY BLUETOOTH® LASER RECHARGEABLE NOTEBOOK MOUSE
Snap the battery cover back into position
Turn on the mouse by sliding on/off switch on the bottom
to the “on” position.
•
•
Charge the mouse for 8 hours before using. Plug in the
USB charge cable to the mouse and connect the other
end to the computer.
•
Charging the Batteries
WARNINGS: WHEN REPLACING THE BATTERIES, ALWAYS REPLACE WITH NiMH
BATTERIES OR OTHER RECHARGEABLE BATTERIES. NEVER USE ALKALINE
BATTERIES IN THIS DEVICE. AVOID MIXING NEW AND USED BATTERIES IN A DEVICE
NOTE: WHILE THE MOUSE IS FUNCTIONING, NO LASER LIGHT IS VISIBLE TO THE
NAKED EYE. BE CAREFUL NOT TO LOOK DIRECTLY INTO THE EMITTER HOLE
WHILE THE MOUSE IS ACTIVE.
To determine if the laser mouse is on and functioning is by
moving the mouse to see if the cursor is moving. The mouse
should be paired with the computer before it operates. The
scroll wheel will light up for approximately 1 sec. when the
power is turned on.
5

GATEWAY BLUETOOTH® LASER RECHARGEABLE NOTEBOOK MOUSE
1. Charge the mouse for at least 8 hours before using it. And please
make sure only rechargeable batteries (the ones that come with your
product) are used.
2. Your computer needs to stay powered on for the mouse to charge.
Follow these steps to prevent your computer from going in to Standby
or Hibernate:
a) Click “Start”
b) Click “Control Panel”
c) Click “Performance and Maintenance” (Skip in Classic View)
d) Click “Power Options”
e) Make sure “System Standby:” and “System Hibernates:” under
“Plugged in” are set to “Never”
3. If you use your notebook computer’s LCD monitor, please do not close
the lid. (Please ignore this step if you use an external monitor with your
notebook lid closed.)
4. If your mouse does not respond after a period of inactivity, please wake
it up by pressing one of the buttons on the mouse or moving the mouse
around.
6

GATEWAY BLUETOOTH® LASER RECHARGEABLE NOTEBOOK MOUSE
Initial Configuration
Before you can begin using Bluetooth connectivity on your
computer and other Bluetooth devices, you must perform
some initial setup tasks.
The Gateway Bluetooth Laser Rechargeable notebook mouse
is designed to work with the four major software stack
(protocol) standards: WIDCOMM, Toshiba, Microsoft and Mac
OS X. Please check your computer’s documentation to see
which software stack your computer has. Please contact your
system vendor if your system does not support one of the
following Bluetooth software standards.
Using the enhanced Resolution feature
This bluetooth laser mouse has a special enhanced
resolution feature. By activating this feature, the laser
mouse will increase its tracking sensitivity from 800 CPI to
1600 CPI. This will improve the precision of the mouse
pointer for fine details with increased speed. Press both the
scroll and right key when the mouse is on , the red LED in
the scroll wheel will light up around 3 secs to proceed
resolution switching. When the LED is off, it indicates the
resolution switching is successful.
Bluetooth Software: WIDCOMM
1. Go to the Bluetooth Places icon located on your desktop
or in the system tray and double click, then click Bluetooth
setup wizard.
NOTE: TO CONTINUOUSLY CHARGE THE BATTERIES VIA THE USB CHARGE CABLE,
YOUR COMPUTER MUST BE ON AND AWAKE . FOR BEST RESULTS , TURN OFF
YOUR COMPUTER ’S POWER MANAGEMENT / SLEEP MODE FEATURE WHILE
CHARGING THE MOUSE.
7

GATEWAY BLUETOOTH® LASER RECHARGEABLE NOTEBOOK MOUSE
2. The Bluetooth configuration screen will prompt. Please
follow the onscreen instructions. Click Next to continue.
3. Continue to setup your bluetooth device profile.
8

GATEWAY BLUETOOTH® LASER RECHARGEABLE NOTEBOOK MOUSE
4. Click Next to continue setup.
5. Please select the service which the bluetooth device
offers. (Default setting allows the most coverage. It is
recommend to keep as default). Click Next.
6. Installation will perform setup and click Next when setup is
completed.
9

GATEWAY BLUETOOTH® LASER RECHARGEABLE NOTEBOOK MOUSE
7. Please turn on the mouse and press the connection ID
button located at the bottom of the mouse until the light in
the middle scroll wheel blinks red light (discoverable mode).
Click Next to continue pairing.
8. The confirmation window will appear as the system installs
the drivers. Click OK. When this is done, the mouse should
be functioning. The bluetooth mouse has been successfully
installed.
Gateway
BT Laser
Notebook
Mouse
10

GATEWAY BLUETOOTH® LASER RECHARGEABLE NOTEBOOK MOUSE
(There may be one or more different bluetooth device
detected.) If the mouse is not detected, please make sure
the power is on and in discoverable mode. Press Search
Again to re-pair the device.
9. Once the pairing search is complete, the bluetooth mouse
icon should appear on the screen as shown. Setup is
complete. You may choose to close the window, or continue
pairing other bluetooth devices.
Connection with Gateway BT laser notebook mouse has
been established successfully.
To confirm that the correct mouse is being connected
please use it to click the button below.
Gateway BT
Laser
Notebook
Mouse
11

GATEWAY BLUETOOTH® LASER RECHARGEABLE NOTEBOOK MOUSE
Bluetooth Software: TOSHIBA
How to check your version of the Toshiba Bluetooth Stack
1. Launch the Bluetooth Manager.
2. Select the Help menu.
3. Select About.
NOTE: TO ENSURE OPTIMAL PERFORMANCE OF YOUR BLUETOOTH PRODUCT YOU
NEED TOSHIBA BLUETOOTH STACK V3.20.00 OR HIGHER. IF YOU HAVE A DIFFERENT
VERSION PLEASE UPDATE IT FROM WWW.SUPPORT.TOSHIBA.COM
1. Double click on the Bluetooth Manager icon in the system
tray, and then click “New Connection.”
2. When follow window appears, click “New Connection” to
begin setup.
12

GATEWAY BLUETOOTH® LASER RECHARGEABLE NOTEBOOK MOUSE
3. Please turn on the mouse and press the connection ID
button located at the bottom of the mouse until the light in
the middle scroller wheel blinks red light (discoverable
mode). Click Next to continue pairing.
4. The computer will now search for the bluetooth mouse and
other bluetooth devices. Please wait until the search is
completed.
13

GATEWAY BLUETOOTH® LASER RECHARGEABLE NOTEBOOK MOUSE
5. Please choose the device you wish to connect. There
maybe more then one bluetooth device detected. Select
Targus bluetooth mouse and click Next to continue. If the
mouse is not detected, please make sure the mouse is in
discoverable mode and click Refresh.
6. The computer will begin connecting with the mouse. If an
authentication is required, a dialogue will appear. The mouse
does not require a passkey (PIN code).
Gateway BT Laser Notebook Mouse
14

GATEWAY BLUETOOTH® LASER RECHARGEABLE NOTEBOOK MOUSE
7. Please follow the on-screen instructions to continue
setting up your bluetooth mouse. Click OK.
8. You may want to create a connection name or change icon
for the device. Once completed, press Next to finalize setup.
15

GATEWAY BLUETOOTH® LASER RECHARGEABLE NOTEBOOK MOUSE
9. The connection is established and setup is complete. The
mouse is ready to use. If the connection is not successful,
please click Back and search the device again. Click Finish
to exit setup.
10. The following screen should show the newly added
mouse connection. You may want to continue to add other
bluetooth device or close the window.
16

GATEWAY BLUETOOTH® LASER RECHARGEABLE NOTEBOOK MOUSE
Bluetooth Software: MICROSOFT
Make sure the Bluetooth radio is turned on. If necessary,
check your computer’s manual to determine if the radio is
activated. To add the mouse, proceed with the following
steps:
1. Double click on the Bluetooth Manager icon in the system
tray.
2. This window should appear. Click Add to launch the
bluetooth device wizard.
17

GATEWAY BLUETOOTH® LASER RECHARGEABLE NOTEBOOK MOUSE
3. Please turn on the mouse and press the connection ID
button located at the bottom of the mouse until the light in
the middle scroller wheel blinks red light (discoverable
mode). Check the box “my device is set up and ready to be
found” then click Next to continue.
4. The computer will now search for the bluetooth mouse.
18

GATEWAY BLUETOOTH® LASER RECHARGEABLE NOTEBOOK MOUSE
5. Please choose the device you wish to connect. There
maybe more then one bluetooth device detected. Select the
bluetooth mouse icon and click Next to continue. If the
mouse is not detected, please make sure the mouse is in
discoverable mode and click search again.
6. The mouse does not require a passkey (PIN code). Please
check the “don’t use a passkey” circle and click Next to
continue.
Gateway BT Laser Notebook Mouse
New device
19

GATEWAY BLUETOOTH® LASER RECHARGEABLE NOTEBOOK MOUSE
7. Windows will begin connecting with the bluetooth mouse.
Please wait until this process is complete.
8. The setup is complete. Click Finish to exit setup.
20
/