Waterpik Technologies CF-201 User manual
- Category
- Sanitary ware
- Type
- User manual

Flow Control
Operation
Have any questions or need assistance?
Waterpik
®
,
Waterpik
®
(stylized),
Cascadia
®
,
and OptiFLOW
®
are
registered trademarks of Water Pik, Inc.
© 2006 Water Pik, Inc.
Water Pik, Inc.
1730 East Prospect Road, Fort Collins, CO 80553-0001 USA
www.waterpik.com
If in the U.S., call our toll-free
Customer Assistance Line,
1-800-525-2774
www.waterpik.com
If outside the U.S., write us at:
Water Pik, Inc.
1730 East Prospect Road
Fort Collins, CO 80553-0001
USA
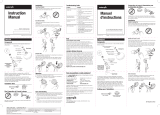
1. Remove old showerhead. Clean pipe threads thoroughly.
2. Attach the flexible shower arm collar to the
showerhead, being careful to align
the threads.
3. While installing, support the showerhead and hold onto the
nut rather than the cover. Turn only the nut to tighten.
Do not twist the flexible shower arm covering
during installation. (This could damage the
covering and/or cause the product to
malfunction.) Take care in aligning
the nut to the shower pipe so you
do not cross threads.
4. Tighten the shower nut onto the pipe
securely by hand. Do not over
tighten or use pliers.
5. Slowly turn on cold water and check for leaks. If leaks occur, retighten
all connections.
6. Do not use excessive force in positioning the showerhead and/or arm.
7. If the showerhead is not maintaining its position, re-tighten the
showerhead collar and shower arm nut.
Nut
Flow Regulator
(black O-ring faces out)
Washer
Filter Screen
Waterpik
®
showerheads are equipped with an OptiFLOW
®
regulator that
limits maximum water flow to 2.5 gallons per minute at 80 psi
as mandated by U.S. federal law.
In areas with extremely low water pressure, causing
the shower water flow to be unsatisfactory, the
flow regulator may be removed to improve
the water flow in the showerhead.
To remove, unscrew
filter screen by turning
counterclockwise.
Remove regulator
with needle-nose
pliers and replace
filter screen.
FN 20007764-F AB
Shower
Arm Nut
Adapter
Spray Change
Button
5’ hose
Instruction Manual
drenching rain
showerhead
Models:
CF-200
CF-201
CF-201C
CF-203C
CF-209C
CF-261
CF-263C
Limited Lifetime Warranty
Water Pik, Inc. warrants to the original purchaser of this product that
it is free from defects in material and workmanship for as long as the
original purchaser owns this product. Water Pik, Inc. will at our election,
repair or replace any part of the product which in our opinion is defec-
tive, provided that the product has not been abused, misused, altered
or damaged after purchase. (This includes damage due to use of tools
or harsh chemicals.) In the event an item has been discontinued we will
replace with what we deem to be the closest product. Water Pik, Inc.
is not responsible for labor charges, installation, or other consequential
cost. The responsibility of Water Pik, Inc. shall not exceed the original
purchase price of the product. This warranty gives you specific legal
rights. You may also have other rights that vary where you reside. Save
your receipt as proof of purchase is required for warranty action.
U.S. Patent Numbers: 5,865,378; 5,997,047 (Lic);
6,164,570 (Lic); 6,626,210; 6,629,651;6,641,057; D440,641;
D452,897; D485,887
Filter
Screen
Flow Regulator
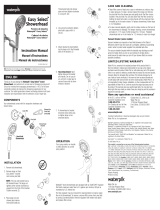
Hand-Held Installation
1. Remove old showerhead. Clean pipe threads thoroughly.
2. Slightly loosen swivel collar on bracket.
3. Hand tighten pivot ball to pipe.
4. Hand tighten adaptor to showerhead.
5. Hand tighten hose to adapter and bracket.
6. Place showerhead in bracket.
Collar
Flexible Arm
Spray Change
Button
Bracket
Flexible Installation
Your new showerhead will fit a standard 1/2” shower arm. Do not
attach this product to a plastic shower arm since it may not provide
adequate support.
Tools are not required. Do not use pipe tape or any other sealants when
installing the showerhead. These materials are not necessary and may cause
the nut to loosen prematurely. Hand tightening is sufficient to secure the
shower thread. Make sure the washer is in the end of the nut.
Operation
To change settings, from
either the full-body spray
or the concentrated power
spray, push the spray
change button at the base
of the showerhead so it
extends to the opposite
side of its current position.
Spray Change Button
Spray Change Button
Clean the filter screen at least once a year, or when you notice a drop in
water pressure. To remove, unscrew the nut from the pipe. Remove the
screen by turning it counter-clockwise (pliers may be used) and rinse.
If you remove the flow regulator, be sure you reinstall it with the black O-ring
facing out.
• Cleaning is required when mineral deposits appear on the spray holes to
maintain proper working conditions.
• Clean the flexible nozzles by rubbing with a finger or soft bristled toothbrush.
• Do not clean or rinse any part with harsh chemicals, heavy-duty cleaners or
abrasives. This may damage parts or finish and may void the warranty.
Page is loading ...
-
 1
1
-
 2
2
Waterpik Technologies CF-201 User manual
- Category
- Sanitary ware
- Type
- User manual
Ask a question and I''ll find the answer in the document
Finding information in a document is now easier with AI
in other languages
Related papers
-
 Waterpik Technologies Cascadia CF-200 User manual
-
 Waterpik Technologies FN 20012813-F AB User manual
-
 Waterpik Technologies 20011364-F User manual
-
 Waterpik Technologies Total Body Showerhead AquaScape User manual
-
Waterpik JP-120 User manual
-
Waterpik Technologies CF-261(C) User manual
-
Waterpik WP-260 User manual
-
 Waterpik Technologies wp-900 User manual
Other documents
-
Waterpik HRK-001 User manual
-
Waterpik BRK-006 Operating instructions
-
Camco 43717 Installation guide
-
DANCO 88185X Operating instructions
-
Gerber D460074 User manual
-
Gerber D460072 User manual
-
Waterpik NML-603 User manual
-
Waterpik MPC-773 User manual
-
Waterpik LAR-563E User manual
-
Waterpik ATC-473 User manual


