Page is loading ...

Assembly Instruction
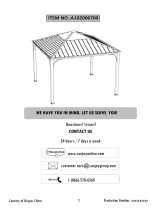
Summerhouse pergola
Item: L-PG080PST

Warnings:
1. Assembly Instructions must be followed.
2. Pegs supplied must be used to hold this pergola in place when upright.
WARNING: KEEP ALL FLAME AND HEAT SOURCES AWAY FROM THIS TENT FABRIC.
It is not fire proof. The fabric may burn if left in continuous contact with any flame source.
This unit is heavy. Do not assemble this item alone.
CARE & MAINTENANCE:
1. This pergola is not a permanent structure and should be disassembled & stored away after use.
2. Do not repack your pergola until completely dry.
3. This pergola must not be left erect in windy conditions.
IMPORTANT:
1. Keep all children and pets away from assembly area. Children and pets should be supervised when they
are in the area of pergola construction.
2. The area for assembly should not be less than 6 feet from any obstruction such as fence, garage, house,
overhanging branches, laundry line or electrical wires.
3. This unit is heavy. Do not assemble this item alone. Four people are recommended for safe assembly.
4. Some parts may contain sharp edges. Wear protective gloves if necessary during assembly.
5. When assembling and using this product, basic safety precautions should always be followed to reduce the
risk of personal injury and damage to equipment. Please read all instructions before assembly and use.
6. For outdoor use only. Install on level ground. 16 stakes are provided to secure the pergola in the ground. If
you wish to secure the pergola to a wood deck or concrete surface, you will need to purchase fasteners
appropriate for these surfaces. These are readily available at your local hardware store or home center.
7. Check all bolts for tightness before and during usage.
8. Please check your state and local regulations prior to purchasing. Some jurisdictions may require permits
for, or otherwise regulate, installation and use.
9. While this pergola is manufactured to withstand gale force winds utilizing only the supplied ground stakes,
in areas subject to frequent severe weather, securing the pergola to a deck, concrete patio or footings should
be considered.
10. Your pergola has been engineered to accommodate winter snow loads incurred in most areas. Removal
of accumulated snow on the pergola roof with a roof rake is recommended. In areas that are regularly
subject to blizzard conditions however, removal of the roof panel is suggested. The assembled roof structure
can simply be left intact until warmer conditions return.

Top Bar (1) A 7
Top Bar (2) B 7
Long Side Support Bar (1) C 2
Long Side Support Bar (2) D 2
Short Side Support Bar (1) E 2
Short Side Support Bar (2) F 2
Corner Connector 1 G1 2
Corner Connector 2 G2 2
Post 1 H1 2
Post 2 H2 2
Post Base I 4
Base Protector J 4
Arch Support Frame 1 K 4
Arch Support Frame 2 L 4
Fixity M 8
Small Connector N 4
Beam 1 O 2
Beam 2 P 2
Guideway Bar Q 4
Top Canopy R 1
Parts List

AA M6x15 Bolt 54 PCS
BB M6 Washer 68 PCS
CC M6x45 Bolt 14 PCS
W M6 Wrench 1 PC
Hardware Pack Used in Step 1
AA M6x15 Bolt 48 PCS
BB M6 Washer 84 PCS
DD M6x15 Bolt 20 PCS
EE M6x70 Bolt 16 PCS
FF Φ8x180 Floor Nail 16 PCS
Hardware Pack Used in Step 2
Fig.1: Insert Long Side Support Bar (D) to Long Side Support Bar (C), tighten by using Bolt (AA) and
Washer (BB).Connect Short Side Support Bar (E & F) in the same way.
Fig.2: Insert the assembled Long Side Support Bar and Short Side Support Bar to the “U” shaped plate
of Corner Connector (G1/G2), tighten by using Bolt (AA) and Washer (BB).
Fig.3: Insert Top Bar (B) to Top Bar (A), and tighten by using Bolt (AA) and Washer (BB).
Fig.4: Attach the assembled Top Bar to Long Side Support Bar and tighten by using Bolt (CC) and
Washer (BB).

Fig.5: Attach Base Protector (J) to Post (H1/H2), fix Post Base (I) to Post (H1/H2) by using Bolt (DD) and
Washer (BB).
Fig.6: Lift the whole assembled top, insert Post (H1/H2) to Corner Connector (G1/G2).
Fig.7: Attach Arch Support Frame (K/L) to Support Bar (C/D/E/F), and tighten by using Bolt (AA) and Washer
(BB).
Fig.8: Attach the other end of Arch Support Frame (K/L) to Post (H1/H2) by using Bolt (AA) and Washer (BB).
Fig.9: Attach the Small Connector (N) to the Guideway Bar (Q).
Fig.10: Insert the Guideway Bar(Q) with Small Connector(N) into the Fixity(M), then lock it to the
Post(H1&H2) by using Bolt(EE) and Washer(BB).
Fig.11: Insert Beam (O) to Beam (P), tighten by using Bolt (DD) and Washer (BB).
Fig.12: Put the canopy on the top of the pergola, then insert the assembled beams to the hemline of the
canopy.
Fig.13: Attach Small Connector (N) to Beam (O/P) by
using Bolt (DD) and Washer (BB).
Fig.14: Fix the assembled pergola on the ground by
Floor nail (FF). And now your gazebo is ready
for use.
/