Page is loading ...

WHOLE HOUSE WATER FILTER SYSTEM
Quick Setup Guide
Model# AF-6001
Model# AF-6002

Made with highest quality NSF
approved high performance parts

Your box contains:
Cartridge Information:
Model # Name Filter Model# (Stage)
AF-1501
Sediment Filter
Cartridge
AF-6001 & AF-6002
(Stage 1)
AF-1502
KDF + GAC Filter
Cartridge
AF-6002
(Stage 2)
AF-1500
Carbon Block Filter
Cartridge
AF-6001 & AF-6002
(Stage 2 & Stage 3 respectively)
- installation steps for all the Anchor Whole House Filter
Systems
- replacement steps for Anchor Whole House Filter cartridges
This Quick Setup Guide provides:
Pre-assembled
Filter System
Wrench
Setup Guide
3

Know your filter
Attribute Value
Temperature Range 40°F - 100°F
Service Flow 15 gpm
Rated Capacity 60,000 gallons
Operating Pressure 20 psi - 90 psi
Dimensions 3-Stage: 24.25”L x 7.75”W x 27.5”H
2-Stage: 16.25”L x 7.75”W x 27.5”H
Specifications
Stage 1
Stage 2
Stage 3
Stage 1
Stage 2
Stage 3
Note: 2-Stage Whole House Filter System has only Sediment and
Carbon Block filter cartridges.
4

Installing your filter
IMPORTANT
- Follow the assembly instructions before proceeding. It is
recommended that installation of the whole house water filter be
done by a professional plumber since cutting into your home's main
water line is required.
- Be sure to note inlet and outlet markings on both units. See image
below. The filter has 1” NTP fittings.
- Maximum water pressure is 90 PSI. Install a pressure regulator on
water with pressures higher than this.
- Operating temperature is 40° -100° F. Protect from freezing.
- Use PTFE tape for the fittings and do not overtighten.
RECOMMENDATIONS
- Install a three-valve by-pass valve to loop the entire system. This
enables bypassing water for lawn watering and makes servicing
easier. If installed, a shutoff valve after the filtration system should
also be installed to prevent water entering from wrong end into the
system.
5

- Ensure the unit is at least 3
inches above ground. This
will make it easy to open
housings for filter
replacement
2. Cut the Pipe
- Turn off the main water supply.
- Measure length of the unit and mark the pipe at exact locations
where the filter will be placed. Leave space for shut-off valves on
either sides also if that is to be installed.
- Use a tube cutter to make cut at the marks and remove the
section. Place a bucket below the pipe at the location for any water
remaining in the water line.
STEPS
1. Choose Filter Location
- The first step of water filter installation is to choose a location that
is easily accessible - the unit will need to be accessed regularly to
change the filter cartridges regularly, so be sure no obstacles
interfere with installation.
- Protect the system against extreme weather - operating
temperature range is 40° -100° F.
- Select a position near the main water shut-off valve, before the line
splits or meets the hot water heater.
- If you have a water softener installed, the whole house filtration
system should be installed after that.
- Keep in mind that a filter mounting bracket will be secured to the
home structure, such as a wall. Make sure the wall can support
weight of the system when full of water.
6

Important Operating Notes
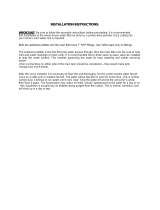
After the unit is installed, it is necessary to flush the unit thoroughly.
Do this at the nearest water faucet (such as a utility sink or outdoor
faucet). The water will be blackish in color for some time - this is
normal carbon dust. Continue to run water until it runs clear. Shut the
water off and let the unit sit for a while, then flush it again.
An initial "cloudy" appearance to the water may be noticed for a day
or so - this cloudiness is due to tiny air bubbles being purged from the
carbon. This is normal, harmless, and will clear up in a day or two.
After an extended period of inactivity, allow water to run through the
filter for several minutes before drinking.
Maximum recommended flow rate is 15 gallons per minute. Operating
at higher flow rates will not necessarily damage the unit but will
reduce the contaminant removal efficiency.
3. Install the Filter
- Install shut-off valve at the exposed ends of the supply line.
- Remove the blue housings from the mounting bracket to install
bracket on the wall. Do not unscrew the black lids of housing from
the bracket. Use the supplied wrench if needed.
- Adaptors may be needed on either side of the filter in order to join
the pipe size and type in the house. The filter inlet/outlet fitting is
1 inch.
- After the fittings are done, put the housings with the cartridges
back in the brackets.
4. Restart Water Flow
- Once all the pipes and connections are complete the system is
ready to be turned on. Turn the main water valve back on slowly.
Sound of water entering the Whole House Filtration System can be
heard.
7

Replacing Your Cartridge
HOW DO I KNOW WHEN TO REPLACE MY FILTER MEDIA?
The whole house filter is designed to remove chlorine and other
contaminants from approximately 60,000 gallons of water. In virtually all
cases, the taste and odor of chlorine will return to municipal water when
the cartridge has lost its effectiveness. The type and concentration of
contaminants varies widely throughout the country. Therefore, to assure
maximum effectiveness and the best possible water quality, it is
suggested that the cartridge be replaced at least every three years.
SEDIMENT Filter Cartridge
This Filter Cartridge replacement should be done as necessary as
determined by visual inspection. When the cartridge has noticeably
darkened and/or the water pressure has dropped, it is time to clean or
replace the sediment prefilter.
STEPS
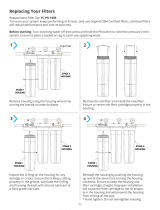
1. Shut the IN water supply off.
2. Open a faucet closest to the filter housing and
allow all the water to empty from the plumbing
system.
3. Push the red button on top of the filter housing to
release the remaining water pressure.
4. Use the supplied filter wrench to remove the
housing by turning it counterclockwise.
WARNING! It is important that the water pressure is
released before attempting to remove the filter housing. If
the pressure is not released it will be difficult to remove the
housing.
8

5. Remove the old filter and discard.
6. At this point, it is recommended to clean the
housing from inside.
7. Install the new filter in the housing. Make sure the
filter is correctly aligned.
8. Lubricate the o-ring and housing threads with food
grade silicone grease or petroleum jelly.
9. Support the base of the filter housing and insert it
back into filter cap by turning it clockwise until it is
hand tight.
NOTE: The housing should spin tight easily. If not, add more
lubrication to the housing threads. This will aid with removing
the housing when the filter needs to be replaced again.
10. Once the filter housing is hand tight, tighten it an
additional 1/4-1/2 turn with the supplied filter
wrench.
11. Repeat these steps for the other filter housings.
12. Turn the main water supply on and open a faucet
closest to the filtration system to release air.
13. Once the air has been released, push the red button on top of the
filter housing to release any additional air in the housing.
14. Check the housing for leaks and repairs, as necessary.
9

Replacement Cartridges
Model # - Name QR Code /URL
AF-1501 -
Sediment
Filter Cartridge
https://www.anchorfilters.com/pr
oducts/af-1501
AF-1502 - KDF +
GAC Filter Cartridge
https://www.anchorfilters.com/pr
oducts/af-1502
AF-1500 - Carbon
Block Filter
Cartridge
https://www.anchorfilters.com/pr
oducts/af-1500
AF-156001 -
Cartridge Set for
Whole House
System
https://www.anchorfilters.com/pr
oducts/af-156001
AF-156002 -
Cartridge Set for 3-
Stage Whole House
System
https://www.anchorfilters.com/pr
oducts/af-156002
10

All rights reserved. No part of this user guide may be
reproduced, distributed, or transmitted in any form or
by any means, including photocopying, recording, or
other electronic or mechanical methods, without the
prior written permission of Anchor USA.
Technical Support
At Anchor USA, we are always here to help you. With 24-hour access to
our company contact web page, you can drop a message or email us
directly anytime, and one of our representatives will respond to your
query in less than 24-hrs.
Web: https://www.anchorfilters.com/contact-us
Email: support@anchorfilters.com
IMPORTANT!
Run only cold water through the unit.
WARNING!
Do not use this filter for water that is microbiologically
unsafe or of unknown quality.
SN0060EN2019
Warranty Policy
One-year warranty against manufacturer defects is offered with the
purchase of the system. This warranty does not cover damage due to
abuse, neglect, freezing, fire or other fortuitous event. No allowance is
made for the consequential damage, labor or expense incurred as a
result of a proven defect.
/


