Page is loading ...

3 Stage Whole House
System Installation Manual
Cuomer Support 1-800-992-8876

3
You’ve taken the r ep to having clean water for your entire home. Your new
whole house lter protects you and your appliances from major contaminants.
Fir, take a look at your syem, make sure that all components are included and
undamaged. If you nd anything or have any queions we can help. Ju give us a
call Monday to Friday during normal business hours (10 am - 5 pm Pacic Time)
at 1-800-992-8876.
Pressure Gauges
OUT
Height
29
1/4
” Inch
Depth
8
1/2
” Inch
Lenght
23
1/2
” Inch
IN
Mounting Bracket
Whole House System
Introduction
Syem Usage Conditions:
Feed Water Pressure: 20-80 PSI
Feed Water Temperature: 40-100
O
F
We recommend using a professional licensed plumber for the Whole House Filtration Syem Inallation.
If your feed water is prone to spikes in pressure or is over 80 PSI you will need a pressure protection or
reducer valve inalled before the feed water ows to the syem. Always use appropriate safety measures
and methods for the inallation.
Your inallation mu comply with all of your ate and local codes. The inallation area needs to be level
and dry. The syem mu be inalled in a sheltered environment with no exposure to extreme hot or cold
weather, out of direct sunlight. Never expose the syem to freezing temperatures. The syem cannot be
inalled upside down.
Express Water assumes no liability for the determination of the proper equipment necessary for your home.
This syem does not remove biological contaminants. We recommended a UV light if your water is
biologically unsound.
Visit our website: www.ExpressWater.com or call us at 1-800-992-8876 to explore UV ltration options.
Copyright © 2018 by Express Water Inc.
All rights reserved. No part of this publication may be reproduced, diributed, or transmitted in any form or by any
means, including photocopying, recording, or other electronic or mechanical methods, without the prior written
permission of the publisher, except in the case of brief quotations embodied in critical reviews and certain other
noncommercial uses permitted by copyright law.
Conditions

4 5
Pressure Reduction
You may need a Pressure Protection/Reducer Valve before your syem if your
source water is prone to pressure spikes.
NOTE! This is not supplied by Express Water
Every setup will be dierent depending on the plumbing setup of your home.
You may use dierent pipes or ttings.
Optional By-Pass Setup
This is recommended for allowing continual water supply, even during maintenance.
NOTE! Piping and valves are not provided by Express Water
Inallation Diagram
Incoming
Water
Shut o Valves
OUT
1” NPT
IN
1” NPT
1 Year Limited Warranty
We Cover
This warranty covers any defects in the parts or manufacturing of your Express Water Whole House Water
Filtration Syem. We will give you new replacement parts in exchange for any defective parts.
What to Do
Give us a call at 1-800-992-8876 or send an email to support@expresswater.com and describe the problem
to our support. Be sure to have a copy of your purchase conrmation email or receipt. Our support will
verify that the product and problem are under warranty and help you arrange to send your defective part
back to Express Water with your receipt and contact information (name, address, phone number, email
address). Support will arrange sending the delivery of your replacement part, as well as guiding you through
the inallation.
Time Covered
This warranty is eective for 1 full year from the date of original purchase.
Not Covered
This warranty does not cover labor for removal or inallation, accumulation of dirt or grime (you are
responsible for your own cleaning), syems with the serial number removed or altered, damage from
improper orage (high or low temperature, sun damage, etc), damage from a syem not inalled correctly,
anyone other than original purchaser or additional inallations, damage from syem abuse or unintended
operation of syem, acts of God, improper water source, modication, negligence, commercial use of the
syem, lters, incidental damages from syem failure, syems used with parts not provided by Express Water
(including tanks, lters, faucets, pumps, diverter valves), or cosmetic damages.
Your State
Some ates has further regulation on damages and warranty coverage. You may have other rights
depending on your ate.
For warranty queions, service, or help give us a call Monday - Friday 10 am to 5 pm PST:
1-800-992-8876
Express Water Inc.
12730 Raymer St, Unit 1, North Hollywood, CA 91605
Email us:
support@expresswater.com

6 7
Tools and Parts
Tools
Towels
Medium Crescent Wrench
Monkey Wrench
Pipe Cutter (Depends on pipes used) (eg: ratchet cutter,
hacksaw, wheel cutter)
Teon Tape
Plumber’s Silicone Grease
Depending on plumbing setup, you may need:
Soldering Iron or Torch
Power Drill
NOTE!
This is not a complete li of tools and parts, your home set up may require additional parts or
dierences from the inallation eps we detail. The eps we detail describe a typical inallation.
Parts
Depending on your setup you may need:
Shut-O Valves
Pipe Converter (1” to 3/4”) (or other)
Additional Piping
Pipe Hangers
Pressure Protection or Reducer Valve
Before You Begin
Make a li of all the plumbing parts and tools you will need to completely inall the syem to t your
home’s needs.
Conrm the inow direction of the syem and your inall location.
Turn o all incoming water to the house. The valve for this may be located under the house, on the
side of the house, under a ground panel, or elsewhere.
If you have an electric water heater turn o the electricity to your water heater.
If you have a gas water heater turn the knob to pilot.
We sugge planning for a bypass loop around the syem.
Use teon tape on the threaded connections

8 9
After shutting o the main water line open all of your home plumbing xtures to drain as much water
as possible and reduce pressure in your plumbing.
Prepare Your Inall Site
Your inall location should be at any point after the main water supply line enters your home, but
before the line splits or meets the hot water heater. If your line branches o to outdoor and indoor
plumbing you may wish to inall on the indoor line if you would only like to lter your indoor water.
Measure the amount of line you will need to remove at your inall location.
You will need enough space for the syem, and any adapters, shut-o valves, bypass valves, or other
ttings you may need.
Prepare for the line to discharge water once cut. Allow the line to drain before proceeding. Make sure
the end of the line is smooth with no jagged edges after cutting.
You can mount the syem to the wall at your inall location, or it can and on its frame on the oor.
If you are mounting the syem o the oor make sure the wall can support the weight of the syem
when full of water.
Attach Plumbing
Attach the necessary pipes, valves, and ttings to each side of the syem.
Once all of your pipes and connections are complete and ow is opened you are ready to turn your
water back on.
Reart Water Flow
Turn your main water valve back on slowly. You will be able to hear the sound of water entering the
Whole House Filtration Syem, after a while the syem will be full and sound will op. Now, you will
need to ush the syem before you are ready to use the water.
Go to your neare water faucet and turn on a ow of COLD WATER.
DO NOT USE HOT WATER FOR THE SYSTEM FLUSH
Observe your syem and piping for any leaks.
The ush water will be blackish as loose carbon particles are ushed out of the syem. The water may
also appear cloudy as air bubbles are pushed out of the syem and your pipes after the shut down.
This is perfectly normal. Run the water until it becomes clear, then run for 5 additional minutes before
turning the faucet o.
Wait 30 minutes, then run the cold water again for 10 minutes.
Shut o your faucet.
Your syem is now ready for use!
Start-Up Notes
The cloudiness may persi for anywhere between 1 day to 1 week as your syem and pipes expel tiny
air bubbles from your plumbing and the carbon lters. This is perfectly normal and the air bubbles are
harmless. They should clear up within a week of regular use.
Occasionally check for leaks during your r week of use to be sure all of your connections are able.
You can ush the old non-ltered hot water from your plumbing by running your hot water at this
point. Or you can expend this water through regular use over the next few days.
Make sure to turn your water heater on again.
Inallation

10 11
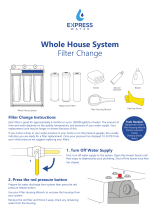
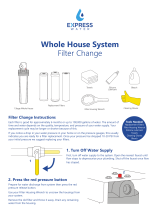
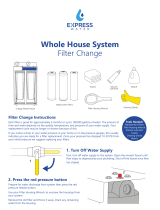
Fir, turn o water supply to the syem.
Open the neare faucet until ow ops to depressurize your plumbing.
Shut o the faucet once ow ops.
Prepare for water discharge then press the red pressure release button.
Press the red pressure release button.
Prepare for the syem to discharge water when you remove the
housing. Use your Filter Housing Wrench to unscrew the lter
housings from your syem.
Each lter is good for approximately 6 months or up to 100,000 gallons of
water. The amount of time and water depends on the quality, temperature,
and pressure of your water supply. Your replacement cycle may be
longer or shorter because of this.
If you notice a drop in your water pressure in your home or on the pressure
gauges, this usually indicates you are ready for a lter replacement. Once
your pressure has dropped 10-12 PSI from your initial pressure we sugge
replacing your lters.
Filter Change
Tools Needed:
- Filter Housing Wrench
- Gasket Lubricant
- Replacement Filters
- Towels
Pressure Release
Button
Turn O Water
Supply
Filter Cleaning
We recommend cleaning your lter housings once a year. To do this scrub
the inside of the housing and the inside of the top manifold with one gallon
of warm water mixed with 1 tablespoon of household bleach. Make sure to
protect your hands during cleaning. Rinse all parts with water until all traces
of bleach are gone.
Note! Do not add bleach directly to any part of the syem.
Remove the old lter and throw it away. Drain any water from your lter
housing.
Support the base of the lter and insert it back into the top manifold. Insert
the new lters facing the correct direction. The carbon, KDF, or PHO lters
will need to have their silicone o-ring facing the top of the syem. Make
sure your lter is correctly aligned and then begin tightening by hand. Once
the housing is hand tight, use your lter housing wrench to give a slight
additional turn. You should only need a fourth turn or a half turn with the
wrench, be careful not to over-tighten.
Repeat these eps for the other two lter housings.
Flushing New Filters
Flush your new lters by turning on the close cold water faucet.
The ush water will be blackish as loose carbon particles are ushed out of the syem. The water may
also appear cloudy as air bubbles are pushed out of the syem and your pipes after the shut down. This is
perfectly normal. Run the water until it becomes clear, then run for 5 additional minutes before turning the
faucet o.
Wait 30 minutes, then run the cold water again for 10 minutes. Shut o your faucet.
Your syem is now ready for use!
Syem Start-up
Once all of your lters have been replaced and your housings are in place you
are ready to turn on water supply to the syem.
Check the syem for leaks as it lls with water. If you discover a leak turn the
water o, inspect your connection points and o-rings, retighten, and try again.
Reattaching Housings
Your o-ring may come loose during the housing removal. If it doesn’t carefully
remove it from the housing and apply your silicone grease to the o-ring, before
setting it back in place.
Apply gasket lubricant to the threads of each lter housing.
Throw Away Old Filter
Turn On Water Supply
Correct O-Ring
Placement
Align New Filters

/