Page is loading ...

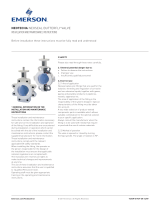
NEOTECHA SAPRO
®
- ASEPTIC SAMPLING VALVE SV
InstallatIon, operatIon and maIntenance InstructIons
USE
Valves for aseptic sampling of liquid mediums
in tubes.
1 GENERAL INFORMATION ABOUT THIS
INSTRUCTION
These instructions include all directs to
safely install and operate the SAPRO-aseptic
sampling valve. If any problems arise, which
cannot be solved with these instructions, please
call for more information at the manufacturer.
These instructions are corresponding to the
valid EN-safety standards.
Using this armature requires the operator,
design engineer or the fitter of the plant to
observe all valid national technical standards.
Any technical change or improvement can
only be lead trough the manufacturer. Using
these instructions (and therefore also using the
sampling valve) requires qualified personnel,
installation and operating staff needs to be
trained according to these instructions.
1.1 Validity of these installation, maintenance
and repair instructions
These installation, maintenance and repair
instructions are valid for all SAPRO-aseptic
sampling valves, built at Neotecha AG after
March, 07. 2002. The period of validity ends with
the release of a new revision of the instructions.
2 SAFETY
Please read these instructions carefully.
2.1 General danger potential
• Not paying attention to this instruction
• Incautious use or misuse
• Unqualified personnel or staff
2.2 Use as directed
2.2.1 Area of use
SAPRO-aseptic sampling valves are armatures,
used for taking exact aseptic samples from
mediums in tubes. In combination with the
special aseptic bottle adapter, it is possible to
take samples from any high-corrosive or hot
medium without any contact of the medium
with (maybe polluted) air. It is even possible
to fill the sampling bottle with nitrogen before
taking a sample, and also clean the inner parts
of the bayonet sleeve and bottle adapter with
cleaning liquid or to sterilize them with steam.
When not taking samples, the SAPRO-aseptic
sampling valve can be closed with a dummy
adapter, preventing the bayonet sleeve from
pollution. The SAPRO-aseptic sampling valve
can only be installed in horizontal tubes, there
is no possibility to install the valve in a vertical
tube. All parts of the sampling valve in contact
with medium are in stainless steel 1.4435
(316L), Hastelloy (different types), PTFE, PEEK
or Perfluore.
Before installation these instructions must be fully read and understood
2.2.2 Detailed function of the aseptic sampling valve
The valve stem seals against the bottle adapter
in the valve seat. By lifting up the stem with
the dead man lever, the sampling medium
flows through the bottle adapter into the bottle.
The air (or nitrogen) in the bottle is blown out
through a small drilling on the side of the
bottle adapter, closed with a cross-cut silicone
septum to prevent pollution reaching into the
bottle. All parts in contact with the medium
can be cleaned with cleaning liquid or steam
before taking a sample, the bottle can be
attached to the bottle adapter in the laboratory,
the bottle may even be filled with nitrogen
and the adapter keeps entirely closed until
it’s connected to the bayonet of the sampling
valve. When not taking a sample, the bayonet
sleeve of the valve can be closed with a dummy
adapter as a protection against pollution.
VCIOM-01983-EN 15/09
www.valves.emerson.com © 2017 Emerson. All rights reserved.

2
NEOTECHA SAPRO
®
- ASEPTIC SAMPLING VALVE SV
InstallatIon, operatIon and maIntenance InstructIons
2.2.4 Restricted use
The valve can only be used with products
when the materials used (SS, PTFE, PEEK or
Perfluore) are compatible. Information about
the chemical resistance of these materials is
found in technical literature or may be asked at
the manufacturer.
2.2.5 Illegal technical changes
It is illegal to do mechanical changes of the
design of the SAPRO-aseptic sampling valve, or
to use parts of other manufacturers for repairs,
otherwise Neotecha can not guarantee for the
safety of the valve. Repairs can only be done
by Neotecha or personnel specially trained by
Neotecha.
2.2.6 Warning of misuse
The Sapro aseptic sampling valve with all
connection pipes and actuators can never be
used to climb up or to stand on it.
2.2.7 Liability to obtain all directs about operation,
maintenance and repair
These instructions are a part of the product
delivery and has to be available for all operators
of the valve, stored well protected from
pollution.
3. TRANSPORTATION AND STORAGE
The SAPRO-aseptic sampling valve is delivered
with protection caps. Please leave these caps
on the valve until it is ready to be installed. The
aseptic sampling valve has to be stored in a dry,
dust-free place until it’s installed.
3.1. Transportation
• Transportation temperature range -20°C to
65°C.
• Protect against mechanical stress (shock,
punch, vibration).
3.2. Storage
• Storage temperature range -20°C to 65°C,
dry and dust-free.
• Please use driers or heating against
condensation water in humid storerooms.
3.3. Handling before installation
• Remove the protection caps just before
installation.
• Protect the sampling valve against wetness
(otherwise dry before installation).
• Handling as directed protects from damage.
FIG. 1
2.2.3 Technical data
Pressure range: 20Pa vacuum to 16bar
Temperature range: See diagram
Sizes
DIN PN 16: DN40 - 100
ANSI cl. 150: NPS 1½ - 4
Testing pressure: 1.5 x PN = 24bar
PRESSURE/TEMPERATURE DIAGRAM
bar
20Pa
vacuum
2.3 Danger sources
2.3.1 Chemical external
The sleeve on the actuator should not be
cleaned with solvents, use alcohol or a mild
detergent.
2.3.2 Electrically
To prevent static charges, the entire aseptic
sampling valve is made of conductive metal.
2.3.3 Thermically
With a sample medium temperature range
between -20°C to 200°C, the surface of
the sampling valve may assume the same
temperature. It is therefore necessary to wear
gloves to avoid injuries when operating the
valve.
2.3.4 Protection against opening the valve by
mistake (see fig. 1)
To prevent opening the valve by mistake, the
locking pin (3) can be used. A padlock (10, not
included in delivery) can additionally be used
against deliberate opening.
2.4 Requests for the operators
Operators are people who are familiar with the
installation, operation, maintenance and repair
of the SAPRO-aseptic sampling valve. They also
have to be qualified enough to safely handle the
valve and they have to:
• Keep all technical, internal and national
regulations and instructions.
• Be trained according national safety
standards, for example the use of their
personal safety clothes or heat gloves,
which have to be appropriate to production
conditions.
• Have read and understood these instructions.

3
25 1 6.5
40 1½ 8.7
50 2 10.6
65 2½ 16.0
80 3 18.0
100 4 20.0
4. CHARACTERISTICS
4.1 General characteristics
Connection versions:
I-Clamp
Tri-Clamp
Other connection versions are
available, ask the manufacturer.
Body styles: Flanged DIN-length
Flanged ANSI-length
Screws: Screw quality A2 for all pressure
loaded screws
Adapters: Aseptic bottle adapter for glass
bottles, thread ISO GL45
Dummy adapter to protect the
valve from pollution
Cleaning/sterilizing connections:
3 connections threads ¼" NPT for steam, rinse
(with cleaning liquid) and drain
Blocking medium connections:
2 connection threads ¼" NPT for blocking
medium (normally alcohol)
Operating: Dead man lever for manual
operation
Pneumatic actuator for
automatic operation
Weights:
Weight table is only approximately,
because of different connection-
and adapter versions
WEIGHT TABLE
Weight flanged version
DN NPS kg
4.1.3 Description of the connections
The 3 connection threads ¼” NPT on the
bayonet sleeve are:
1. Steam inlet connection to sterilize the
sample passage in the bayonet sleeve and
the bottle adapter in pos. 1
2. Rinse connection to clean the sample
passage in the bayonet sleeve and the
bottle adapter in pos. 1
3. Drain connection to let the steam or
cleaning liquid flow out before taking a
sample
The 2 connection threads ¼” NPT on the
upper part of the valve body are:
4 + 5: Connections for blocking media (normally
alcohol), one of them is used to fill in the
alcohol, the other can be used to take
a sample of the alcohol. By taking an
alcohol sample at this point the state of
the blocking media and the stem seal can
be monitored
4.1.4 Description of the bayonet positions (see fig. 5)
FIG. 2
FIG. 3
FIG. 4
FIG. 5
Pos. 1
Pos. 2
When bottle adapter is
connected to pos. 2 the valve
on the adapter is open.
In this position steam or cleaning liquid
can be put trough the product passage
and exit trough the drain connection on
the bayonet sleeve.
NEOTECHA SAPRO
®
- ASEPTIC SAMPLING VALVE SV
InstallatIon, operatIon and maIntenance InstructIons
4.1.1 Aseptic sampling valve (see fig. 2)
1. Sapro-aseptic sampling valve body
flanged version, I-Clamp or Tri-Clamp
(DIN/ANSI)
2. Dead man lever
3. Locking pin (can be completed with a
padlock, not included), fixed with a SS chain
4. Set screw for medium flow regulation
5. Hexagon nut to fix the regulation set screw
6. Bayonet sleeve for the aseptic bottle
adapter
7. Connections 3 x ¼“ NPT for steam/rinse/
drain
8. Connections 2 x ¼“ NPT for blocking
medium
4.1.2 Aseptic bottle adapter and dummy adapter
(see fig. 3 and 4)
1. Sapro-aseptic bottle adapter with thread
ISO GL45
2. Sapro-aseptic dummy adapter (used
when not taking a sample)
3. Sampling bottle 100 ml to 2000 ml ISO
GL45 (standard version is 250 ml)
4. Vent, closed with a cross-cut silicone
septum
5. Grips aluminium black anodized

4
SV050LN-162S2B
NEOTECHA SAPRO
®
- ASEPTIC SAMPLING VALVE SV
InstallatIon, operatIon and maIntenance InstructIons
5 MARKS ON THE VALVE (see fig. 6)
The CE-mark on the valve is only needed, if the
product is according to PED/DGRL 97/23/EG.
Manufacturer Land of origin
Type of valve according
order
CE-mark with 4
digit notified body
number (only
for DN 40 - 100,
NPS1½ - 4)
Year of production
Serial number
6 INSTALLATION
6.1 General
6.1.1 Preparation for the installation
The Sapro-aseptic sampling valve is designed
for installation between flanged tubes. The
standard clamp is an I-clamp with a standard
(DIN or ANSI) face-to-face length. Please check
the correct flange version before installing the
valve.
The dimensions of the valve are in the catalog
otherwise ask the manufacturer
The installation flanges need:
• Cleaned and undamaged connection flanges.
• To have the same size and standard as the
connection flanges on the sampling valve
have. Please check this out before any
installation.
6.1.2 Installation position of the Sapro-aseptic
sampling valve (see fig. 7)
The Sapro-aseptic sampling valve can only
be installed in horizontal tubes, where the
sampling bottle stands vertically. There is no
possibility to install the valve in a vertical tube.
6.2.1 Installation step by step (see fig. 8)
1. Check the correct size and type of the
connection flanges on the sampling valve.
Also check if the length of the valve body is
correct for the installation.
2. Spread the connection tubes with a special
tool (do not use the sampling valve itself to
do this operation).
3. If needed, attach the connection gaskets to
the connection flanges.
4. Turn the valve to the correct position and
tighten the clamps (I-clamp or Tri-clamp)
on the connection flanges. The valve is now
ready to install the additional connections.
5. On the bayonet sleeve (6), there are 3
connections (¼” NPT). Connect the steam
connection to an external steamer (if
possible) and the rinse connection to a
cleaning medium connection. The drain
connection needs normally no external
connection.
6. On the upper side of the body, there are 2
connections (¼” NPT). Connect one of them
to enter with the blocking media (normally
alcohol), the other connection is to take
samples of the alcohol (to check the state of
the blocking media and the stem seal can
also be monitored).
Aseptic valve body
Connection flanges
Connection tube
(customer-side)
Bayonet sleeve
FIG. 6
FIG. 7
FIG. 8
6.2 Installation between the flanged tubes
The flow direction of the sampling medium is
not relevant for this aseptic sampling valve,
but please check out if any special flange seals
(gaskets) are needed.
A sampling valve should not be used to spread
the connection tubes, this could damage the
connection flange surfaces.
WARNING
Please do not apply any welding procedures when
the sampling valve is already installed! The inner
parts like the soft seat or the packing sleeve could
be damaged!
Always tighten the clamps well before testing the
sampling valve, even in low-pressure lines, never
apply pressure to the valve without having all
clamps tightened!

5
7 STARTING
7.1 General
WARNING
Before starting, all specifications like material
resistance/pressure and temperature of the
production process need to be checked again. Any
pollution (for example from welding processes)
could cause problems on the valve.
7.2 Flow regulation (see fig. 10)
Attach the bottle adapter with the bottle to the
bayonet sleeve of the valve. By operating the
dead man lever, the bottle can be filled. To
control the amount of medium flowing through
the adapter, screw the set screw (4) in (less
medium) or out (more medium). When having
Sampling valve body
Aseptic bottle adapter
Dummy adapter
Bayonet sleeve
Sampling bottle
9 OPERATION (see fig. 11)
1.
To take an aseptic sample, the bottle should
be attached to the bottle adapter in the
laboratory, where it can also be filled up with
nitrogen.
2. Take the dummy away from the bayonet
sleeve and attach the bottle adapter
(with the bottle connected) to the aseptic
sampling valve, turn to position 1 (see point
4.1.4: Description of the bayonet positions).
3. The inner parts of the bottle adapter and
the bayonet sleeve can now be sterilized
with steam or cleaned with cleaning liquid
trough the two connections on the bayonet
sleeve. Let the liquid flow trough the drain
connection.
8 DANGER POTENTIAL DURING INSTALLATION,
OPERATION AND MAINTENANCE
WARNING
Safe operation of the Sapro-aseptic sampling
valve is only guaranteed, when installed, operated
and repaired by qualified personnel (see ‘Qualified
personnel’). All safety instructions and standards
need to be fulfilled during installation, operation,
maintenance and repair.
6.2.2 Final testing (see fig. 9)
Before you use the aseptic sampling valve for the
first time, please rinse the system with cleaning
liquid or water to prevent the soft seat of the
valve of damage. Please also rinse and clean the
bottle adapter and dummy before taking the first
sample. The cleaning can be done by taking the
padlock away (if there is one), taking the locking
pin (3) out and operate the dead man lever (2) for
a few seconds. The bottle adapter can be set in
position 2 for cleaning. After cleaning, please put
the locking pin in again.
FIG. 9 FIG. 10
FIG. 11
Hexagon wrench,
size 6
NEOTECHA SAPRO
®
- ASEPTIC SAMPLING VALVE SV
InstallatIon, operatIon and maIntenance InstructIons
found the right position of the set screw, it can
be locked with the hexagon nut (5).

6
NEOTECHA SAPRO
®
- ASEPTIC SAMPLING VALVE SV
InstallatIon, operatIon and maIntenance InstructIons
10 MAINTENANCE AND REPAIR
Though almost all parts of the Sapro-sampling
valve are made of SS, only few maintenance
or repair is needed. If any problems with
crystallizing medium arise, it may be necessary
to clean the soft seat and/or the bayonet sleeve
of the sampling valve. This operation should
only be done by qualified personnel and only
when there is no medium or pressure in the
tube anymore!
Prior to any maintenance or dismantling
operation, the sampling valve and the tube
needs to be empty and without any pressure!
Depending on the medium flowing trough the
valve, the system has to be rinsed with water or
cleaning liquid to protect the operator.
11 DISPOSAL
The valve needs to be cleaned before any
disposal!
WARNING
• Incorrect cleaned sampling valves can cause
injuries on hands or other parts of the human
body, depending on the sampled medium.
• The manufacturer would not guarantee the
safety of the valve when it is sold to other plants
or factories after having it in sampling process.
4. After cleaning, turn the bottle adapter to
position 2, the bottle adapter now opens the
sampling bottle.
5. Take the locking pin out and operate the
dead man lever to the maximum opening
position (see point 7.2: Flow regulation).
Now, the stem is lifted up and the sampling
medium flows trough the bottle adapter into
the sampling bottle. The air (or nitrogen) in
the bottle is blown out trough the silicone
septum on the side of the bottle adapter.
Control the filling of the bottle.
WARNING
Don’t overfill the bottle!
6. As the bottle contains enough sampling
medium, let the dead man lever go, it closes
the valve automatically.
7. Turn the bottle adapter back to position 1,
the bottle is now closed again, do the same
cleaning process as in point 3.
8. Take the bottle adapter away from the
bayonet sleeve and attach the dummy
adapter again.
9. The aseptic sampling process is now
finished, the sampled medium can be taken
to the laboratory to be analyzed.
1. To clean the bayonet sleeve and/or
dismantle the soft seat and valve seat,
simply open the four screws on the bottom
side which connect the bayonet sleeve to the
sampling valve body.
2. All parts can be cleaned now, use normal
cleaning liquids. If the soft seat looks
really bad, it has to be exchanged, ask the
manufacturer for spare parts.
3. Install all parts again, tighten the screws
well!
If any problems on the upper part of the valve
arise (dead man lever/problems with the stem
seal), please contact the manufacturer.
© 2017 Emerson. All rights reserved.
/