Page is loading ...

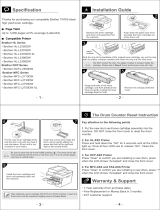
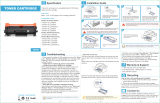
How to replace the toner cartridge
WARNI NG
Just after you use the MFC, some internal parts of the machine will
be extremely HOT! So, never touch the shaded parts shown in the
illustration.
1
Open the front cover and pull out the drum unit.
Caution
■
Place the drum unit on a drop cloth or large piece of disposable
paper to avoid spilling and scattering the toner.
■
To prevent damage to the MFC from static electricity, do not
touch the electrodes shown below.
HOT!

2
Hold down the lock lever on the right and pull the toner cartridge
out of the drum unit.
Caution
Handle the toner cartridge carefully. If toner scatters on your hands
or clothes, immediately wipe it off or wash it with cold water.
Lock Lever

3
Unpack the new toner cartridge. Place the used toner cartridge
into the aluminum bag and discard it according to local
regulations.
Caution
■
Wait to unpack the toner cartridge until immediately before you
install it in the MFC. If a toner cartridge is left unpacked for a long
period of time, the toner life is shortened.
■
Brother strongly recommends that you do not refill the toner
cartridge provided with your MFC. We also strongly recommend
that you continue to use only Genuine Brother Brand
replacement toner cartridges (TN-540 or TN-570). Using or
attempting to use potentially incompatible toner and/or toner
cartridges in your MFC may cause damage to the machine itself
and/or it may result in unsatisfactory print quality. Our warranty
coverage does not apply to any problem that was caused by the
use of unauthorized third party toner and toner cartridges. To
protect your investment and guarantee your print quality please
continue to replace consumed toner cartridges with only Genuine
Brother Branded Supplies.
4
Gently rock the toner cartridge from side to side five or six times
to distribute the toner evenly inside the cartridge.

5
Remove the protective cover.
6
Insert the new toner cartridge in the drum unit until it clicks into
place. If you put it in properly, the lock lever will lift automatically.
7
Clean the primary corona wire inside the drum unit by gently
sliding the blue tab from right to left several times. Return the
blue tab to the Home position (
▼
) before reinstalling the drum
unit and toner cartridge assembly.
Toner Cartridge
Drum Unit
Corona Wire
Tab
Home Position(▼)

8
Reinstall the drum unit and toner cartridge assembly and close
the front cover.
/

