Page is loading ...

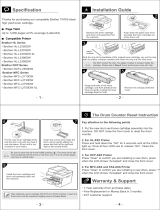
Thanks for purchasing our compatible Brother TN760 black
high yield toner cartridge.
Brother HL Printer Series
·Brother HL-L2350DW
·Brother HL-L2370DW
·Brother HL-L2370DW XL
·Brother HL-L2390DW
·Brother HL-L2395DW
Brother DCP Printer Series
·Brother DCP-L2550DW
Brother MFC Printer Series
·Brother MFC-L2710DW
·Brother MCF-L2730DW
·Brother MFC-L2750DW
·Brother MFC-L2750DW XL
TN760
ISO9001 / ISO14001
Black - up to 3,000 pages at 5% coverage (Letter/A4)
→Clean the corona wire.
This issue may have occurred because the corona wire has
become dirty. Here is the details of how to clean the corona
wire.
Remove the toner cartridge and drum unit assembly from the
machine.
After replacing a toner cartridge, DO NOT turn off the machine or open the
Front cover until the machine's display returns to Ready Mode.
Grasp both side of the toner
cartridge, and then distribute the
toner by gently rocking the toner
cartridge back for forth.
6
2
7
Put the new toner cartridge firmly
into the drum unit until you hear it
lock into place. (Drum unit is not
included in your order.)
Install the toner cartridge and
drum unit assembly back into
the machine.
8
Be sure to return the tab to the Home position ( ). The arrow on the tab
must be aligned with the arrow on the drum unit. If it is not, printed pages
may have a vertical stripe.
!
Clean the corona wire inside the
drum unit by gently sliding the
green tab from left to right and
right to left several times.
The Drum Counter Reset Instruction
Pay attention to the following points
1.Put the new drum and toner cartridge assembly into the
machine. DO NOT close the front cover to reset the drum
counter.
2.For HL-XXX Printer
Press and hold down the “GO” for 4 seconds until all the LEDs
light up. Once all four LEDs are lit, release “GO”. Close the
front cover.
3.For HL-XXX Printer
Press “Clear” to confirm you are installing a new drum, press
when the LCD shows “Accepted” and close the front cover.
4.For MFC-XXX and FAX-XXX Printer
Press “Clear” to confirm you are installing a new drum, press ”1”
when the LCD shows “Accepted” and close the front cover.
Troubleshooting
?
If the machine's display or LED continues to show the "Toner
Low", "Replace Toner" or "Toner Ended" error indication after
installing a new toner cartridge, follow the steps below to
resolve the issue.
→ Verify that you replace the correct consumable.
→ Verify you are using a NEW toner cartridge.
When replacing the toner cartridge, you MUST install a new
unused toner cartridge in order to reset the toner status.
Swapping toner cartridges from one machine to another or
installing a partially used toner cartridge may cause this issue.
Brother machine control their image quality for the most suitable
print quality by monitoring toner consumption. If you install a
partially used toner cartridge, your Brother machine is unable
to recognize toner consumption correctly which will cause this
issue. Therefore, when you replace the toner cartridge, use a
new toner cartridge, not a partially used toner cartridge from
another machine.
→Verify the toner cartridge is installed correctly.
If you install a new Brother toner cartridge but the "Toner Low",
"Replace Toner" or "Toner Ended" error indication remains,
the toner cartridge may not be installed correctly.
Reinstall the toner cartridge, referring to the instructions on
how to replace the toner cartridge.
Confirm that you have installed both a toner cartridge and a drum unit in
the machine.
Clean the corona wire inside the drum unit by gently sliding
the green tab from left to right and right to left several times.
If printer pop-up message "Non-Genuine", "Non-Original"
please ignore and click "OK" or "Next" to continue.
If your printer can't recognize toner cartridge, turn printer
off and on, put toner cartridge back and try again.
Installing different brand cartridges may cause blending
color by air pressure difference in cartridges.
Remove the toner cartridge
and drum unit assembly from
the machine.
Push down the green lock lever
and take the toner cartridge out
of the drum unit.
1
Step
1
2
4 5
Remove the orange protective
cover.
Find the chip at the backside of the original toner cartridge, pry out the chip
with the plastic crowbar carefully and insert the chip into the new toner.
3
DO NOT scratch the chip. The plastic crowbar is included inside the
package. Please skip to Step-4 if your product was come with chip.
!
B
r
ot
he
r TN
76
0
Comp
atib
l
e
·1-Year warranty (from purchase date).
·Free Replacement or Money Back in 3 months.
·24/7 customer support.
Be sure to return the tab to the Home position ( ). The arrow
on the tab must be aligned with the arrow on the drum unit. If it is not,
printed pages may have a vertical stripe.
5 64
2 31
4
‚
ƒ
„
Contact Us
*
If you have any problem, please feel free to contact us .
Logging in your your Amazon Account > Click Your Account >
Your Orders > Find your order and Click Contact Seller All .
emails will be responded within 24 hours.
TONER CARTRIDGE
TONER CARTRIDGE
Warranty & Support
Compatible Printer
Page Yield
Specification
Installation Guide
plastic
crowbar
Recycling
2. Ruturn the used cartridge to local recycling company.
We appreciate your support and participation in this earth environment
green program. Your small effort means a big step towards a clean and
healthy environment for all of us.
How to return and recycling used cartridge?
1. Put the used cartridge inside the plastic bag to avoid the
unused toner coming off.
/


