TEW-714TRU User’s Guide General Setups
© Copyright 2013 TRENDnet. All rights reserved.
4
General Setups
Where to nd setup informaon
The TEW-714TRU is a mul-funconing router and your best traveling
partner. Depending on your locaon and Internet availability, you need
to setup your TEW-714TRU to operate in dierent network mode from
me to me. This secon describes general network setups and how to
access system conguraons. For specic setup task, please go to the
page directly.
USB Power Charging: The TEW-714TRU Quick Charge Port can
recognize iPhones, iPads, and many portable devices for quick power
charging. Read instrucons here for more details. ���������������������� page 4
Web Management: How to log into the web management interface ���� page 5
Router: If you have a wired Internet connecon, you can set network
mode to Router mode to connect to the Internet ����������������������� page 7
WISP: Wireless Internet Service Provider mode� If you have an 802�11
wireless connecon provided by the ISP, hotel, library, or hot spot and
you want to share this connecon to your mulple devices, you can
setup TEW-714TRU in WISP mode ���������������������������������������������� page 9
Repeater: Simply repeats weak Wi-Fi signals to a beer Internet
connecon ��������������������������������������������������������������������������������� page 13
System Conguraon: The TEW-714TRU has many advanced
conguraon opon; Read this secon for complete instrucons on
how to ne tune your TEW-714TRU . ���������������������������������������� page 18
File Sharing: To download picture from your camera or share
documents in a meeng, simply plug in your ash drive to the USB File
Share Port. For more informaon, see this secon ������������������� page 30
Reset Your Router
All instrucons in this user’s guide assume that you have a brand new
TEW-714TRU out of box, or that you have reset your conguraons to
factory default� If you are not sure whether your TEW-714TRU currently
set to factory defaults, power on your TEW-714TRU, wait for the LED
lights up, then press and hold the Reset buon at the boom of router
for 2 seconds�
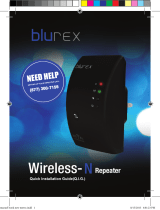
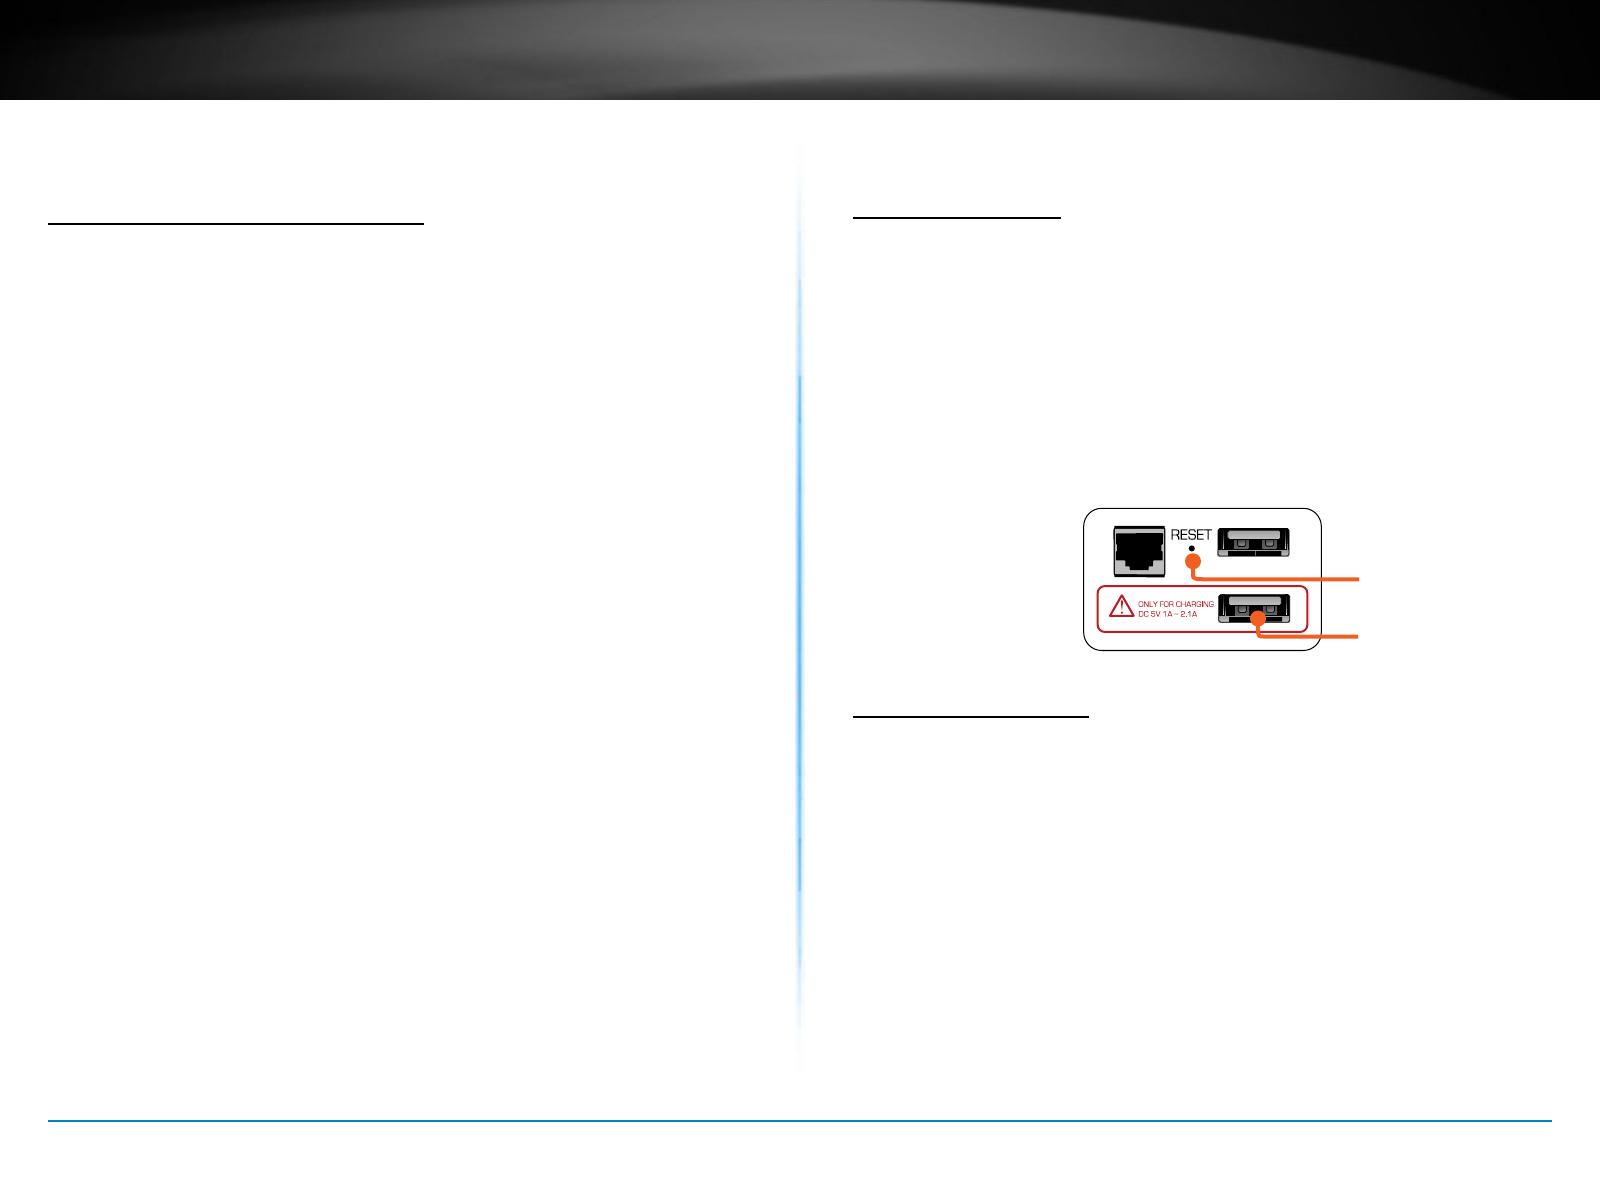
USB Power Charging
TEW-714TRU comes with a USB Charge Port which is the lower the
USB port on the TEW-714TRU. This power charging port detects
iPhones, smart phones and tablets. When the TEW-714TRU detects
your portable device, it will intelligently communicate with it, providing
more than 500mA (up to 2.1A) to quickly charge your device. For
devices not recognized by the TEW-714TRU, you can sll charge your
device with 500mA limit gracefully�
* Router Switch: If you want TEW-714TRU works as a charger only, you
can switch o the router
Reset Buon
Quick Charge
Port