Page is loading ...

ZVOX AccuVoice TV Speaker
www.zvoxaudio.com
MODEL AV100 | SETUP & OPERATION

ii ZVOX AV100 | Safety Instructions ZVOX AV100 | Table of Contents iii
Quick Setup Guide ...................................................................................................................................................................................................................................1
Alternative Ways To Connect The AccuVoice AV100 TV Speaker ..............................................................................................................................................................2
TV to AV100 Audio Signal Cable Guide .....................................................................................................................................................................................................3
Placement Options ...................................................................................................................................................................................................................................3
Button Functions on the ZVOX Remote Control ........................................................................................................................................................................................4
Still Need Assistance? ..............................................................................................................................................................................................................................5
Table of Contents
READ THIS FIRST
Important Safety Instructions For ZVOX Audio System
CAUTION
RISK OF ELECTRICAL SHOCK, DO NOT OPEN
Warning: To reduce the risk of electrical shock, do not remove
cover (or back) – no serviceable parts inside. Refer servicing to
qualied service personnel.
This lightning ash with arrowhead symbol,
within an equilateral triangle, is intended to
alert the user to the presence of uninsulated
“dangerous voltage” within the product’s
enclosure that may be of sufcient magnitude to
constitute a risk of electrical shock to persons.
The exclamation point within an equilateral
triangle is intended to alert the user to the
presence of important operating and
maintenance (servicing) instructions in the
literature accompanying the appliance.
TO PREVENT FIRE OR SHOCK HAZARD, DO NOT EXPOSE THIS
APPLIANCE TO RAIN OR MOISTURE.
THIS APPLIANCE SHALL NOT BE EXPOSED TO DRIPPING OR
SPLASHING WATER AND NO OBJECT FILLED WITH LIQUIDS
SUCH AS VASES SHALL BE PLACED ON APPARATUS.
WARNING
1. Read these instructions.
2. Keep these instructions.
3. Heed all warnings.
4. Follow all instructions.
5. Do not use this apparatus near water.
6. Clean only with dry cloth.
7. Do not block any ventilation openings. Install in accordance
with the manufacturer’s instructions.
8. Do not install near any heat sources such as radiators, heat
registers, stoves, or other apparatus (including ampliers) that
produce heat.
9. Do not defeat the safety purpose of the polarized or
grounding-type plug. A polarized plug has two blades with one
wider than the other. A grounding type plug has two blades
and a third grounding prong. The wide blade or the third prong
are provided for your safety. If the provided plug does not t
into your outlet, consult an electrician for replacement of the
obsolete outlet.
10. Protect the power cord from being walked on or pinched
particularly at plugs, convenience receptacles, and the point
where they exit from the apparatus.
11. Only use attachments/accessories specied by
the manufacturer.
13. Unplug this apparatus during lightning storms or when unused
for long periods of time.
14. Refer all servicing to qualied service personnel. Servicing is
required when the apparatus has been damaged in any way,
such as power-supply cord or plug is damaged, liquid has
been spilled or objects have fallen into the apparatus, the
apparatus has been exposed to rain or moisture, does not
operate normally, or has been dropped.
15. Grounding or Polarization–This product may be equipped
with a polarized alternating-current line plug (a plug having one
blade wider than the other). This plug will t into the power
outlet only one way. This is a safety feature. If you are unable
to insert the plug fully into the outlet, try reversing the plug. If
the plug should still fail to t, contact your electrician to replace
your obsolete outlet. Do not defeat the safety purpose of the
polarized plug.
16. Ventilation–Slots and openings in the cabinet are provided
for ventilation and to ensure reliable operation of the product
and to protect it from overheating, and these openings must
not be blocked or covered. The openings should never be
blocked by placing the product on a bed, sofa, rug, or other
similar surface. This product should not be placed in a built-
in installation such as a bookcase or rack unless proper
ventilation is provided or the manufacturer’s instructions have
been adhered to.
17. The MAINS plug or an appliance coupler is used as the
disconnect device, the disconnect device shall remain
readily operable.
18. CLASS II apparatus with double insulation, and no protective
earth provided.
19. CAUTION: Danger of explosion if the remote control battery
is incorrectly replaced. Replace only with the same or
equivalent type.
20. WARNING: The remote control battery (battery or batteries or
battery pack) shall not be exposed to excessive heat such as
sunshine, re or the like.
21. No naked ame sources, such as lighted candles, should be
placed on the apparatus.
Disposing of this appliance
Electric and electronic appliances often contain valuable materials. These appliances may also contain
materials essential for the correct functioning of your appliance which, if handled or disposed of incorrectly,
could be hazardous to human health and to the environment. Therefore, please do not dispose of this
appliance with your household waste. Dispose of it at your local community waste or recycling center,
or contact your retailer for advice.
255 mm (10")
67 mm
(2-5/8")
62 mm
(2-1/2")
AccuVoice TV Speaker Model AV100 Dimensions

AccuVoice AV100 TV Speaker
DIGITAL
AUDIO
OUT
HDMI 1 HDMI 2
VIDEO
1 ZVOX AV100 | Quick Setup Guide ZVOX AV100 | Connect AV100 2
Quick Setup Guide
(This quick guide is valid for an optical digital audio connection from your TV to the AccuVoice TV Speaker. This is the most common audio output on TVs.)
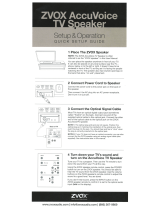
1 Place The ZVOX Speaker
NOTE: For brevity, the ZVOX AccuVoice TV
Speaker AV100 is often referred to as the
“ZVOX speaker” or “AV100” in this User
Manual.
You can place the ZVOX speaker anywhere in
front of your TV. It can also be placed on any
level surface near the TV – above, below or to
the left or right. It doesn’t have to be centered
in front of the TV. The ZVOX speaker performs
best if it faces the people watching the TV.
2 Connect Power Cord
to the ZVOX Speaker
Connect the power cord to the power
jack on the back.
Then connect the AC plug into an
AC power receptacle. The AV100 will
then power on and the blue light on
the front of the speaker will blink four
times to indicate this.
3 Connect the Optical Signal Cable
Most TVs have an optical digital output jack (sometimes called
“TOSLINK”) on the back panel. The supplied optical cable has
a square-like end which plugs into the TV and a round end
which goes into the ZVOX AV100. The optical cable might, or
might not, have small clear plastic covers protecting the metal
tips. Simply remove the covers before connecting the cable.
NOTE 1: The optical jack on your TV is not perfectly square.
You need to align the square-like end of the optical cable to the
orientation of the TV’s optical jack. Once it is aligned, the
cable’s plug should slip into the jack with a slight push. You
may hear and feel a small “click” once the cable is inserted
completely
NOTE 2: If your TV does not have an optical jack, you can use
one of the supplied analog signal cables. See instructions later
4 Turn off your TV’s
internal speakers
Some TVs require you to go into the audio
menu of the TV and turn off the TV’s internal
speakers in order to get an audio signal
from the optical jack. Also, turning off the
TV speakers prevents an ‘echo’ caused by
both the ZVOX speaker and the TV speaker
playing together. Using the remote that
originally came with the television, access
the setting and turn off the internal TV
speakers. If you are unsure how to do this,
get your TV’s model number from the rear
panel and call us at 1-866-367-9869. A
ZVOX representative
will then walk you through it.
Back of TV
a
Alternative Ways To Connect The AV100 TV Speaker
If your TV doesn’t have an optical audio output, here are some other options:
AccuVoice AV100 TV Speaker
AccuVoice AV100 TV Speaker
b
Back of TV
Minijack Analog Audio Out
Some TVs have a 3.5mm audio output AV100jack or a
headphone jack. Insert one end of the supplied analog
“Miniplug to Miniplug” cable into the TV’s audio out miniack.
Insert the miniplug at the other end of the cable into the ZVOX
speaker’s rear input jack labeled MINIJACK INPUT ANALOG
(STEREO) OR OPTICAL DIGITAL.
If the TV has a headphone jack, you will want to make sure that
the TV’s volume is turned up to 50 to 75-percent of maximum
volume to make sure that the ZVOX speaker is receiving a
strong audio signal to amplify.
Red and White RCA Jack Analog Audio Out
Some TV models use red and white RCA jacks for the analog audio
output. Be sure you have located red and white jacks on the TV that
are marked as an “OUTPUT” (not “INPUT”). Next, identify the cable
supplied with the ZVOX speaker that has a stereo miniplug at one
end and red and white RCA plugs at the other end.
Make The Connection
Insert the end of the cable with red and white plugs into the red
and white jacks on the TV labeled “OUT”. Insert the miniplug at the
other end of the cable into the ZVOX speaker input jack labeled
MINIJACK INPUT ANALOG (STEREO) OR OPTICAL DIGITAL.
AccuVoice AV100 TV Speaker
Connect To Your Cable Or
Satellite TV Set Top Box
If your TV’s audio output is inaccessible (on a wall-mounted TV,
for instance) or unavailable, you can connect the audio output of
your cable or satellite set top box to the ZVOX speaker. Most set
top boxes have an “audio output” in addition to the HDMI output
intended for use with the TV.
To connect between the set top red and white jacks and the ZVOX
speaker, identify the cable supplied with the ZVOX speaker that
has a stereo miniplug at one end and red and white RCA plugs at
the other end.
Follow the “Make The Connection” instructions in the
previous column.
c
Back of
Cable/Sat Set Top Box
AccuVoice AV100 TV Speaker

3 ZVOX AV100 | Cables and Placement ZVOX AV100 | Remote Control 4
Placing The AV100 TV Speaker in
Front of the TV.
Most people choose to place the ZVOX speaker in front of the TV.
But it can also be placed on any level surface near the TV – above,
below or to the left or right. Choose a place that lets you direct the
ZVOX Speaker towards the TV viewers.
• A safe, secure installation of the AccuVoice TV Speaker is the
owner’s responsibility.
• Do not place any objects on top of the AccuVoice
TV Speaker.
Placement OptionsTV to AV100 Audio Signal Cable Guide
The AV100 includes two analog signal cables and one optical digital signal cable. The optical cable has a standard optical plug on one
end and a AV100 optical plug on the other end. One of these three cables will connect from most TVs or cable/satellite set top boxes to
the input on the AV100. In the rare instance your TV or cable/satellite set top box has only an optical minijack audio output, an optical
miniplug to optical miniplug cable is needed (not supplied with the AV100).
from TV or set top box
to AV100
Audio cables supplied with the AccuVoice TV Speaker AV100
standard optical plug
to
mini optical plug
analog miniplug
to
analog miniplug
left and right
RCA plugs
to analog miniplug
Power
The Power button switches the ZVOX speaker between off (STANDBY)
and on. When the ZVOX AV100 is powered on, you will see the blue light
behind the front speaker grille ash four times. When it is powered off into
STANDBY, you will see the amber light ash four times. Any button press
from the ZVOX remote will also power on the system.
Note: The ZVOX AV100 will also enter STANDBY if it receives no audio
signal for 20 minutes.
Button Functions on the ZVOX Remote Control
Volume
When the volume up arrow button is quickly pressed and released,
you will see the amber light ash three times indicating one volume
step increase. If you press and hold down the volume up button, the
amber light will continuously ash and the volume will go up until you
release the button. The volume down arrow button is indicated by the
blue light and ashes in the same manner when pressed and released.
Mute
Press this button to mute the ZVOX speaker. When the MUTE function is
active, the display blinks both the amber and the blue lights at the same
time repeatedly. The AV100 will enter STANDBY if it is left in MUTE for
longer than 5 minutes. You would then see the amber light ash four times
indicating power off.
AccuVoice
Press the AccuVoice button to select the AccuVoice function. Additional
presses of the AccuVoice button allow you to select increasing
levels of voice enhancement. There are six levels of increasing voice
enhancement, starting with AccuVoice 1 going up to 6. The blue light
ashes a certain number of times to indicate which AccuVoice mode
you are selecting. The default setting is AccuVoice 1. If you were to
press the AccuVoice button once you would see the blue light blink
twice indicating AccuVoice 2 mode, three blinks for AccuVoice 3 mode
and additional blinks on upwards to AccuVoice 6. Once you are in
AccuVoice 6 mode, pressing the AccuVoice button will return you to
AccuVoice 1, which is indicated by a blink of the the amber light
followed by a blink of the blue light. The setting you select remains the
default AccuVoice setting until you decide to change it.

STILL NEED ASSISTANCE? If your TV is not the same as the
descriptions in this guide, don’t hesitate to send an inquiry to
[email protected] or call ZVOX Audio at (866) 367-9869.
Please provide your TV brand and model number. A ZVOX Audio
representative should be available (Eastern Time Zone) 9:30 AM
to 7:30 PM Monday through Friday and 10:30 AM to 5:30 PM on
Saturday. For information about additional options, please refer to the
ZVOX Audio website, www.zvox.com.
USA Warranty
For warranty information applicable to an AV100, please visit this webpage:
https://zvox.com/pages/warranty-returns
4001201 6/19
www.zvox.com
© 2020 ZVOX Audio LLC. ® ZVOX, AccuVoice and PhaseCue
are registered trademarks of ZVOX Audio LLC.
/
