1
RZ4-2ARC
Polaris RZR XP Turbo S 2-Speaker Kit
!
Please read and understand these
instructions completely before
installation to avoid possible injury, or
damage to the accessory or vehicle.
WARRANTY INFORMATION:
All SSV Works enclosures are covered by a limited lifetime warranty against defects in
material or workmanship. All SSV Works Electronics are covered by a limited 1 year warranty
against defects in material or workmanship. All Kicker Speakers are covered by a limited 1
\HDUZDUUDQW\DJDLQVWGHIHFWVLQPDWHULDORUZRUNPDQVKLS$OO.LFNHU$PSOLÀHUVDUHFRYHUHGE\
a limited 2 year warranty against defects in material or workmanship. Labor for replacement
of defective components is not covered. Contact SSV Works for further warranty information.
TOOLS NEEDED FOR INSTALLATION
- T30 & T40 Torx Socket
- 10mm and 5.5mm Socket
& Rachet or Wrench
- 4mm & 5mm Allen Wrench
- #2 & #3 Phillips Screwdriver
- Drill with 13/64”, 1/8”, 1/4”
& 1/2” Drill bits
- Panel removal tool
- Wire Crimpers
- Wire Strippers
- Scribe or Marker
- Utility Knife
SSV WORKS, 201 N. Rice Ave Unit A, Oxnard, CA 93030
www.SSVworks.com | Phone: 818-991-1778 | Fax: 866-293-6751
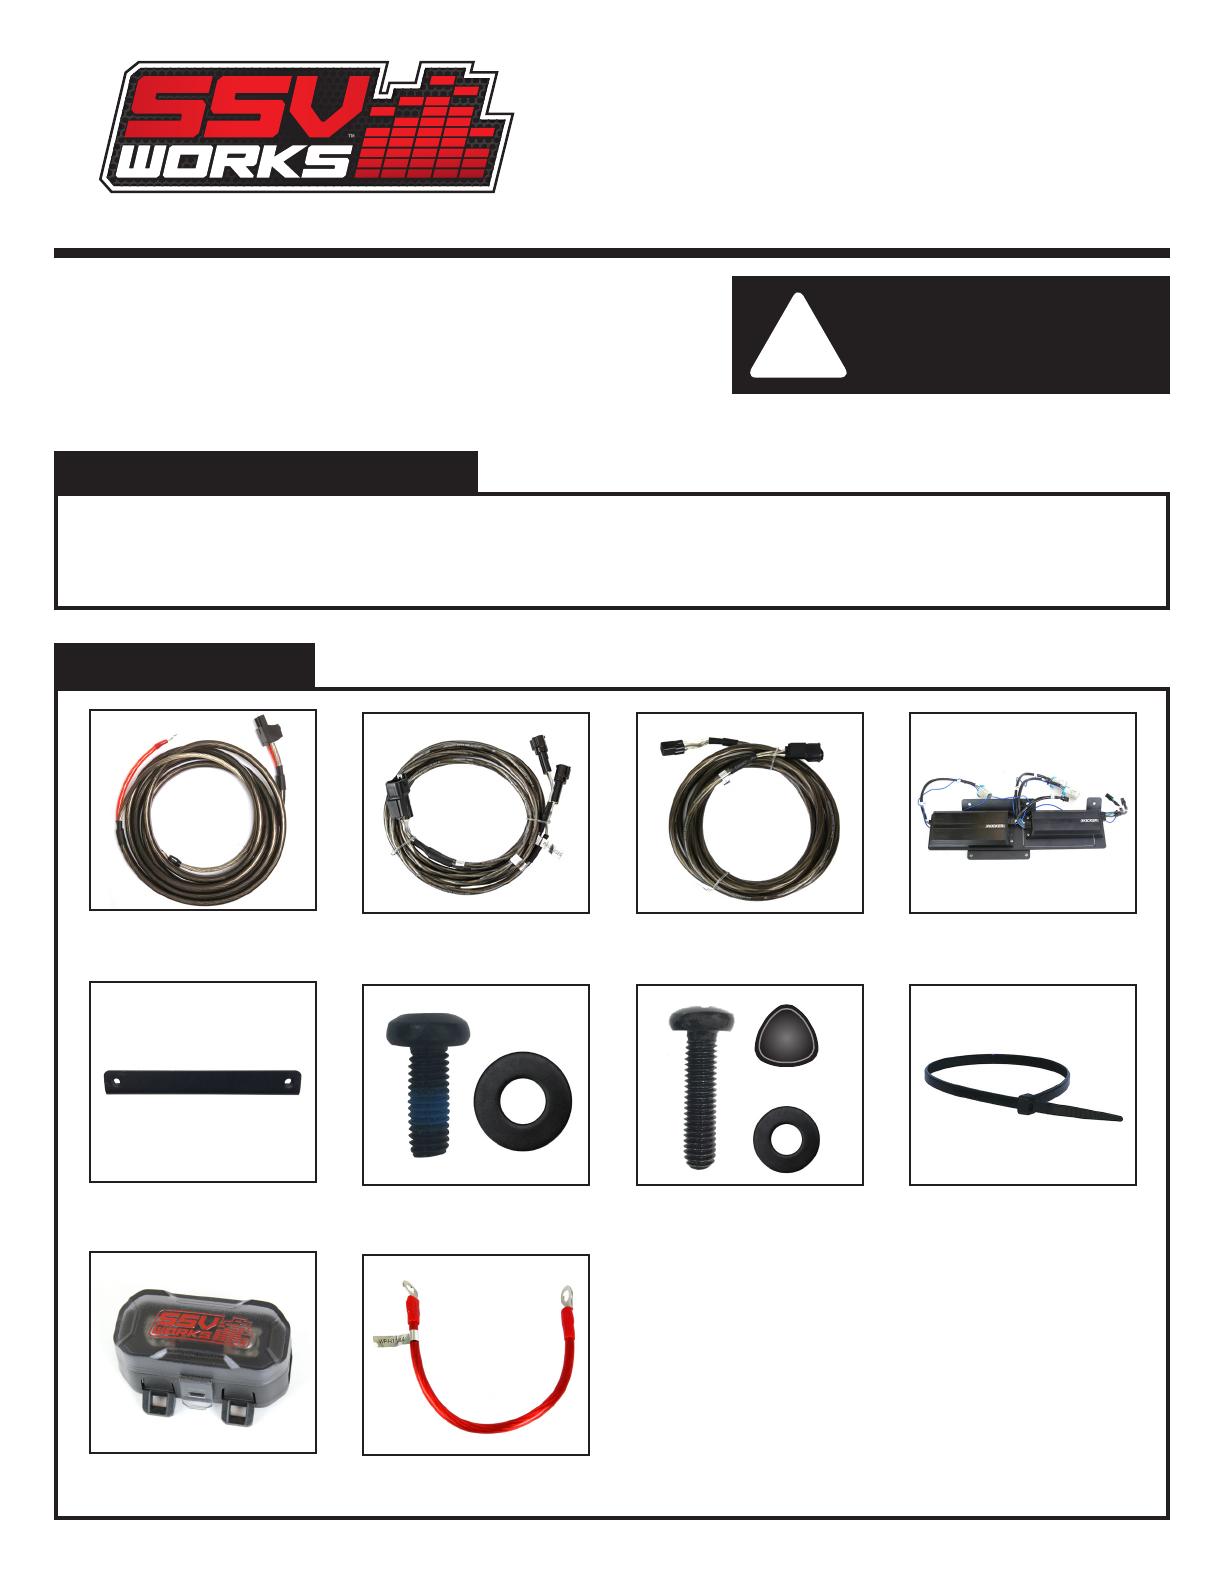
PARTS LIST IMAGES
2. B-H1149 Front Speaker Wire
6. M6 x 1.0 Screws and
Washers x 2
10. Battery Terminal Cable x2
7. Self-Tapping Screw and
Washer x 1
8. Zip Ties
1. Amp Power Wire x2
5. Amp Tray Base Bracket
9. Fuse Holder with 40A Fuse x2
3. B-H1151 Rear Speaker
Expansion
4. Amp Tray with pre-loaded
.LFNHU$PSOLÀHUV
Triangular end


