Page is loading ...


GETTING STARTED
PAIRING YOUR STYLUS AND LAPTOP
Pairing allows your laptop to communicate with the stylus.
1.
Turn laptop on and log in.
2.
Remove USB Key (aka dongle) from stylus box
3.
Insert USB key in an available USB port on your computer.
(Located on
the side of your computer). *Remember which port you used as you will
need
to use the same port each time.
4.
You must leave the key in the computer as long as you are using
the
stylus.
5.
Uncap your stylus.
6.
Open Polyvision Driver — (right click on Polyvision icon located in the bottom right of your screen and
choose the top option- Configure Polyvision Driver)
7.
Select hardware to see if your pen is recognized.
8.
Click ‘Pair Stylus’
9.
If Auto-pairing dialogue box appears, ignore directions and click
‘pair’
10.
Follow the directions
STILL NOT WORKING?
You may need a new dongle (does it light up?)
Or a new stylus (see pg. 4)
Contact helpdesk for further assistance
CALIBRATING YOUR ENO BOARD: You should only
have to do this once
Once your pen is paired you will be asked to tap the center of 9 targets on a green
screen to calibrate the board.
1.
After you calibrate your board- Open the Polyvision Driver again (icon on the lower right of
your screen)
2.
Choose Configure Polyvision Driver
3.
Select Projection
4.
Change ‘fixed projector’ to enable
5.
Close the Polyvision Driver and begin using your board
IF you notice your stylus is not matching your cursor or line strokes then re-calibrate
1.
Using the Eno Stylus
A.
Tap the projection icon on the magnetic strip (bottom image)
B.
Wait 5 seconds
C.
Tap the projection icon on the magnetic strip again
D.
Touch each target precisely in the center as it appears projected on the whiteboard,
following any instructions you see on the board. (there are nine targets total)

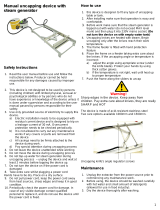
PEN & BOARD MECHANICS
TIPS FOR USING THE ENO STYLUS
Use only lithium batteries with the pen/stylus. To save battery life, be sure to cap
your pen
when not using it.
It takes about 6-7 seconds for the pen to ‘wake up’ after uncapping or after a few
minutes
with no use. You will have to recap / uncap to wake it up again.
The on/off switch is activated by the cap. It can also be activated if you bump it
with your
fingers while writing / holding the pen. Try to hold the pen further back
to avoid turning it
off during instruction.
Label your pen / stylus. Your computer is paired with one stylus in particular
although you
can pair up to six different utilities (including tablet), it’s easiest to
work with the same stylus
each time.
Do not hold pen at 90 degree angle to board. (The resulting line may ‘skip’)
Keep your pen safe. Replacements cost approximately $200.
TIPS FOR SETTING UP THE PRINT AND SAVE FEATURE
Open the Polyvision Driver
• (right click on the icon located in the bottom right of your screen & choose Configure
Polyvision Driver)
Print
Select the Print tab
From the dropdown menu choose the printer where you would like to print
Choose Printer Properties
• In the Orientation box select Landscape
Save
Click the blue link besides Save in to specify which folder you would like the screen shots to be
saved
Save image size—1600 recommended
Click the drop down next to Save as file type & choose Adobe PDF
Under Base file name choose Use Date/Time in the names
Change Disabled to Enabled next to Save PDF in landscape orientation
Page 4


MAGNETIC Icon STRIP (quick links)
Page 6
Poly Vision Eno Board Quick Start Guide
Some user’s Icon Strip has an additional feature for users to set quick
links.
To identify if your strip has the additional feature look at the bottom of your Icon
Strip you will notice two squares one with a #1 & one with a #2
Setup:
1.
Open the Polyvision Driver (icon located in the bottom right of your screen)
2.
Choose Configure Polyvision Driver
3.
Select the Icons tab
4.
To customize the icon so it launches a program on the computer, click the button on the right
edge of the window and navigate to the executable file for the program you want to launch
5.
OR if you would like the icon to launch a website, click the blue link beside “User Defined”
and type the complete web address (i.e. http://www.webpage.com) in the text box.
3
4
5
/