Page is loading ...

5 6
Introduction
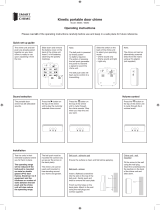
The Wireless Door Chime (DC687)
consists of two separate units:-
1. Push Button Unit
(Transmi t ter)
2. Chime Unit
(Receiver)
These units are completely
self-contained and no wiring between
them is necessary.
Range
Up to 100 metres.
NOTE: Range depends on location,
temperature, and battery condition.
Socket Outlet Output
230-240v a.c. 10amp 2400w max.
6. Clean only with a damp cloth and mild detergent. Do not use solvents.
7. In an event of power outage, surge or unstable main power supply,
your door chime will default to factory setting. Please reset the unit
according to ‘Resetting the Unit’.
Security
When you are away from home for long periods you may wish to leave
your Chime Unit with one of your neighbours so that they can monitor
callers to your house during your absence.
Trouble Sooting & User Hints
Problem Possible Cause Suggested Remedy
Chime does
not sound.
1. Units are out of range
(max. range 100m).
Operate the Chime unit within the
operation range (100m).
2. Push Button and Chime
units are not on same
frequency coding.
Re-set the frequency coding
(see Code Selection) or select a
different tone (see Tone Selection).
3. Flat Push Button battery. Change the battery.
4. Wrong polarity of bat tery
in Push Button.
Re-insert battery with polarity to
match markings.
5. Power outage, surge or
unstable main power
supply.
Re-set unit according to
‘Resetting the Unit’
Chime sounds
without Push
Button being
pressed
1. A power interruption
to the Door Chime unit
plus a similar door chime
product operating nearby
has caused the chime unit
to reset to the incorrect
House Code
A. Switch off the Chime Unit for at
least 1 minute. Switch on again.
It should beep twice. Press
the Push Button to operate the
chime. This re-sets the House
Code in the Chime Unit or;
B. Re-set the frequency coding
(see Code Selection
2. A similar Wireless
Door Chime product is
operating nearby on the
same House Code
Re-set the House Code
(see Code Selection).
3. Interference from CBs,
Taxis or remote control
toys operating on the
same frequency.
Re-set the House Code
(see Code Selection).
Warranty
Arlec guarantees this product in accordance with the Australian Consumer Law.
Arlec also warrants to the original first purchaser of this product (“you”) from a retailer that
this product will be free of defects in materials and workmanship for a period of 12 months
from the date of purchase; provided the product is not used other than for the purpose,
or in a manner not within the scope of the recommendations and limitations, specified by
Arlec, is new and not damaged at the time of purchase, has not been subjected to abuse,
misuse, neglect or damage, has not been modified or repaired without the approval of
Arlec and has not been used for commercial purposes (“Warranty”).
If you wish to claim on the Warranty, you must, at your own expense, return the product,
and provide proof of original purchase and your name, address and telephone number,
to Arlec at the address below or the retailer from whom you originally purchased the
product within 12 months from the date of purchase.
Arlec will (or authorise the retailer to) assess any claim you may make on the Warranty in
the above manner and if, in Arlec’s reasonable opinion, the Warranty applies, Arlec will
at its own option and expense (or authorise the retailer to) replace the product with the
same or similar product or repair the product and return it to you or refund the price you
paid for the product. Arlec will bear its own expenses of doing those things, and you must
bear any other expenses of claiming on the Warranty.
The Warranty is in addition to other rights and remedies you may have under a law in
relation to the product to which the Warranty relates.
Our goods come with guarantees that cannot be excluded under the Australian Consumer
Law. You are entitled to a replacement or refund for a major failure and for compensation
for any other reasonably foreseeable loss or damage. You are also entitled to have the
goods repaired or replaced if the goods fail to be of acceptable quality and the failure
does not amount to a major failure.
Arlec Australia Pty. Ltd. ACN 009 322 105 (“Arlec”) gives the Warranty.
Arlec’s telephone number, address and email address are:
Customer Service: (03) 9982 5111
Building 3, 31 – 41 Joseph Street, Blackburn North, Victoria, 3130
Blackburn North LPO, P.O. Box 1065, Blackburn North, 3130
Email: [email protected]
CPIN002309
Plug-In Wireless Door Chime
with Power Socket
DC687
Installation & Operating
Instructions
CPIN002309
DC687_CPIN002309.indd 1-3 30/03/12 4:00 PM

Code/Push Button Limiting Switch
Your Chime Unit is capable of working with a maximum of 4 Bell
Push Button units, each with its own frequency. If your Chime
Unit activates intermittently for no apparent reason, it might be
caused by a nearby device working on a similar frequency channel.
To eliminate frequency channel interruption, use the Code/Push
Button Limiting Switch (Fig. 3) to limit the Bell Push Button unit
and/or frequency channel that your Chime Unit can be activated by.
1. Connect the Chime Unit to the mains power and press
the Bell Push Button once. The Chime Unit will sound
to indicate that the 1st operating code is registered and
memorised. This is the factory setting and intended to limit
the active frequency channel and Bell Push Button unit to 1.
2. To register a 2nd Bell Push Button, press and hold the
Code Limiting Switch on the Chime Unit for 1 second, a ‘beep’ will sound
to indicate that it is ready to learn the 2nd operating code. Press the 2nd
Bell Push Button once, the Chime Unit will sound to indicate that the 2nd
operating code is registered and memorised. This will allow 2 different Bell
Push Button units and/or frequency channels to work with the Chime Unit at
the same time.
3. Repeat Step 2 to add a 3rd and 4th Bell Push Button.
4. To reset, disconnect the Chime Unit from mains power for at least 1 minute
then reconnect. This will reset the Chime Unit to learn 1 Push Button
and/or frequency channel only.
Note: Power outage, surge or unstable main power will also reset the
Code/Push Button Limiting function.
Resetting the Unit
To avoid uncontrolled activation:
1. Switch off the Chime Unit for at least 1 minute.
2. Switch back on. A double beep should be heard indicating that the unit is in
learning mode.
3. Press the Push Button. The chime should sound to indicate code selection.
Important Notes
1. The operation and range of your Wireless Door Chime depends on location,
temperature and battery condition.
2. Try different locations in your home, ideally more than 1 metre from the floor.
Move Chime unit closer to Push Button unit to improve operation.
3. Do not expose either unit to rain or immerse in water.
4. Avoid locations where the Push Button unit is exposed to direct summer
sunlight.
5. Do not leave exhausted batteries in Push Button unit.
432
Push Button
1. Push Button unit is operated by 1 x 3 volt Lithium battery (CR2032 - included).
2. Remove the back of case by pushing in the tab on the bottom with a small,
flat screwdriver.
3. The 3 volt Lithium battery (CR2032) is already installed.
Simply pull off the isolation strip which will allow the battery to make electrical
contact.
To Replace the Battery
Remove the locking screw from the battery holder clip and remove
old battery.
Insert 1 x 3 volt Lithium battery (type CR2032) in the battery
compartment, ensuring the battery polarity is correct as in Fig.1.
Replace clip and tighten locking screw to hold battery firmly in
place.
Chime Unit
The Chime Unit is powered by 240 volt and should be plugged into
any convenient household power point.
INSTALLATION
Chime Unit
Plug the Chime Unit into any household power point and switch power on. The
Chime Unit indicator lamp will glow and it will beep twice to indicate it is ready.
Press the push button unit to test the chime.
Do not mount the chime unit near metal objects, security door or in close
proximity to any radio emitting equipment. The range of the unit may be
substantially reduced
.
Push Button Unit
The Push Button unit has two mounting holes on rear plate of unit that must be
pushed through before unit can be mounted.
1. Remove rear plate of unit (see battery installation).
2. Push through tabs in mounting holes.
3. Using the back plate of the Push Button unit as a guide, mark the position of
holes onto mounting surface.
4. Drill appropriately sized holes and insert wall plugs if required.
5. Secure the back plate of Push Button unit to mounting unit.
6. Clip Push Button unit to back plate.
Alternatively the Push Button unit can be attached to smooth mounting
surfaces such as painted wood, glass and plastic using Self-Adhesive Pad
(supplied).
Do not mount the push button unit on metal or near metal door frame, security
door, metal furniture or in close proximity to any radio emitting equipment. The
range of the unit may be substantially reduced.
Door Chime Operation
Once the Push Button and Chime units have been installed in their desired
locations, the system is ready for use.
Depress button on Push Button unit momentarily, and chime should sound.
Press button again to repeat. Continual pressing of the button will not repeat
the chime.
If chime fails to sound, check batteries in push button and check power is on to
Chime Unit.
Tone Selection
The Wireless Door Chime is supplied with 8 built-in chimes.
Westminster Chime Twinkle Twinkle
Double Ding-Dong It’s a Small World
Circus Theme Dog Barking
Banjo on My Knee Telephone Ring
To change the chime tune, remove the Push Button Unit’s rear
cover.
Inside the Push Button Unit locate the small Tune Selector push
button marked ‘S’ (Ref. Fig 2). Each time that this Tune Selector
push button is pressed, the next of the 8 melodies will be played.
You can step through and listen to each in turn. When you hear
the melody you wish to choose, do not press the tune selector
again. The chime will play the selected melody each time the
bell press is pushed. At any time you can select another melody
by repeating the tune selector button process.
Refit the Push Button Unit rear cover.
Whenever the Push Button Unit battery is fitted or replaced, the
chime tune may default to the Westminster Chime.
Code Selection
The push button unit generates random code sequences to which the chime
unit is able to learn. Should your door chime unit activate intermittently for no
apparent reason, the uncontrolled activation may be caused by another unit
nearby or from a device operating on the same frequency.
C
R
2
0
3
2
+
s
Fig 1.
Fig 2.
Fig 3.
Code
Limiting
Switch
CPIN002308
DC687_CPIN002309.indd 4-6 30/03/12 4:00 PM
/