Dynamic CCTV MX4-SDI) User manual
- Category
- Digital Video Recorders (DVR)
- Type
- User manual
This manual is also suitable for
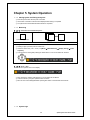
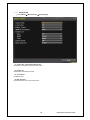
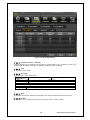
Dynamic CCTV MX4-SDI) is a powerful and versatile video surveillance system that offers a wide range of features and capabilities to meet the needs of any security application. With its high-resolution cameras, advanced recording options, and intuitive user interface, the MX4-SDI is ideal for use in homes, businesses, and other commercial settings.
Some of the key features of the MX4-SDI include:
- High-resolution cameras: The MX4-SDI supports up to 4 high-resolution cameras, providing crystal-clear images for both live viewing and recorded playback.
- Advanced recording options: The MX4-SDI offers a variety of recording options, including continuous recording, motion-activated recording, and scheduled recording. This allows you to customize the system to meet your specific needs.


-
 1
1
-
 2
2
-
 3
3
-
 4
4
-
 5
5
-
 6
6
-
 7
7
-
 8
8
-
 9
9
-
 10
10
-
 11
11
-
 12
12
-
 13
13
-
 14
14
-
 15
15
-
 16
16
-
 17
17
-
 18
18
-
 19
19
-
 20
20
-
 21
21
-
 22
22
-
 23
23
-
 24
24
-
 25
25
-
 26
26
-
 27
27
-
 28
28
-
 29
29
-
 30
30
-
 31
31
-
 32
32
-
 33
33
-
 34
34
-
 35
35
-
 36
36
-
 37
37
-
 38
38


Dynamic CCTV MX4-SDI) User manual
- Category
- Digital Video Recorders (DVR)
- Type
- User manual
- This manual is also suitable for
Dynamic CCTV MX4-SDI) is a powerful and versatile video surveillance system that offers a wide range of features and capabilities to meet the needs of any security application. With its high-resolution cameras, advanced recording options, and intuitive user interface, the MX4-SDI is ideal for use in homes, businesses, and other commercial settings.
Some of the key features of the MX4-SDI include:
- High-resolution cameras: The MX4-SDI supports up to 4 high-resolution cameras, providing crystal-clear images for both live viewing and recorded playback.
- Advanced recording options: The MX4-SDI offers a variety of recording options, including continuous recording, motion-activated recording, and scheduled recording. This allows you to customize the system to meet your specific needs.
Ask a question and I''ll find the answer in the document
Finding information in a document is now easier with AI
Other documents
-
Provision-ISR SA-8200D1SDI Datasheet
-
Digital Watchdog DW-VF16 User manual
-
WebGate HD400H User manual
-
 NetPromax LXP-900 - REV 1.3 Operating instructions
-
Falcon EYE-ON 16/16R+ User manual
-
Falcon 960H User manual
-
 InterVision XPR-4004E User manual
-
ERNITEC EDNS1000 - 4 CH User manual
-
Clover HDV4324 User manual
-
Costar SP 10 Series Owner's manual

