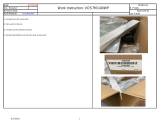
Page is loading ...

User manual
Please read the sections “Important notice” and “Warnings” at the end of this
document
V 1.0
https://www.infineon.com/ngc1081
2023-04-12
UM_2302_PL39_2304_090250
User manual for DEV_KIT_NGC1081
About this document
Scope and purpose
This document describes the evaluation kit for Infineon’s NGC1081 microcontroller, which supports near-
field communication (NFC). The kit has all the necessary components to enable the user to quickly start sensing
the world via NFC in active and/or passive mode. The required settings for both modes, for programming and
debugging, are covered in this document.
Intended audience
This document aims to help developers make use of the NGC1081 in NFC sensing applications. It can also serve
as a demo for customers when used to sense different parameters at the same time.
Reference board/kit
Product(s) embedded on a PCB with a focus on specific applications and defined use cases that may include
software. PCB and auxiliary circuits are optimized for the requirements of the target application.
Note: Boards do not necessarily meet safety, EMI and quality standards (for example UL, CE).
Figure 1 A photo of the Evaluation board EVAL_NGC1081

User manual
2
V 1.0
2023-04-12
User manual for DEV_KIT_NGC1081
Important notice
Important notice
“Evaluation Boards and Reference Boards” shall mean products embedded on a printed circuit board
(PCB) for demonstration and/or evaluation purposes, which include, without limitation, demonstration,
reference and evaluation boards, kits and design (collectively referred to as “Reference Board”).
Environmental conditions have been considered in the design of the Evaluation Boards and Reference
Boards provided by Infineon Technologies. The design of the Evaluation Boards and Reference Boards
has been tested by Infineon Technologies only as described in this document. The design is not qualified
in terms of safety requirements, manufacturing and operation over the entire operating temperature
range or lifetime.
The Evaluation Boards and Reference Boards provided by Infineon Technologies are subject to functional
testing only under typical load conditions. Evaluation Boards and Reference Boards are not subject to the
same procedures as regular products regarding returned material analysis (RMA), process change
notification (PCN) and product discontinuation (PD).
Evaluation Boards and Reference Boards are not commercialized products, and are solely intended for
evaluation and testing purposes. In particular, they shall not be used for reliability testing or production.
The Evaluation Boards and Reference Boards may therefore not comply with CE or similar standards
(including but not limited to the EMC Directive 2004/EC/108 and the EMC Act) and may not fulfill other
requirements of the country in which they are operated by the customer. The customer shall ensure that
all Evaluation Boards and Reference Boards will be handled in a way which is compliant with the relevant
requirements and standards of the country in which they are operated.
The Evaluation Boards and Reference Boards as well as the information provided in this document are
addressed only to qualified and skilled technical staff, for laboratory usage, and shall be used and
managed according to the terms and conditions set forth in this document and in other related
documentation supplied with the respective Evaluation Board or Reference Board.
It is the responsibility of the customer’s technical departments to evaluate the suitability of the
Evaluation Boards and Reference Boards for the intended application, and to evaluate the completeness
and correctness of the information provided in this document with respect to such application.
The customer is obliged to ensure that the use of the Evaluation Boards and Reference Boards does not
cause any harm to persons or third-party property.
The Evaluation Boards and Reference Boards and any information in this document is provided "as is"
and Infineon Technologies disclaims any warranties, express or implied, including but not limited to
warranties of non-infringement of third-party rights and implied warranties of fitness for any purpose, or
for merchantability.
Infineon Technologies shall not be responsible for any damages resulting from the use of the Evaluation
Boards and Reference Boards and/or from any information provided in this document. The customer is
obliged to defend, indemnify and hold Infineon Technologies harmless from and against any claims or
damages arising out of or resulting from any use thereof.
Infineon Technologies reserves the right to modify this document and/or any information provided
herein at any time without further notice.

User manual
3
V 1.0
2023-04-12
User manual for DEV_KIT_NGC1081
Safety precautions
Safety precautions
Note: Please note the following warnings regarding the hazards associated with development systems.
Table 1 Safety precautions
Caution: A drive that is incorrectly applied or installed can lead to component damage
or reduction in product lifetime. Wiring or application errors such as undersizing the
motor, supplying an incorrect or inadequate AC supply, or excessive ambient
temperatures may result in system malfunction.

User manual
4
V 1.0
2023-04-12
User manual for DEV_KIT_NGC1081
Table of contents
Table of contents
About this document ....................................................................................................................... 1
Important notice ............................................................................................................................ 2
Safety precautions .......................................................................................................................... 3
Table of contents ............................................................................................................................ 4
1 The board at a glance .............................................................................................................. 5
1.1 Scope of supply ....................................................................................................................................... 5
1.2 Main features ........................................................................................................................................... 5
1.3 Board parameters and technical data .................................................................................................... 5
2 System and functional description ........................................................................................... 7
2.1 Operating in active mode ........................................................................................................................ 7
2.1.1 Steps to power up the board in active mode .................................................................................... 7
2.1.2 Jumper connections in active mode ................................................................................................. 7
2.1.3 Potential applications in active mode............................................................................................... 7
2.2 Operation in passive mode ..................................................................................................................... 8
2.2.1 Steps to power up the board in passive mode .................................................................................. 8
2.2.2 Jumper connections in passive mode ............................................................................................... 8
2.2.3 Potential applications in passive mode ............................................................................................ 8
3 System design ....................................................................................................................... 9
3.1 Schematics .............................................................................................................................................. 9
3.2 Layout .................................................................................................................................................... 10
3.3 Bill of materials ...................................................................................................................................... 11
3.4 Connector and switch details ............................................................................................................... 12
4 System in operation .............................................................................................................. 13
4.1 Shield 2GO ............................................................................................................................................. 13
4.2 Firmware ................................................................................................................................................ 13
4.2.1 Steps to measure CO2 ....................................................................................................................... 14
4.2.2 Steps to measure temperature ........................................................................................................ 16
4.2.2.1 Active mode temperature measurement ................................................................................... 16
4.2.2.2 Passive mode temperature measurement ................................................................................ 17
Appendices ................................................................................................................................... 18
A Debugger connection ............................................................................................................................ 18
B NFC antenna .......................................................................................................................................... 19
Glossary ....................................................................................................................................... 20
Revision history............................................................................................................................. 21
Disclaimer..................................................................................................................................... 22

User manual
5
V 1.0
2023-04-12
User manual for DEV_KIT_NGC1081
The board at a glance
1 The board at a glance
This development kit is a tool for engineers who want to use NGC1081 as a solution for sensing the world via
NFC and energy harvesting. NGC1081 is an NFC tag-side controller, which combines in one device the functions
of energy harvesting, NFC, sensing unit and motor control. NGC1081 is based on a 32-bit Arm® Cortex®-M0
processor core operating at a CPU frequency of 28 MHz. Standard peripheral modules such as UART, I2C, SPI
and 32 kHz RTC are included. The user manual reference number is UM_2302_PL39_2304_090250.
1.1 Scope of supply
The development kit consists of the evaluation board EVAL_NGC1081, packages of firmware, demo cell phone
app, and a USB-A to micro-USB cable for power supply. With the QR code printed on the shipping box, it is
possible to register the board at http://www.infineon.com to get access to all related documents and code
examples. The following packages will be available after registration:
• Standalone temperature-sensing firmware (with additional sensing examples using Shield 2GO (S2GO)
sensors)
• Firmware development SDK (without source code)
• Mobile application demo for Android (without source code)
• Evaluation board schematic, PCB layout files, Gerber files, and bill of materials (BOM)
1.2 Main features
• Arm® Cortex®-M0 controller
• ISO14443-A NFC interface
• 60 kB non-volatile memory (NVM), 16 kB RAM
• Boot ROM
• 12-bit SAR ADC/10-bit DAC
• Integrated temperature sensor
• Integrated H-bridge
• Energy harvesting
• 128-bit AES accelerator
• True random number generator
• Chip UID, I²C, SPI and UART
1.3 Board parameters and technical data
Table 2 Operational conditions and parameters
Parameter
Symbol
Min.
Typ.
Max.
Unit
Note
Board power supply
VCCboard
5
V
Through micro-USB
IC power supply
VCCIC
2.8
3
3.6[*]
V
Stepped down on the
board, or connected
externally
GPIOs as outputs, high level
GPIO0 to GPIO15
2.2
2.5
V
Load 2 mA
GPIOs as outputs, low level
GPIO0 to GPIO15
0.2
V
Load 2 mA
GPIOs as inputs, high level
GPIO0 to GPIO15
1.75
3.6
V

User manual
6
V 1.0
2023-04-12
User manual for DEV_KIT_NGC1081
The board at a glance
Parameter
Symbol
Min.
Typ.
Max.
Unit
Note
GPIOs as inputs, low level
GPIO0 to GPIO15
0
0.7
V
Wake-up threshold, high level
WAKEUP
2.3
V
Wake-up threshold, low level
WAKEUP
0.8
V
Voltage at VCC_HB
VCC_HB
3.3
V
Avoid low-ohmic load on
VCC_HB over extended
period of time (several
seconds)
Current between MA and MB
I_HB
250
mA
Analog input
AN_IN0 to AN_IN3
0
1.8
V
Analog outputs
AN_OUT
0
1.7
V
[*] The maximum external voltage should not exceed the selected clamping voltage of NGC1081 – see the
datasheet for the possible values of the clamping voltage.

User manual
7
V 1.0
2023-04-12
User manual for DEV_KIT_NGC1081
System and functional description
2 System and functional description
The EVAL_NGC1081 has been developed to operate in two different modes. It can operate either in active mode
(by external wired power supply) or passive mode (by harvesting energy from the NFC antenna and without any
external wired power supply). Additionally, there is debugging mode, which is slightly different from active
mode.
2.1 Operating in active mode
As already mentioned, the EVAL_NGC1081 needs external power supply in active mode, between 3.0 V and
3.6 V, precisely.
2.1.1 Steps to power up the board in active mode
First, remove any reader device in the NFC antenna field, to avoid two conflicting power sources, then use one
of the two options below.
• Option 1: plug in a micro-USB and switch the S1 switch on.
The voltage from the micro-USB will then get stepped down internally to the recommended 3.3 V operating
voltage (additionally, please check the jumper connections in Table 3).
• Option 2: switch off the S1 switch, connect a direct 3.3 V to the pins marked with the 3.3 V label, and also
connect the ground to the pins marked with the GND label (additionally, please check the jumper
connections in Table 3).
2.1.2 Jumper connections in active mode
Table 3 Jumper connections in active mode
Jumper
Connection
Condition
JP8
Connected
–
JP10
Connected
When wake-up pin is not in use
JP5
Connect pins 2 to 3
When using half-bridge
All other jumpers may be connected or not depending on the application.
2.1.3 Potential applications in active mode
Active mode is an option in applications that require long time sensing. In that case, the board will be
programmed via NFC and supplied by an external wired power supply. Data sensed by the board can be read
via NFC at the end.
Potential applications:
• Temperature logger
• Smart thermostat
• CO2 logger
• General environment parameter logging

User manual
8
V 1.0
2023-04-12
User manual for DEV_KIT_NGC1081
System and functional description
2.2 Operation in passive mode
In passive mode, the EVAL_NGC1081 not only communicates with the reader device (e.g., smartphone), but also
harvests energy from it.
2.2.1 Steps to power up the board in passive mode
• Check jumper connections in Table 4.
• Make sure the capacitor on VCC_CB is soldered (C9 = 1 µF (recommended value)).
• When planning to use the half-bridge, solder C2, C11, or C12 if needed for harvesting energy (as shown in
Figure 2).
Figure 2 Capacitors for storing harvested energy to use the MA pin as an output power source
2.2.2 Jumper connections in passive mode
Table 4 Jumper connections in passive mode
Jumper
Connection
Condition
JP8
Disconnected
–
JP10
Connected
When wake-up pin is not in use
JP5
Connect pins 1 to 2
When using half-bridge
All other jumpers may be connected or not depending on the application.
2.2.3 Potential applications in passive mode
Sensing the world in passive mode is practical, as it doesn’t require batteries. All you need is a reader device
(e.g., smartphone), which most people have.
Potential applications are usually those that require one-time sensing or one-time motor movement, such as:
• Temperature and humidity sensing
• Tire pressure sensing
• CO2 sensingSmart lock applications

User manual
9
V 1.0
2023-04-12
User manual for DEV_KIT_NGC1081
System design
3 System design
3.1 Schematics
Figure 3 EVAL_ NGC1081 schematics

User manual
10
V 1.0
2023-04-12
User manual for DEV_KIT_NGC1081
System design
3.2 Layout
Figure 4 EVAL_NGC1081 layout (top layer)
Figure 5 EVAL_NGC1081 layout (bottom layer)

User manual
11
V 1.0
2023-04-12
User manual for DEV_KIT_NGC1081
System design
3.3 Bill of materials
Table 5 EVAL_NGC1081 BOM
Serial no.
Part ref.
Value
Package
Description
1
U1
MIC5365-3.3YD5-TR
SOT95P280X100-5N
LDO with 3.3 V output
2
U2
NGC1081
QFN32_NGC1081
Infineon tag-side microcontroller
3
U3
MIC5209-2.5YS
SOT230P700X180-4N
LDO with 2.5 V
output
4, 5
C1, C16
100 nF
C0603
Ceramic/X7R
6, 7, 8
C2, C3, C12
N/A
C0805K
N/A, ceramic/X7R
9, 10, 11
C4, C6, C8
0.1 µF, 10%, 6.3 V
C0805K
Ceramic/X7R
12, 13
C5, C9
1 µF, 10%, 6.3 V
C0805K
Ceramic/X7R
14
C7
22 µF, 10% or 20%,
6.3 V
Tantalum capacitor,
0805
TLJR226M010R3800
15
C10
20 pF, 10%, 6.3 V
C0805K
Ceramic/X7R
16
C11
1 mF, 10%, 6.3 V
Tantalum capacitor,
2917
399-18864-1-ND
17
C13
N/A
Tantalum capacitor,
2917
N/A, 399-18864-1-ND
18, 19
C14, C15
1 µF, 10%, 6.3 V
C0603
Ceramic/X7R
20
C17
N/A
C0603
N/A, ceramic/X7R
21, 22, 23
R1, R2, R6
100 kΩ, 5%
R0805
5%
24
R4
0.33 kΩ
R0805
5%
25, 26
R12, R13
47 Ω
R0805
5%
27
R14
1 MΩ
R0603
5%
28
LED1
KS_DELLS1.22-JHKI-1
KSDELLS122JHKI1
SMD super red top LED E
1608 mm
39, 30
S1, S2
DS04-254-1-01BK-SMT
DS04254101BKSMT
Voltage switches to circuit
31
J1
SAMTEC-FTSH-105-01-
X-DVJ
SAMTEC-FTSH-105-
01-X-DV
Debugger connector
32
J2
Micro-USB B, USB 2.0
Position surface
mount
Input voltage micro-USB
33
J3
Print socket, board-to-
board, 2.54 mm, 8
contacts (female)
2212S-08SG-85
Print socket, board-to-
board, 2.54 mm, 9
contacts (female)
2212S-10SG-85
Only 9 pins, not 10
34, 35, 36,
37
JP1, JP2,
JP11, JP12
1X08 (male), 2.54 mm
TSW-108-14-G-S
2.54 mm pitch
38
JP3
1X06 (male), 2.54 mm
TSW-106-14-G-S
2.54 mm pitch
39
JP4
1X04 (male), 2.54 mm
TSW-104-14-G-S
2.54 mm pitch

User manual
12
V 1.0
2023-04-12
User manual for DEV_KIT_NGC1081
System design
Serial no.
Part ref.
Value
Package
Description
40, 41, 42,
43
JP5, JP7,
JP13, JP14
1X03 (male), 2.54 mm
TSW-103-14-G-S
2.54 mm pitch
44, 45, 46,
47
JP6, JP8,
JP10, JP15
1X02 (male), 2.54 mm
TSW-102-14-G-S
2.54 mm pitch
48
JP9
1X02 (male), 2.54 mm
TSW-102-14-G-S
N/A, 2.54 mm pitch
3.4 Connector and switch details
Table 6 EVAL_NGC1081 connector and switch descriptions
Pin
Function
JP1
NGC1081 pins (1)
JP2
NGC1081 pins (2)
JP3
3V3 and GND pins
JP4
VIN (power supply for debugger) and GND pins
JP5
VCC_HB (half-bridge) connection options:
1 to 2: connect to external capacitor (passive mode)
2 to 3: connect to 3V3 (active mode)
JP6
(Optional) connection between the debugger power
supply and 3V3
JP7
Power supply for the S2GO (VCC sense) options:
1 to 2: MA (half-bridge motor pin)
2 to 3: 3V3 (connect only in active mode)
JP8
VCC_CB connection with 3V3:
Connected in active mode
Disconnected in passive mode
JP9
(Optional) pinouts for external an antenna
JP10
(Recommended) connected when wake-up pin is not in
use
JP11
NGC1081 pins (3)
JP12
NGC1081 pins (4)
JP13, JP14
UART and SPI connection between NGC1081 and S2GO
JP15
5 V pinouts connected to the S2GO sensors
J1
Debugger connector
J2
Micro-USB connector
J3
S2GO sensors connector
S1
Switches 3V3 from USB to the whole circuit
S2
Switches 5 V from USB to the S2GO sensors and JP15

User manual
13
V 1.0
2023-04-12
User manual for DEV_KIT_NGC1081
System in operation
4 System in operation
To sense the world using NGC1081, you can use the internal temperature sensor or any of the other peripherals
(I2C, SPI, UART ...) that the NGC1081 supports to sense using external sensors.
For an easy trial of different sensors, the EVAL_NGC1081 supports the S2GO boards.
4.1 Shield 2GO
The S2GO kits are different boards. Each has a different sensor, but all have the same pinning. This makes
trying different sensors using the EVAL_NGC1081 possible with minimal effort. Figure 7 shows the pinning of
the S2GO.
Figure 7 Pinning of S2GO
The S2GO used in the default firmware is the SHIELD_PASCO2_SENSOR, as shown in Figure 8.
Figure 8 SHIELD_PASCO2_SENSOR
This shield has the XENSIV™ PAS CO2 sensor on it. This is a real carbon dioxide (CO2) sensor in an
unprecedented small form factor.
4.2 Firmware
The default firmware on the EVAL_NGC1081 already makes one of two measurements:
1. If the SHIELD_PASCO2_SENSOR is present, the NGC1081 will make a connection with it, configure it and
read the CO2 (only available in active mode).
In order to have a correct measurement and not burn the sensor:
• Turn on S1 (3V3), then right after it S2 (5 V).

User manual
14
V 1.0
2023-04-12
User manual for DEV_KIT_NGC1081
System in operation
2. If the SHIELD_PASCO2_SENSOR is not available, the NGC1081 will use the internal sensor to make a
temperature measurement (available in active and/or in passive mode).
After going through one of the two options, the NGC1081 sends the results over UART. The results can be read
using the Android app supplied with the board. Below is the flow chart of the firmware.
Start
CO2_Sensor
available?
Initialize UART
Communicate
with
CO2_Sensor
Configure
Sensor and
Measure CO2
Measure
Temperature
via internal
Sensor
No
Yes
Send data over
UART and allow
NFC access to
data
Initialize I2C
Go to sleep
mode
Figure 9 Firmware flow chart
4.2.1 Steps to measure CO2
1. Plug the micro-USB into J2 for power supply.
2. Make sure the following jumpers are connected correctly:
a. JP8 connected
b. JP7 connected between 2 and 3
3. Connect the Rx UART cable to GPIO2 (Tx of the NGC1081).
4. Place the SHIELD_PASCO2_SENSOR on J3.
5. Switch S1 on, then right after switch S2 on.
These steps are labeled on the board in Figure 10.

User manual
15
V 1.0
2023-04-12
User manual for DEV_KIT_NGC1081
System in operation
Figure 10 CO2 measurement steps labeled on the EVAL_NGC1081 with the SHIELD_PASCO2_SENSOR
After less than 2 s the result will already be shown on the UART terminal.
6. Additionally, if the phone is placed where the NFC antenna is, the result of the measurement will also be
shown in the app.
Note: Every phone has its NFC antenna in a different place (usually on the back of the phone). The
performance is best when the phone’s NFC antenna is placed in the middle of the EVAL_NGC1081
antenna.
The figures below show a screenshot of both the phone and the UART terminal.
Figure 11 Screenshot of the result on the app after CO2 measurement

User manual
16
V 1.0
2023-04-12
User manual for DEV_KIT_NGC1081
System in operation
Figure 12 Screenshot of the result on the UART terminal after CO2 measurement
4.2.2 Steps to measure temperature
For temperature measurement there are two options – either measuring in active mode, or measuring in
passive mode.
4.2.2.1 Active mode temperature measurement
1. Plug the micro-USB into J2 for power supply.
2. Make sure the following jumper is connected correctly:
a. JP8 connected
3. Connect the Rx UART cable to GPIO2 (Tx of the NGC1081).
4. Switch S1 on.
Figure 13 shows the steps mentioned above on the board.
Figure 13 Temperature measurement steps labeled on the EVAL_NGC1081
5. After around 2 s the result will already be shown on the terminal.
6. Additionally, if the phone is placed where the NFC antenna is, the result of the measurement will also
be shown in the app.

User manual
17
V 1.0
2023-04-12
User manual for DEV_KIT_NGC1081
System in operation
The figures below show the results of temperature measurements.
Figure 14 Screenshot of the result on the app terminal after temperature measurement
Figure 15 Screenshot of the result on the UART terminal after temperature measurement
4.2.2.2 Passive mode temperature measurement
For passive mode temperature measurement, there are just two steps:
1. Make sure JP8 is not connected.
2. Place the phone where the EVAL_NGC1081 antenna is, for roughly 2 s.
The result should look similar to that shown in Figure 14 and Figure 15.

User manual
18
V 1.0
2023-04-12
User manual for DEV_KIT_NGC1081
Appendices
Appendices
A Debugger connection
NGC1081 IC supports Arm® SWD and TAG debug ports for firmware programming. Figure 16 shows the
connection of the debugger to the device. Two signals of the SWD debug port – SWDCLK and SWDIO – are
connected with the pull-down resistors of 100 kΩ. Series termination resistors of 47 Ω on the SWCLK and SWDIO
lines are strongly recommended. As shown in Figure 16 and Figure 17, if JP6 is connected, the system will be
supplied by VDD (3.3 V); debugging/flashing is only done in active mode. As GPIO outputs of the device have a
“high” level (2.2 V to 2.5 V) instead of the 3 V range, a low-dropout (LDO) regulator with the 2.5 V output is used
to generate the required level for the VTref signal of the debugger. Nine-pin debugger SWD/JTAG pinout is shown
in Figure 18.
As a debugger tool, micro trace for Cortex-M from Lauterbach or Segger J-LINK JTAG debuggers can be used.
Both debuggers have a 20-pin header, therefore a 20-pin to 10-pin adapter is required. Please be aware that a
debugger is not included in the development kit and must be ordered separately.
Figure 16 Schematics of the debugger part

User manual
19
V 1.0
2023-04-12
User manual for DEV_KIT_NGC1081
Appendices
Figure 17 rConnection of USB and debugger to the NGC1081
Figure 18 Ten pin descriptions of the JTAG
B NFC antenna
The evaluation kit offers an antenna as part of the evaluation board. An additional finished antenna design can
be downloaded from the NGC1081 product web page. It is also possible to remove the antenna on the PCB and
use an external antenna by connecting it to JP9. NFC readers operate in the 13.56 MHz high-frequency band.
The typical value of the internal capacity between terminals LA and LB of NGC1081 is given in the datasheet,
and it is 23.5 pF. For the antenna tuning (if necessary) capacitors C5 and C6 are laid out on the evaluation
board.

User manual
20
V 1.0
2023-04-12
User manual for DEV_KIT_NGC1081
Glossary
Glossary
S2GO
Shield 2GO
EVAL_NGC1081
Evaluation board NGC1081
/