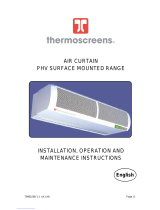
Claudgen CA1309S10 User manual

Type
User manual

Claudgen CA1309S10 is a commercial air curtain designed for discreet positioning above doorways up to 3.4m ceiling height, providing a comfortable indoor climate by creating an invisible barrier of air that separates the indoor and outdoor environments. With multiple modular blower units, it delivers efficient airflow and temperature control, making it ideal for retail or commercial premises. Its advanced features include mechanical switch control, optional touchscreen controller, and BMS connectivity for integration with building management systems.

Claudgen CA1309S10 is a commercial air curtain designed for discreet positioning above doorways up to 3.4m ceiling height, providing a comfortable indoor climate by creating an invisible barrier of air that separates the indoor and outdoor environments. With multiple modular blower units, it delivers efficient airflow and temperature control, making it ideal for retail or commercial premises. Its advanced features include mechanical switch control, optional touchscreen controller, and BMS connectivity for integration with building management systems.


All electrical appliances produced by the Company are guaranteed for one year against faulty
materials or workmanship. This applies only if the appliance has been used for purposes in
accordance with the instructions provided and has not been connected to an unsuitable
electricity supply, or subject to misuse, neglect, damage or modified or repaired by any person
not authorised by us. This guarantee is offered to you as an extra benefit and does not affect your
legal rights.
The correct electricity supply voltage is shown on the rating label attached to the appliance.
Reasonable care has been taken to ensure that this guide is accurate at the time of printing.
In the interest of progress the Company reserve the right to vary specifications from time to time
without notice.


  
  
 




1 General Information
1.1 Warnings
1.2 Health and Safety
1.3 Electrical Supply
1.4 Location
1.5 Clearance Distance
1.6 Standards
2 Introduction
2.1 Introduction
2.2 Mechanical switch
2.3 Touchscreen controller
3 Dimensions & fixing locations
3.1 Dimensions
3.2 Fixing location
4 Technical Specification
4.1 Specification
5 Wiring Details
5.1 Installer Wiring
5.2 Factory Wiring
5.3 Network Wiring - Controller
5.4 Network Wiring - Switches
6 Modifying the heater to single phase operation
7 Installation Details
8.1 Screw location for grille removal
8.2 Mounting
8.3 Electrical Supply
8.4 Installation
8 Fault detection and LEDs
8.1 Installer Wiring
8.2 Overheat protection reset
9 BMS Connection MODBUS Protocol
10.1 BMS Connection
10.2 MODBUS Protocol
10 Touchscreen Controller Operation
11.1 Main Screen
11.2 Setting menu
11.3 Time
11.4 Lock
11.5 Timer
11.6 Timer - time schedule
11.7 External switches
11.8 Operating Mode selection
11.9 Manual Mode
11.10 Autoomatic Mode
11.11 Temperature Mode 1
11.12 Temperature Mode 2
11.13 Energy usage
11.14 Identification

1.1 Warnings
All installations must be in accordance
with the regulations. These instructions
must be handed to the user on comple-
tion of the installation. Installers and ser-
vice engineers must be able to demon-
strate competence and be suitably
qualified in accordance with the regula-
tions. To ensure continued and safe op-
eration it is recommended that the ap-
pliance is serviced annually. The air cur-
tain outlet/inlet grille must not be ob-
structed during use. Any modifications
made to the unit not approved by Con-
sort will void manufacturers warranty and
potentially create a hazard. The appli-
ance is NOT intended for use by persons
(including children) with reduced physi-
cal, sensory or mental capabilities or lack
of experience or knowledge unless they
have been given instruction concerning
use of the appliance by a person re-
sponsible for their safety. Children should
be supervised to ensure that they do not
play with the appliance. Parts of the
heater can become very hot when in
operation and cause burns. The heater is
not equipped with room thermostat and
should not be used in small rooms so as
to avoid overheating.
1.2 Health and Safety
Please read this instructions thoroughly before
installing the appliance. Sole liability rests with the
installer to ensure that all site safety procedures
are adhered to during installation. Sole liability
rests with the installer to ensure that protective
safety wear such as hand, eye, ear and head
protection is used during installation of the prod-
uct. Ensure that all anchoring points are suitable
for the weight of the appliance.
1.3 Electrical Supply
This heater must be permanently con-
nected to the electricity supply via a
double pole switch having 3mm gap on
each pole. There are no exceptions.
All units must be wired in accordance with I.E.E.
regulations for the Electrical Equipment of
Buildings.
BMS control, time switches and door interlocks
can be installed at the discretion and responsi-
bility of the installer.
Follow paragraph 4 ‘technical specification
for more details.
1.4 Location
All units should be installed directly over the
door opening. It is recommended that the air
curtain is installed on the inside of the building.
Care must be taken to allow complete free air
movement into the inlet grilles of the unit to
ensure correct working operation of the air cur-
tain. The discharge opening should be as close
to the top of the door as possible and cover
the entire door width.
Units can be mounted adjacent to each other
to cover the full door opening across wider en-
trances.
1.5 Clearance Distance
It is recommended that a minimum clearance
of 50mm is allowed above the heater. The
clearance allows for cable entry and addition-
al air inlet. It also prevents surfaces overheat-
ing.
The minimum mounting height (floor to grille) is
2m. The maximum mounting height is 3.4m.
1.6 Standards
The heater conforms to the following standards
Electrical Equipment (Safety) Regulations 2016
SI. 2016 1101
Electromagnetic Compatibility Regulations
2016 SI. 2016 No. 1091
Radio Equipment Regulations 2017 SI. 2017
No. 1206
The Ecodesign for Energy Related Products
and Energy Information (Amendment) (EU Exit)
Regulations 2019. SI. 2010 2617
The Restriction of use of Certain Hazardous
Substances. SI. 2012 No. 3032
The Supply of Machinery (Safety) Regulations
2008 (SI 2008/1597)


2.1 Introduction
This instruction manual describes the Screen-
Zone Commercial range of air curtains. They
are designed for discreet positioning above
the doorways of retail or commercial prem-
ises up to 3.4m ceiling height.
The air curtains comprise multiple modular
blower units 510mm or 615mm wide and
with nominal maximum power output from
4.5kW to 7kW 3Ph 415V.
Models are available in 1.3m, 1.5m and 2m
lengths, made up of 2 or 3 blower units. For
wider doorways, up to 7 air curtains can be
easily interconnected using CAT5/CAT6 RJ45
networking cable.
It is recommended that this control cable is
run separately within its own trunking to
avoid external interference.
The air curtain can be controlled by option-
al Touchscreen controller (not supplied with
the heater) , mechanical switches or BMS.






2.2 Mechanical switch Controller
Each air curtain is supplied with HE8408 me-
chanical switch. More details at Installer wiring
section. This controller will provide 2 fan speed
and 3 heat setting options.
2.3 Optional Color Touchscreen
Controller
Optional Color touch screen controller (not
supplied with the heater) giving options for 8
fan and 8 heat settings can be mounted up to
50m from the air curtain. Optional BMS control,
remote thermostats and door interlocks can be
installed.
The electronic touch screen controller shown
on the picture below allows the user to control
either a single air curtain, or a network of up to
7 air curtains with the same settings.
The controller is designed to be mounted on a
surface double gang back box, and is pow-
ered by an RJ45 connection. The controller will
not fit metal or dry lining back box.
The cable length between the base unit and
the controller can be up to 50 metres.


 
 

   
 
   
 
 
 
 
 
    

 
  
    
   
    
 
 
 
 

 

     
   
  
 
 
     
@ 10
   
  

    
  
  


   
 
   
 
   
 
 
 
    

 
    
    
   
    
 
 
 
 

 

     
   
  
 
 
     
@ 10
   
  

    
  
  


  
 

 
  
 
 
 
   

 
   
   
  
   
 
 
 
 

 

    
   
  
 
 
    
@ 10
   
  

   
  
  





Optional external temperature sensor


 


 -
CAT5 cable with RJ45 connectors can be
used to network up to 7 air curtains in a
daisy-chain configuration.
The DIP switches 1, 2 and 3 are used to
configure each air curtain with a unique
address.
DIP switch setting 000X is reserved for
when a controller or BMS is not used.
E.g. air curtain 1 DIP switches set to 1000.
External and door switches are connected
between COM and SW1 or SW2.
Their behaviour can be configured in the
controller settings menu.
E.g. air curtain 2 DIP switches set to 0100.
All possible addresses are:
1 100X
2 010X
3 110X
4 001X
5 101X
6 011X
7 111X


 -
The aircurtain can be also controlled by
mechanical switches.
In this configuration touchscreen controller
or BMS controls will not work.
To operate heater by mechanical switch-
es, the DIP switches on the main pcb
need to be set to 000X.
The DIP switch 4 is used to select fan
speed range.
For installation height of 2 - 3m set the DIP
switches to 0000.
For installation height of 3 - 4m set the DIP
switches to 0001.
SW1 - on / off
SW2 - low speed / high speed
SW3 - 1/3 heat output
SW4 - 2/3 heat output
CAT5 cable with RJ45 connectors can be
used to network up to 7 air curtains in a
daisy-chain configuration.
The 2 DIP switches on all 7 connected air-
curtains must be set to different addresses.
All possible addresses are:
1 100X
2 010X
3 110X
4 001X
5 101X
6 011X
7 111X


CA1309 is supplied as 3 phase only appliance. In order to use it with a single phase sup-
ply, the internal wiring has to be modified. The appliance is supplied with a single phase
conversion kit. The pictures below describe how to change the internal wiring. After the
internal wiring has been modified it is necessary to change labelling of the connector as
shown on the picture below and also new rating label showing single phase supply must
be use to cover the existing 3 phase operation rating label.
This has to be followed exactly.










 



7.2 Mounting
All units should be installed horizontally directly over
the door opening. It is recommended that the air
curtain is installed on the inside of the building,
within the open room space against a wall or ceil-
ing.
Care must be taken to allow complete free air
movement into the inlet grilles of the unit to ensure
correct working operation of the air curtain. The
discharge opening should be as close to the top of
the door as possible and must cover the entire
door width.
Units can be mounted adjacent to each other to
cover the full door opening across wider entranc-
es.
7.3 Electrical Supply
The cable entry is located on the top centre of the
heater. Cable entry is located on a removable
bracket for easier installation. The heater is supplied
with two 20mm cable glands. The cable gland
holes can be enlarged by removing excess metal
to 25mm. The bracket is secured by two hex head
screws.
7.4 Installation
It is the sole responsibility of the installer to ensure
that the points of attachment to the building are
sound. Consultation with the consultant/architect
or owner of the building is recommended to ensure
that a sound, mechanically stable installation is
achieved.
All attachments must be capable of supporting the
weight of the product .

Step 1
Carefully unpack the heater.
Step 2
Remove the grille by loosening screws as shown on
the picture above.
Step 3
For wall mounting:
The heater can be fixed to the wall using 6mm or
10mm holes provided.
Mark and drill required holes as explained in section
3 and fix heater to the wall.
For suspending from the ceiling:
Either drop rods or catenary wire can be used to
fasten the air curtain to the ceiling support structure.
The mounting points can be seen in section 3.
Step 4
Remove cable entry bracket.
Connect electrical supply , optional door switches
and external sensor to appropriate terminals and
reattach the bracket.
Step 5
Test the heater.
Step 6
Refit the heater grille.
 



The air curtain monitors the fan speed,
power output and heatsink temperature. In
the event of a fault the red LED on the sec-
ondary PCB flashes:
The red LED flashes a number of times and
then pauses. The number of flashes de-
notes the fault.
The heater is equipped with electronic over
heat protection and also manually resetta-
ble over temperature cut-outs. There are
two cut-outs on each blower module on
the top of the heating element. The CA13
and CA15 heaters have four cut-outs in to-
tal and CA20 six cut-outs. In the unlikely
event of electronic failure, the mechanical
cut-outs will switch off power to the heating
element. In order to reset cut-outs, isolate
the heater from power and press small
plastic push button on the top of each cut-
out. The cause of cut-outs operating should
be investigated before resetting.
When the air curtains are powered up in
standby mode, a green LED on the main
board shows that the 12V power supply is
working correctly:
When heat or cold blow is demanded the
secondary PCBs are powered. A second
LED on the main PCB shows that the second
12V power supply is working correctly:
A fault with the auxiliary power is indicated
by a flashing orange LED on the main PCB:
A green LED on the secondary PCBs shows
that they are receiving 12V power:









-




Main PCB
Main PCB
Main PCB
Secondary PCB
Secondary PCB
 
 



9.1 BMS Connection
The heater is compatible with BMS systems using
MODBUS protocol.
The connection to BMS system can be made using
one of the RJ45 connectors.
Only one means of control can be used at any
time. If BMS is used to control the heater, the colour
screen controller must not be used.
The BMS can control fan speed and heat output
and also read and report the heater status.
Speed can be set in the range of 600 - 1700RPM in
1RPM steps. If the speed is set below 600RMP, the
heating element is automatically disabled. Care
has to be taken when selecting speed. The fan
speed should be always correct for the selected
heat output. If the speed is too low, the heater can
overheat.
Heat output can be set in the range of 0 - 100% in
1% steps.
9.2 MODBUS Protocol
The DIP switches 1, 2 and 3 are used
to configure each air curtain with a
unique address.
RJ45 cable can be used to network up to 7 air cur-
tains in a daisy-chain configuration.
DIP switch setting 000X is reserved for when a con-
troller or BMS is not used.
All possible addresses:
RS485 serial half-duplex interface
MODBUS RTU
9600 baud
8 bits
1 start bit
no parity + 2 stop bits
‘mark’ parity + 1 stop bit
Supported MODBUS function codes:
0x03 read multiple input registers
0x04 read multiple holding registers
0x06 write single holding register
0x10 write multiple holding registers
16 Bit Input Registers:
1 Status
2 Temp 1
3 Temp 2
4 Temp Heatsink
5 Temp External
6 External Switches
Temperatures are formatted as 16 bit signed integers.
Units are sixteenths of a degrees Celsius, as used by
DS18B20 temperature sensors. The hex value 0xF000 is
used to denote an invalid reading.
The status register uses bits to indicate faults:
Bit 0 - overheat
Bit 1 - heatsink overheat
Bit 2 - temp sensor 1
Bit 3 - temp sensor 2
Bit 4 - heatsink temp sensor
Bit 5 - remote temp sensor
Bit 6 - L2 on current low
Bit 7 - L2 off current high
Bit 8 - L3 on current low
Bit 9 - L3 off current high
Bit 10 - motor PSU
Bit 11 - motor
Bit 12 - MCU
Bit 13 - connection
Bit 14 - 12V auxiliary power
Bit 15 - main PCB relay
External switches register uses bits to show the state
of switches:
Bit 0 - Switch 1
Bit 1 - Switch 2
Bit 2 - Switch 3
Bit 3 - Switch 4
16 Bit Holding Registers:
1 RPM (units revolutions per minute)
2 Power (units percentage 0 –100)
RPM must be set to at least 600, otherwise heating is
disabled.
1 100X
2 010X
3 110X
4 001X
5 101X
6 011X
7 111X
Main PCB



10.1 Home Screen
The home screen provides information about the
heater status and all relevant functions.
· Time
· Operating mode
· Heater status
· Door switch status
· Timer status
· Heat output
· Fan speed
· ON / Stand-by button
· Settings menu button
10.2 Settings menu
All functions and settings are available from this
menu.
10.3 Time
The time can be set using the arrow buttons. A coin
battery CR1220 maintains the time when power is
interrupted. Time is displayed on the home screen
and needs to be set to use the timer function.
10.4 Lock
PIN function can be enabled to prevent unwant-
ed operation of the heater or changing the set-
tings.
The PIN can be completely disabled, enabled
for settings only or all functions.
The default Pin is set as 1234, but can be
changed using the Change Pin button. If the PIN
is forgotten contact Consort technical help.
10.5 Timer
The 7 day timer function allows scheduling auto-
matic switching between on and stand-by. Each
day can be individually enabled or disabled. The
timer allows up to two periods of operation per
day. The white bars indicate when the heater is
timed to switch on.
Use the settings buttons to set up the time for
each day (see next page), and the copy button
to copy settings from one day to another.


-
10.6 Timer - time schedule
There are 2 timer periods for each day available.
Tapping the slider in the top right corner will
change between 1 or 2 time periods.
The times for the first time periods are on the top of
the screen, the times for the second timer period
are on the bottom of the screen. Times can be ad-
justed in 15 minute intervals using the buttons.
When the timer is active, an icon will appear on
the home screen giving information about the next
switch time.
10.7 External switches
There is a provision for 2 remote switches than can
be wired into the air curtain with. The switches must
be voltage free type, NO or NC configuration.
SW1 can be connected to a door switch or occu-
pancy sensor installed in the door area. When the
function is activated, the door switch will enable
the air curtain when the door is open and disable it
when the door is closed. The second slider is used
to configure the system for the correct switch type.
When the air curtain is disabled by the door switch,
the heater will operate at a low fan speed. This will
allow for a fast start-up when the door is opened.
When SW1 is active, the home screen will show the
status of the door switch.
SW2 is intended for a remote switch that can be
used to disable the air curtain from a remote loca-
tion. Usually this would be a simple BMS or external
timer connection. Once disabled using remote
switch the air curtain can’t be controller by the
touchscreen controller and will remain disabled
until enabled remotely.
10.8 Operating Mode selection
One of four operating modes can be selected.
Each mode uses a different method of select-
ing heat and fan settings when the air curtain is
not in stand-by mode. Use the settings button
to configure each mode.
10.9 Manual Mode
In manual mode user can select required fan
and heat output by tapping + or - symbols on
the home screen next to the fan and heat bars.
There are 8 fan speeds and 8 heat settings
available. It is possible set maximum and mini-
mum limits for fan speed and heat output.
Once limits are set and functions activated,
only limited fan speed and heat output will be
available on home screen when in manual
mode.
  • Page 1 1
  • Page 2 2
  • Page 3 3
  • Page 4 4
  • Page 5 5
  • Page 6 6
  • Page 7 7
  • Page 8 8
  • Page 9 9
  • Page 10 10
  • Page 11 11
  • Page 12 12
  • Page 13 13
  • Page 14 14
  • Page 15 15
  • Page 16 16
  • Page 17 17
  • Page 18 18
  • Page 19 19
  • Page 20 20
  • Page 21 21
  • Page 22 22
  • Page 23 23

Claudgen CA1309S10 User manual

Type
User manual

Claudgen CA1309S10 is a commercial air curtain designed for discreet positioning above doorways up to 3.4m ceiling height, providing a comfortable indoor climate by creating an invisible barrier of air that separates the indoor and outdoor environments. With multiple modular blower units, it delivers efficient airflow and temperature control, making it ideal for retail or commercial premises. Its advanced features include mechanical switch control, optional touchscreen controller, and BMS connectivity for integration with building management systems.

Ask a question and I''ll find the answer in the document

Finding information in a document is now easier with AI