Page is loading ...

Phoenix #98836 Motorized Treadmill
1
BEFORE YOU BEGIN
Thank you for choosing #98836 Motorized Treadmill from Phoenix Health & Fitness. Whether you are a beginner of using
exercise equipment for the first time, or an athletic pro seeking to maintain peak performance of your body strength,
Phoenix #98836 Motorized Treadmill will help you to achieve your goals.
Should you have any questions, please call our Customer Service Department, Monday through Friday,
9:00AM until 6:00PM pacific time (excluding holidays), toll free at :
1.888.535.8637
Please have the following information ready before placing your call :
Your name
Your address
Your telephone number
Model number
Parts order number
Many times product assembly questions can be handled by our customer service personnel. Please call us
first if you are having problems.
Any return of our products will require all of its original contents, such as packing material, packing box,
components, hardware, etc.
Opening Carton/Assembling Your Product

Phoenix #98836 Motorized Treadmill
2
WARRANTY
Phoenix Health & Fitness warrants this product to be free from defects in workermanship and material, under
normal use and conditions, for two years on Main Frame only (#401), and six months on all other parts (such as
Driving Motor (#507), Front Roller Tube + Shaft (#508), Driving Belt (#509), Control Board (#511) and Running
Belt (#601), etc). This warranty extends to the original purchase only. It is recommended that the original receipt
be kept with the manual.
Phoenix Health & Fitness will provide replacement parts free of charge when defect is found during the warranty
period. If a repair is necessary, please contact our Customer Service Department at 1.888.535.8637. Under no
circumstances will Phoenix Health & Fitness be responsible for damages or failures that occur as a result of
improper assembly, or failure to operate the product correctly. This warranty does not cover misuse, abuse,
freight damage and/or alterations or repairs not made by Phoenix Health & Fitness, or a recommended service
center. In the event a return is necessary, please contact the retailer where the unit was purchased.
THIS WARRANTY DOES NOT APPLY WHEN THE PRODUCT IS USED FOR RENTAL OR COMMERCIAL
USE.
This warranty gives you specific legal rights, and you may also have other rights which may vary from state to
state.
PARTS
To order replacement parts, simply call our Customer Service Department toll-free, at 1.888.535.8637, Monday
through Friday, 9 :00AM until 6 :00PM pacific time (excluding holidays). To help us assist you, please have the
following information ready :
1) Model name and number from the cover of the manual
2) The part description and order number.
CONSUMER RESPONSIBILITY
It is the responsibility of the consumer to retain this warranty as well as the original receipts in case a
warranty claim should be made. Should you have any questions regarding this or any other information, please
call our Customer Service Department toll-free, at 1.888.535.8637 Monday through Friday, 9 :00AM until 6 :00PM
pacific time (excluding holidays).

Phoenix #98836 Motorized Treadmill
3
PRECAUTIONS
WARNING: To reduce the risk of burns, fire, electric shock, or injury to persons, read the following important precautions
and information before operating the treadmill.
1. It is the responsibility of the owner to ensure that all users of this treadmill are adequately informed of all warnings and
precautions.
2. Use the treadmill only as described in this manual.
3. Place on a level surface, with 2m of clearance behind it. To protect the floor or carpet from damage, place a mat under
the treadmill.
4. When choosing a location for the treadmill, make sure that the location and position permit access to a plug.
5. Keep the treadmill indoors, away from moisture or dust. Do not put the treadmill in a garage or covered patio, or near
water.
6. Do not operate the treadmill where aerosol products are used or where oxygen is being administered.
7. Keep children under the age of 12 and pets away from the treadmill at all times.
8. The treadmill should not be used by persons weighing more than 250lbs.
9. Never allow more than one person on the treadmill at a time.
10. Wear appropriate exercise clothing when using the treadmill. Do not wear loose clothing that could become caught in
the treadmill. Athletic support clothes are recommended for both men and women. Always wear athletic shoes. Never
use the treadmill with bare feet, wearing only stockings, or in sandals.
11. If you need an extension cord, use only 14 gauge cord of1.5m or less in length.
13.12. Keep the power cord away from heated surfaces.
14.13. Never move the walking belt while the power is turned on. Do not operate the treadmill if the power cord or plug is
damaged, or if the treadmill is not working properly. (See “Troubleshooting” Page 4331 if the treadmill is not working
properly.)
15.14. Never start the treadmill while you are standing on the walking belt. Stand on the side rails hold the handrails start
the unit at a low speed and then step on to the unit, when comfortable increase the speed to one that you’re
comfortable with.
16.15. The treadmill is capable of high speeds. Adjust the speed in small increments to avoid sudden jumps in speed.
17.16. The pulse sensor is not a medical device. Various factors, including the user’s movement, may affect the accuracy
of the heart rate readings. The pulse sensor is intended only as an exercise aid in determining heart rate trends in
general.
18.17. Never leave the treadmill unattended while it is running. Always remove the safety key when the treadmill is not in
use.
19.18. Do not attempt to raise, lower, or move the treadmill until it’s properly assembled. (See Page 17 “Assembly
Instructions” and Page 19 “Folding Instructions”)
20.19. Do not change the incline of the treadmill by placing objects under the treadmill.
22.20. Inspect and tighten all parts of the treadmill regularly. (See Page 29 & 38 30 “Maintenance”)
23.21. Never drop or insert any object into any opening in/on the treadmill.
Formatted:
Bullets and Numbering

Phoenix #98836 Motorized Treadmill
4
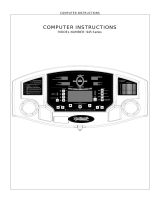
HARDWARE COMPARISON CHART
Hardware chart:
For your convenience, we have identified the hardware used in the assembly of this product. This chart is provided to help
you identify those items that may be unfamiliar to you.
NO.
DESCRIPTION
QTY.
106
Water Bottle Holder
2
407
Lock Pin
1
109
Safety Key
1
819
M8 x 42mm Bolt
4
821
Φ8 Washer
6
823
M8 x18mm Bolt
2
A
Allen Wrench 6mm
1
B
Phillips Head Wrench
1
C
Power Cord
1
Formatted:
Font: Font color: Auto, (Asian)
Chinese (PRC)

Phoenix #98836 Motorized Treadmill
5
PARTS LIST
100
Console Assembly
101
Console Plate Bar
1
98836 -101
102
Computer PC Board
1
98836 -102
103
Console Plate
1
98836 -103
104
Console Housing-Upper
1
98836 -104
105
Console Housing-Bottom
1
98836 -105
106
Water Bottle Holder
2
98836 -106
107
Safety Key Base
1
98836 -107
109
Safety Key
1
98836 -108
200
Handle Bar Assembly
201
Handle Bar
1
98836 -201
202
Handle Bar Foam Grip
2
98836 -202
203
Handle Bar End Cap
2
98836 -203
204
Handle Pulse Sensor
2
98836 -204
300
Upright Assembly
301
Upright-L
1
98836 -301
302
Upright-R
1
98836 -302
303
Power Switch Plate Base
1
98836 -303
304
Power Switch Plate
1
98836 -304
305
Power Switch
1
98836 -305
306
Power Breaker
1
98836 -306
307
Power cord Switch Plate
1
98836 -307
400
Base Frame Assembly
401
Base Frame
1
98836 -401
402
Fold Up Support Tube
1
98836 -402
403
Plastic Wheel
1
98836 -403
404
Caster Holder
2
98836 -404
405
Transportation Wheel
2
98836 -405
406
Rubber Cushion
4
98836 -406
407
Lock Pin
1
98836 -407
500
Motor Assembly
501
Motor Hood Top
1
98836 -501
502
Motor Hood Bottom
1
98836 -502
503
Motor Hood -Left
1
98836 -503
504
Motor Hood -Right
1
98836 -504
505
Motor Bottom Cover
1
98836 -505
506
Motor Holder
1
98836 -506
507
Driving Motor
1
98836 -507

Phoenix #98836 Motorized Treadmill
6
PARTS LIST
508
Front Roller Tube +Shaft
1
98836 -508
509
Driving Belt
1
98836 -509
510
Motor Hood Side Patch
2
98836 -510
511
Control board
1
98836 -511
600
Running Deck Assembly
601
Running Belt
1
98836 -601
602
Running Deck
1
98836 -602
603
Side Rail -Left
1
98836 -603
604
Side Rail -Right
1
98836 -604
605
Side Rail End Cap - Left
1
98836 -605
606
Side Rail End Cap - Right
1
98836 -606
607
Side Rail Guider
8
98836 -607
700
Deck Frame Assembly
701
Deck Frame
1
98836 -901
702
Running Deck Support Tube
1
98836 -902
703
Running Deck Support Tube Foam Grip
1
98836 -903
704
Rear Roller Tube + Shaft
1
98836 -904
705
Rear End Caps
2 sets
98836 -905
706
Cushion Pad
8
98836 -906
800
Fastening
801
Φ3.5x14mm Screw
10
98836 -801
803
Φ4x14mm Screw
26
98836 -803
804
M6 x45mm Bolt
1
98836 -804
805
Φ4x19mm Screw
18
98836 -805
806
M8 x30mm Screw
10
98836 -806
807
M4 x12mm Screw
9
98836 -807
809
M8 Nylon Nut
5
98836 -809
811
M8 x48 Fixed Bolt
1
98836 –811
812
M8 x85mm Fixed Bolt
1
98836 -812
813
Φ8x26x3 Washer
2
98836 –813
814
M8 x12mm Bolt
2
98836 -814

Phoenix #98836 Motorized Treadmill
7
PARTS LIST
815
Φ8 Spring Washer
2
98836 –815
816
M10 x116mm Fixed Bolt
1
98836 –816
818
M4x30mm Screw
2
98836 –818
819
M8 x42mm Bolt
8
98836 –819
820
M5x14 mm Bolt
4
98836 –820
821
Φ8 Washer
16
98836 –821
823
M8 x18mm Bolt
4
98836 -823
824
M8 x34mm Bolt
1
98836 –824
825
Φ10mm Washer
3
98836 –827
826
M10 Nylon Nut
3
98836 –828
828
M12 x98mm Bolt
2
98836 –830
831
Φ8x24x11 Spring
1
98836 –831
833
Φ3x10mm Screw
2
98836 -833
834
Φ4x19mm Screw
2
98836 -834
836
M8 x45mm Bolt
3
98836 -835
837
Hand Pulse Sensor Bush
2
98836 -837
838
Φ12 Washer
2
98836 -838

Phoenix #98836 Motorized Treadmill
8
PARTS DIAGRAM
A MAJORITY OF THE PARTS SHOWN HERE HAVE BEEN PRE-ASSEMBLED AT THE FACTORY
101
801
801
103
104
801
102801
106
107
833
803
803
105
803
803
141
831
832
109
Formatted:
Font: Bold, Font color: Auto

Phoenix #98836 Motorized Treadmill
9
PARTS DIAGRAM
A MAJORITY OF THE PARTS SHOWN HERE HAVE BEEN PRE-ASSEMBLED AT THE FACTORY

Phoenix #98836 Motorized Treadmill
10
PARTS DIAGRAM
A MAJORITY OF THE PARTS SHOWN HERE HAVE BEEN PRE-ASSEMBLED AT THE FACTORY
301
302
307
305
304
303
306
805
835

Phoenix #98836 Motorized Treadmill
11
PARTS DIAGRAM
A MAJORITY OF THE PARTS SHOWN HERE HAVE BEEN PRE-ASSEMBLED AT THE FACTORY
836
406
821
809
836
838
838
407
828
828
819
403
824
820
821
809
402
821
821
823
819
821 823
821
406
803
404
405
405
406
803
803
401
404

Phoenix #98836 Motorized Treadmill
12
PARTS DIAGRAM
A MAJORITY OF THE PARTS SHOWN HERE HAVE BEEN PRE-ASSEMBLED AT THE FACTORY
501
803
511
803
505
803
508
809506507
815
831
814
809
803
803
807
807
807
807
807
804
509
816
826
825
813
812
811821

Phoenix #98836 Motorized Treadmill
13
PARTS DIAGRAM
A MAJORITY OF THE PARTS SHOWN HERE HAVE BEEN PRE-ASSEMBLED AT THE FACTORY
603
605
606
820
604
805
607
806
601
805
805
805
805
607
806
607
806
607
806
805
805
805
602

Phoenix #98836 Motorized Treadmill
14
PARTS DIAGRAM
A MAJORITY OF THE PARTS SHOWN HERE HAVE BEEN PRE-ASSEMBLED AT THE FACTORY
706
806
702
703
704
706
701
705
705

Phoenix #98836 Motorized Treadmill
15
ASSEMBLY INSTRUCTIONS
Before you Begin
Clear your work area.
Make sure that you’ve cleared a large enough area in order to assemble the treadmill.
Make sure there is nothing in the area that may cause injury during assembly.
Make sure there’s enough space for you to move around the treadmill after assembly.
Remove all components from the boxes before you start assembling the treadmill.
Tools
Before you begin to assemble your treadmill please look at the hardware diagram and familiarize yourself with the
parts you need to assemble and the tools you’ll need.
Make sure you can get hold of the tools easily when assembling your treadmill.
Note
The treadmill has some parts that are fairly heavy. It may be an idea if you have someone that could help you to
assemble it.
Make sure that the treadmill is not plugged in before you start assembly.
Make sure the treadmill is on a flat surface.
Dispose of all packing material at a recycling center when ever possible.
Retain this manual for future reference.

Phoenix #98836 Motorized Treadmill
16
ASSEMBLY INSTRUCTIONS
STEP 1:
Remove the contents from the shipping box.
Raise the uprights (#301 & #302) into position.
Secure from the sides using one M8 x 42 mm Bolt (#819) and one Φ8 mm Washer (#821) for each side.
Secure from the front using two M8 x 18 mm Bolts (#823) and two Φ8 mm Washers (#821).
1
823
821
821
301
302
819
2

Phoenix #98836 Motorized Treadmill
17
ASSEMBLY INSTRUCTIONS
STEP 2:
Rotate the handlebar (#201) into position.
Secure from the sides using one M8 x 42 mm Bolt (#819) and one Φ8 mm Washer (#821) for each side.
Formatted:
Font color: Auto

Phoenix #98836 Motorized Treadmill
18
ASSEMBLY INSTRUCTIONS
STEP 3:
Attach the Water Bottle Holder (#106) to the console housing-upper and push down until snap in place.
Connect Power Cord (#C) to Power Switch (#305) located in the bottom of the Upright-L (#301).
10
6
Formatted:
Font color: Auto

Phoenix #98836 Motorized Treadmill
19
FOLDING INSTRUCTIONS
How to fold up the treadmill:
Your treadmill can be folded up for space saving storage. To fold up the treadmill, begin by turning off the
power switch. Lift the deck up from the rear of the treadmill and fold up until it locks in place. TO PREVENT
INJURY BE SURE YOU HAVE A FIRM HOLD WHEN RAISING THE DECK. You will hear a “click” sound as
the Fold Up Support Tube (#402) engages. Insert Lock Pin (#407) as shown in Page 22.
Stand behind the treadmill and lift the deck up.
CLICK
Raise the deck up until the Fold Up Support Tube (#402) engages.

Phoenix #98836 Motorized Treadmill
20
UNFOLDING INSTRUCTIONS
How to unfold the treadmill:
To unfold the treadmill for use, begin by standing behind and supporting the deck with your hands. Next release
the lock with your foot by stepping on the Fold Up Support Tube (#402). TO PREVENT INJURY BE SURE YOU
HAVE A FIRM HOLD ON THE DECK BEFORE RELEASING THE FOLD UP SUPPORT TUBE (#402). Slowly
lower the deck until it rests securely on the ground.
Support the deck and release the Fold Up Support Tube (#402) with your foot.
/