Page is loading ...

THANK YOU
quality products designed to enhance your home. Visit us online to see our full line of products available for your home improvement needs.
Thank you for choosing Hampton Bay!
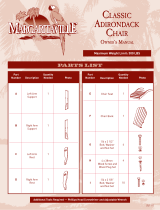
USE AND CARE GUIDE
UNFINISHED ADIRONDACK CHAIR
Questions, problems, missing parts? Before returning to the store,
call Hampton Bay Customer Service
8 a.m. - 7 p.m., EST, Monday - Friday,
9 a.m. - 6 p.m., EST, Saturday
1-855-HD-HAMPTON
HAMPTONBAY.COM
Item # 1001880858
Model # 11061-2
chair

2
Table of Contents
Table of Contents ................................... 2
Safety Information .................................. 2
Warranty .......................................... 2
What is covered ................................... 2
What is not covered ................................ 2
Pre-Assembly ...................................... 3
Planning Assembly ................................. 3
Hardware Included ................................. 3
Chair Package Contents ............................. 4
Assembly. . . . . . . . . . . . . . . . . . . . . . . . . . . . . . . . . . . . . . . . . . 5
Care and Cleaning ..................................
..................................
6
6
Safety Information
CAUTION: Read all of the instructions in this manual
before you begin assembly. Failure to do so may result in
faulty assembly and potential injury!
Warranty
1 YEAR LIMITED WARRANTY ONLINE
WHAT IS COVERED
We warranty the product to be free of manufacturing defects to the original purchaser for one year.
WHAT IS NOT COVERED
It remains the customer’s responsibility for freight and packaging charges to and from our service center. This warranty does not cover
commercial use, hardware, acts of nature, freezing, or abusive use. In addition, purchased parts are not covered under this warranty.
We reserve the right to make substitutions with similar merchandise, if the model in question is no longer in production.
Contact Customer Care at 1-855-HD-HAMPTON or visit www.hamptonbay.com.
Troubleshooting

3
HAMPTONBAY.COM
Please contact 1-855-HD-HAMPTON for further assistance.
Pre-Assembly
PLANNING ASSEMBLY
Please read this entire instruction manual prior to assembly.
Identify all parts packed in the carton against the parts list. Remove all protective materials and place the parts on a non-abrasive surface
to avoid scratching.
NOTE: More than one person may be required to assemble
this product.
HARDWARE INCLUDED
NOTE: Hardware shown to actual size .
BB
CC
DD1 DD2
EE FF
AA
Part Description Quantity
AA M6X70 Bolt
2+1
BB 2+1
CC
M6X45 Bolt 10+1
18
DD1 M6X40 Cam Bolt 2+1
DD2 Φ14.5x12 Cam Lock 2+1
M6X60 Bolt
EE
FF
Φ3.5x30 Self-tapping Screw
Nut
2+1
TOOLS REQUIRED (NOT INCLUDED)
Flathead Screwdriver

4
Pre-Assembly (continued)
CHAIR PACKAGE CONTENTS
IMPORTANT: Do not fully tighten bolts/screws until all pieces are loosely assembled.
Part Description Quantity
A Back Rest
1
B Arms ( Left and Right ) 2
C Front Legs ( Left and Right ) 2
D
E
F Front Leg Cross Beam
1
2
1
Seat
Back Brackets ( Left and Right )
B
B
C
C
F
A
D
E
E

FF
FF
FF
FF
BB
FF
FF
E
E
5
Assembly
1
Attaching the front legs to the seat
□
Attach the front legs (C) to the seat (D) with bolts(CC).
Do NOT completely tighten at this time.
2
3
Installing the back bracket
□
□
□
□
□
Attach the back brackets (E) to the seat (D) with bolts (CC).
Do NOT completely tighten at this time.
Installing the back rest
Attach bolts (DD1) to back rest (A).
Attach the back rest (A) to the seat (D) with bolts (CC) and back
brackets (E) with cam bolts (DD1),Adjust the back brackets (E) to
align the holes if necessary.
Secure the back rest (A) and back brackets (E) with cam locks (DD2).
Tighten cam locks (DD2) and bolts (CC).
4
Assembling the arms
6
Fully tighten all the screws/bolts
□
□
□
Secure the back brackets (E) and the arms (B) together with bolts
(AA) and nuts (FF).
Secure the fronts legs (C) and the arms (B) with bolts (BB) and
nuts (FF).
Adjust the front legs (C) to align the holes if necessary.
□
Fully tighten all the screws/bolts
NOTE: Please ensure all the bolts are assembled correctly
and use the screwdriver or wrench to tighten.
Do not fully tighten bolts/screws until all pieces are
loosely assembled.
NOTE: Please check the chair and bolts are properly
aligned and then fully tighten all the screws/bolts.
5
Securing the seat
□
Secure the seat (D) and the front legs (C) by attaching the cross
beam (F) using self-tapping screws (EE).
NOTE: Please ensure all the bolts are assembled correctly
and use the screwdriver or wrench to tighten.
Do not fully tighten bolts/screws until all pieces are
loosely assembled.

6
Care and Cleaning
Troubleshooting
□ Do not allow water to build up in the frames. This will cause corrosion and possible freezing damage in cold climates.
□ Use a mild soap and water for normal cleaning. Do not use janitorial or alcohol based cleaners. Some cleaners may be marked as
.
□ Rinse with clean water and dry with a soft, absorbent cloth towel.
□ Treat the frames with a liquid wax for maximum protection against UV rays and/or salty, damp air.
Problem Solution
Assembly holes do not line up. Do not fully tighten bolts/screws until all pieces are loosely assembled.

Questions, problems, missing parts? Before returning to the store,
call Hampton Bay Customer Service
8 a.m.-7 p.m., EST, Monday-Friday,
9 a.m.-6 p.m., EST, Sauturday
1-855-HD-HAMPTON
HAMPTONBAY.COM
Retain this manual for future use.
/


