Kichler Lighting 49934WZC User manual

Type
User manual

Kichler Lighting 49934WZC is a versatile outdoor wall light that combines style and functionality. With its weather-resistant construction, it's perfect for illuminating your exterior spaces, such as patios, porches, and walkways. The fixture features a sleek, modern design with a clear glass shade that allows for ample light distribution. The included mounting hardware makes installation quick and easy, and the adjustable arm allows you to direct light precisely where you need it.

Kichler Lighting 49934WZC is a versatile outdoor wall light that combines style and functionality. With its weather-resistant construction, it's perfect for illuminating your exterior spaces, such as patios, porches, and walkways. The fixture features a sleek, modern design with a clear glass shade that allows for ample light distribution. The included mounting hardware makes installation quick and easy, and the adjustable arm allows you to direct light precisely where you need it.

Date Issued: 10/13/17 IS-49934-US
We’re here to help 866-558-5706
Hrs: M-F 9am to 5pm EST
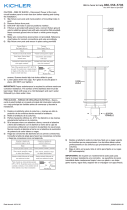
CAUTION – RISK OF SHOCK –
Disconnect Power at the main circuit breaker panel or main
fusebox before starting and during the installation.
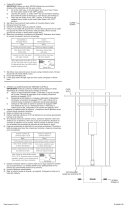
1) Slip xture over post and mark position of mounting holes in
post.
2) Remove xture from post.
3) Drill 3/16” dia holes in post at positions marked .
4) If xture is provided with ground wire, connect xture ground
wire to outlet box ground wire with wire connector. Never con-
nect ground wire to black or white power supply wires.
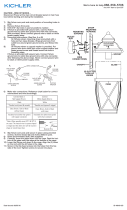
5) Grounding instructions: (See Illus. A or B).
A) On xtures where mounting strap is provided with a
hole and two raised dimples. Wrap ground wire from
outlet box around green ground screw, and thread into
hole.
B) On xtures where a cupped washer is provided. Attach
ground wire from outlet box under cupped washer and
green ground screw, and thread into mounting strap.
If xture is provided with ground wire. Connect xture ground
wire to outlet box ground wire with wire connector. (Not pro-
vided.) After following the above steps. Never connect ground
wire to black or white power supply wires.
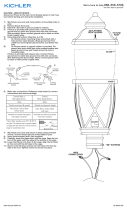
6) Make wire connections using wire nuts[7]. Reference chart
below for correct connections and wire accordingly.
7) Slip xture over post and secure in place using provided
screws[1]. Screws should slip into holes drilled in post.
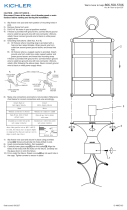
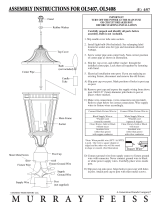
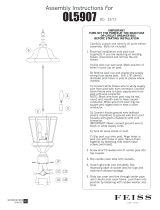
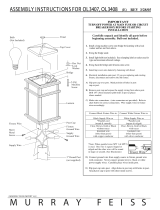
8) Install glass[4] by sliding down from the top of glass cage[2]
and seat into the inside bottom of cage as shown. Next bend
over the tabs above the glass to secure into place. Repeat for
all the glass panels.
9) Insert recommended bulb(s) (not supplied).
10) Take bracket assembly[9] and thread on to the glass cage
assembly[2] and and secure into place with the studded ball
knobs[10] as shown.
11) Place the top[3] onto the installed bracket assembly and se-
cure into place with the two hexnuts[8].
12) Place decorative ring[7] on top of main assembly. Next place
top ring[6] onto the decorative ring as shown and secure into
place using the open nial[5].
GREEN GROUND
SCREW
CUPPED
WASHER
OUTLET BOX
GROUND
FIXTURE
GROUND
DIMPLES
WIRE CONNECTOR
OUTLET BOX
GROUND
GREEN GROUND
SCREW
FIXTURE
GROUND
A
B
3
5
4
2
7
1
6
7
8
9
10
Connect Black or Red
Supply Wire to:
Connect White Supply Wire to:
Blac
kW
hite
*Parallel cord (round & smooth)
*Parallel cord (square & ridged)
Clear, Brown, Gold or Black
without Tracer
Clear, Brown, Gold or Black
with Tracer
Insulated wire (other than green)
with copper conductor
Insulated wire (other than green)
with silver conductor
*Note: When parallel wire (SPT I & SPT II)
are used. The neutral wire is square shaped or
ridged and the other wire will be round in
shape or smooth (see illus.)
Neutral Wire
Date Issued: 10/13/17 IS-49934-US
Estamos aquí para ayudarle 866-558-5706
Horario: Lunes-Viernes 9am a 5pm EST (hora ocial del este)
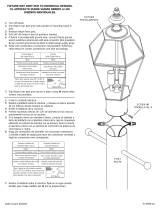
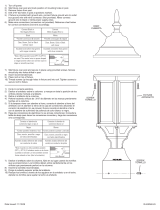
1) Deslice el artefacto sobre la columna y marque en ésta la
posición de los oricios donde montará el artefacto.
2) Retire el artefacto de la columna.
3) Perfore haciendo oricios de 3/16” de diámetro en las marcas
previamente hechas en la columna.
4) Si la lampara viene con alambre a tierra, conecte el alambre a
tierra del artefacto con el alambre a tierra de la caja de
conexiones utilizando el conector de alambre (no se provee).
Nunca conecte el alambre a tierra con el alambre de suminis-
tro de potencia de color blanco o negro.
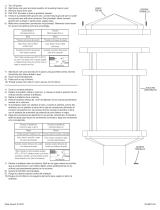
5) Instrucciones para poner a tierra: (Ver Ilustraciones A o B).
A) En artefactos donde se suministra la abrazadera de
montaje con un agujero y dos depresiones onduladas.
Envuelva el conductor de tierra de la caja de salida
alrededor del tornillo de tierra verde y atornille en el
agujero.
B) En artefactos donde se suministra una arandela
cóncava. Fije el conductor de tierra de la caja de salida
debajo de la arandela cóncava y el tornillo de tierra
verde y enrosque en la abrazadera de montaje.
Si se suministra el artefacto con conductor de tierra. Conecte
el conductor de tierra del artefacto al conductor de tierra de
la caja de salida con conector de tierra después de seguir los
pasos anteriores. Nunca conecte el conductor de tierra a los
alambres de alimentación eléctrica negros o blancos.
6) Realice las conexiones de los cables con tuercas de alam-
bre[7]. Re érase a la tabla de abajo para realizar las conexio-
nes correctas de los cables.
7) Deslice el artefacto sobre la columna, fíjelo en su lugar usando
los tornillos que se proporcionan[1]. Los tornillos deben entrar
perfectamente en los oricios que previamente perforó en la
columna.
8) Instale el vidrio[4] deslizando hacia abajo desde la parte
superior de la jaula de vidrio[2] y asiente en la parte interior
inferior de la jaula, como se muestra. Luego, dobla sobre las
lengüetas sobre el cristal para asegurarte en su lugar. Repita
para todos los paneles de vidrio.
9) Inserte el (los) bulbo (s) recomendado (s) (no incluido).
10) Tome el conjunto del soporte[9] y enrósquelo en el ensamblaje
de la jaula de vidrio[2] y asegúrelo en su lugar con las perillas
de bola tachonadas[10] como se muestra.
11) Coloque la parte superior[3] en el conjunto de soporte instala-
do y asegúrelo en su sitio con las dos tuercas hexagonales[8].
12) Coloque el anillo decorativo[7] en la parte superior del con-
junto principal. Coloque el anillo superior[6] en el anillo deco-
rativo como se muestra y asegúrelo en su lugar con el remate
abierto[5].
PRECAUCIÓN – RIESGO DE DESCARGA ELÉCTRICA
Desconecte la electricidad en el panel principal del interruptor
automático o caja principal de fusibles antes de comenzar y
durante la instalación.
ARANDELA
CONCAVA
TIERRA DE LA
CAJA DE SALIDA
TORNILLO DE TIERRA,
VERDE
DEPRESIONES
TIERRA
ARTEFACTO
CONECTOR DE ALAMBRE
TIERRA DE LA
CAJA DE SALIDA
TORNILLO DE TIERRA,
VERDE
TIERRA
ARTEFACTO
A
B
3
5
4
2
7
1
6
7
8
9
10
Conectar el alambre de
suministro negro o rojo al
Conectar el alambre de
suministro blanco al
Negro Blanco
*Cordon paralelo (redondo y liso)
*Cordon paralelo (cuadrado y
estriado)
Claro, marrón, amarillio o negro
sin hebra identificadora
Claro, marrón, amarillio o negro
con hebra identificadora
Alambre aislado (diferente del
verde) con conductor de cobre
Alambre aislado (diferente del
verde) con conductor de plata
*Nota: Cuando se utiliza alambre paralelo
(SPT I y SPT II). El alambre neutro es de forma
cuadrada o estriada y el otro alambre será de
forma redonda o lisa. (Vea la ilustracíón).
Hilo Neutral
  • Page 1 1
  • Page 2 2

Kichler Lighting 49934WZC User manual

Type
User manual

Kichler Lighting 49934WZC is a versatile outdoor wall light that combines style and functionality. With its weather-resistant construction, it's perfect for illuminating your exterior spaces, such as patios, porches, and walkways. The fixture features a sleek, modern design with a clear glass shade that allows for ample light distribution. The included mounting hardware makes installation quick and easy, and the adjustable arm allows you to direct light precisely where you need it.

Ask a question and I''ll find the answer in the document

Finding information in a document is now easier with AI

in other languages