Page is loading ...

5319341EBL(MagnoliaOak)
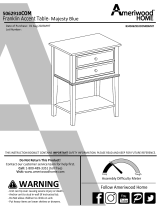
6DrawerDresser
5319340EBL(AndoverOak)
‐Unitcantipovercausingsevereinjuryordeath.
‐Anchorunitto studinwall(ifinstruc te dto).
‐DoNotallowchildrentoclimbonunit.
‐Putheavyitemsonlowershelvesordrawers.
B345319000EBL0
THISINSTRUCTI ONBOOKLETCONTAINS
IMPORTANT
SAFETYINFORM AT ION.PLEASE READANDKEEPFOR FUTUREREFER ENCE.
WARNING
FollowAmeriwoodHome
Tube
You
DateofPurchase___/___/___
LotNumber:
DoNotReturnThisProduct!
Contactourcustomerserviceteamforhelpfirst.
Call:1‐800‐489‐3351(tollfree)
Monday‐Friday9am‐5pmCST
Visit:www.ameriwoodhome.com
AssemblyDifficultyMeter
Easy
Tough

ContactUs!
HelpfulHints
2
ameriwoodhome.com
DoNOTreturnthisproduct!
Contactourfriendlycustomerserviceteamfirstforhelp.
Callus!
1‐800‐489‐3351
Monday‐Friday
9am‐5pmCST
Visitameriwoodhome.com toviewthe
limitedwarrantyvalidintheU.S.andCanada.
AssemblyTips
‐Openyouriteminthe areayo uplantokeepittoavoidexcessiveheavylifting.
‐Identify,sortandcountthepartsbeforeattemptingassembly.
‐Compres sio n dowelsarelight lytappedinwithahammer.
‐Slidesarelab eledwitha
R
(right)and
L
(left)forproperplacement.
‐MakesuretoalwaysfacethepointonthetopoftheCamLocktowardsthe
outeredge.
‐Useallthenailsprovided forthebackpanelandspreadthemoutequally.
‐Backpanelmustbeusedtomakesureyourunitissturdy.
‐Do
NOTuseharshchemicalsorabrasivecleanersonthis item.
‐Neverpush,pull,ordragyourfurniture.
Tube
You
Tube
You
PEOPLENEEDEDFORASSEMBLY:1‐2
ESTIMATEDASSEMBLYTIME:1HOUR

3
ameriwoodhome.com
BeforeYouStart
Q
u
i
c
k
T
ip
A
s
s
e
m
b
l
y
CamLockFasteningSystem
ThisCamLockFasteningSystemwillbeusedthroughouttheassemblyprocess.
1
3
2
4
Tube
You
Readthrougheachstepcarefullyandfollowtheproperorder
Separateand countallyourpartsandhardware
Giveyourselfenoughroomfortheassemblyprocess
Havethefollowingtools:FlatHeadScrewdriver,#2PhillipsHead
ScrewdriverandHammer
Caution:Ifusingapowerdrillorpowerscrewdriverforscrewing,
pleasebeawaretoslowdownandstopwhenscrewistight.
Failuretodosomayresultinstrippingthescrew.

4
ameriwoodhome.com
BoardIdentification
5319340EBL(AndoverOak)PartsList
Tube
You
LeftPanel
35319340010
RightPanel
35319340020
Partition
35319340030
Top
35319340040
A
B
C
D
Bottom
35319340050
LeftFrontMolding
35319340060
RightFrontMolding
35319340070
x2
RearMolding
35319340080
x6
DrawerFront
35319340090
x6
DrawerBottom
35319331100
x6
DrawerBrace
35319000110
x12
DrawerSide
39991167346200C
E
F
G
H
I
J
K
DWR
SIDE

5
ameriwoodhome.com
Tube
You
BoardIdentification
5319341EBL(MagnoliaOak)PartsList
B
A
C
D
F
E
G
H
K
J
I
LeftPanel
35319341010
RightPanel
35319341020
Partition
35319341030
Top
35319341040
Bottom
35319341050
LeftFrontMolding
35319341060
RightFrontMolding
35319341070
x2
RearMolding
35319341080
x12
DrawerSide
39991167346200C
x6
DrawerBrace
35319000110
x6
DrawerBottom
35319331100
x6
DrawerFront
35319341090

6
ameriwoodhome.com
BoardIdentification
Notactualsize
Tube
You
x6
DrawerBack
39991167056150B
BackPanel
K531900000
Thispieceispaperboard
construction.Itisnotmade
fromwood,butisrequiredfor
theassemblyofyourunit.
S
A
B
C
D
E
F
G
H
I
J
K
Drawersides,anddrawerback
arelabeledwiththepart
description.
S
DWR
BACK
DWR
SIDE
DWR
BACK
DWR
SIDE

7
ameriwoodhome.com
PartList
ActualSize
Tube
You
NotActualSize
1
2
3
4
5
6
7
8
9
11
12
13a
13b
13c
13d
14a
14b
14c
14d
(x18)
#A22620
camlock
(x18)
#A22610
cambolt
(x4)
#A22900(white)
#A22920(black)
connector
(x4)
#A22910
connector bolt
(x3)
#A21660
wood dowel
(x6)
#A23030
confirmatscrew
(x60)
#A11080
7/16"flathead
(x48)
#A12120
7/16"panhead
(x12)
#A12930
1‐1/8"panhead
(x36)
#A21970
drivefastener
(x12)
#A17030
5/16"bolt
(x32)
#A21110
nail
LeftCabinetMember
RightCabinetMember
LeftDrawerMember
RightDrawerMember
(x6)
#A56750(black)
#A56770(linen)
DrawerSlideKit
(x1)
#A84050
SafetyBracketKit
(x12)
#A54520
DrawerBracket
(x6)
#A50408
handle
(x4)
#A44410
(AndoverOak)
#A44420
(MagnoliaOak)
foot
(x1)
#A43105(black)
#A43106(white)
plastic
foot
(x2)
#A43490(black)
#A43495(white)
spacer
17
18
19
15
16
10
Note that your unit may contain extra hardware

8
ameriwoodhome.com
STEP
1
Proper orientation of CAM LOCK
Tip
Assembly
Quick
1
3
5
(x2)
#A22620
(x2)
#A22900(white)
#A22920(black)
(x1)
#A21660
Youwillneedtotaptheconnector
(3)withahammertofullyinsert.
Besuretheconnectorispositioned
asshownbeforepushingintohole.
5
1
3
3
A

9
ameriwoodhome.com
STEP2
7
13a
Attachthreeleftcabinetmembers(13a)totheleftpanel(A)withscrews(7)asshown.
(x9)
#A11080
(x3)
#A56750(black)
#A56770(linen)
LeftCabinetMember
Marked with a "L".
7
13a
A

10
ameriwoodhome.com
STEP3
9
9
Attachtherearmolding(H)totheleftpanel(A)withtwoscrews(9)asshown.
Note:Youwillscrewintothegrooveoftherearmolding(H).
Besurethetopedgeoftheleftpanel(A)and
rearmolding(H) areflushwitheachother.
9
A
H
(x2)
#A12930

11
ameriwoodhome.com
STEP
4
Proper orientation of CAM LOCK
Tip
Assembly
Quick
1
3
5
(x2)
#A22620
(x2)
#A22900(white)
#A22920(black)
(x1)
#A21660
Youwillneedtotaptheconnector
(3)withahammertofullyinsert.
Besuretheconnectorispositioned
asshownbeforepushingintohole.
3
5
1
3
B

12
ameriwoodhome.com
STEP
5
7
13b
Attachthreerightcabinetmembers(13b)totherightpanel(B)withscrews(7)asshown.
(x9)
#A11080
(x3)
#A56750(black)
#A56770(linen)
RightCabinetMember
Marked with a "R".
B
7
13b

13
ameriwoodhome.com
STEP6
9
9
B
H
(x2)
#A12930
Attachtherearmolding(H)totherightpanel(B)withtwoscrews(9)asshown.
Note:Youwillscrewintothegrooveoftherearmolding(H).
Besurethetopedgeoftherightpanel(B)and
rearmolding(H)areflushwitheachother.
9

14
ameriwoodhome.com
STEP
7
4
4
Note:Thesmallpilotholeintheleftandright
frontmoldings(F&G)isareferencehole.This
holeindicatesthetopendofthemolding.
4
4
4
(x4)
#A22910
F
G

15
ameriwoodhome.com
STEP8
Presstheleftfrontmolding(F)againsttheleftpanel(A)sotheconnector
bolts(4)engagetheconnectors(3).Turnthescrewinthecenterofthe
connector(3)clockwisetolockinplace.
Notice:Smallreferenceholewill
beatthetopendofthemolding.
Turnthescrewclockwise
tolockinplace.
endview
*rawedgesareshaded
A
F
3

16
ameriwoodhome.com
STEP9
*rawedgesareshaded
endview
Turnthescrewclockwise
tolockinplace.
Notice:Smallreferenceholewill
beatthetopendofthemolding.
Presstherightfrontmolding(G)againsttherightpanel(B)sothe
connectorbolts(4)engagetheconnectors(3).Turnthescrewinthe
centeroftheconnector(3)clockwisetolockinplace.
3
B
G

17
ameriwoodhome.com
STEP10
1
5
7
13a
13b
LeftCabinetMember
RightCabinetMember
(x3)
#A56750(black)
#A56770(linen)
(x18)
#A11080
(x2)
#A22620
(x1)
#A21660
5
1
13a
13b
7
7
Marked with a "L".
Marked with a "R".
finished edge
C
C
right surface
left surface

18
ameriwoodhome.com
STEP
11
2
14b
14a
2
Do not tighten this screw
(x6)
#A22610
(x1)
#A84050
14b
14a
2
2
2
2
2
D

19
ameriwoodhome.com
STEP12
18
19
(x1)
#A43105(black)
#A43106(white)
(x2)
#A43490(black)
#A43495(white)
19
19
18
E
Pressthetwospacers(19)andplasticfoot(18)
intothebottom(E)asshown.Youmayneedto
tapeachonewithahammertosecurelyinsert.

20
ameriwoodhome.com
STEP13
6
6
(x6)
#A23030
6
6
6
6
6
A
B
C
E
/