Page is loading ...

Installation and
Operating Instructions
WARNING: Failure to follow these instructions and comply with all applicable
codes may cause serious bodily injury and/or property damage.
The installation of this product should be carried out by a person knowledgable
in swimming pool plumbing requirements following the installation instructions
provided in this manual.
Please pass these instructions on to the operator of this equipment.
Davey pH Peristaltic Pump
Model: M5138R

2
Contents
1. Warnings and Tips ..............................................................................................3
1.1 Proper use of the Pump ................................................................................3
1.2 Risks..............................................................................................................3
1.3 Toxic and/or Dangerous Liquid Dosage ........................................................4
1.4 Instruction for Diluting Pool Acid ...................................................................4
2. Pump Description ................................................................................................ 5
2.1 Parts Description. ..........................................................................................5
2.2 Buttons Description .......................................................................................6
3. Installation and Recommendation .....................................................................7
3.1 Recommendations ........................................................................................7
3.2 Accessories Mounting ...................................................................................8
3.2.1 Bracket ........................................................................................................8
3.2.2 Mounting of the Clamp ................................................................................9
3.2.3 Mounting of Injection Valve .........................................................................9
3.2.4 Mounting of the Probe on the Probe Holder ..............................................10
3.2.5 Mounting description of Tube on the Injection Valve .................................10
4. Connecting the power and pool pump to your
pH Controller .................................................................................................... 11
5. Commissioning and Operation ........................................................................12
5.1 Calibration Procedure..................................................................................12
5.2 Settings .......................................................................................................13
5.2.1 Adjustment of the Set point .......................................................................13
5.3 Operating Principle ...................................................................................... 14
6. Maintenance ....................................................................................................... 14
6.1 Replacement of the Peristaltic Tube............................................................14
6.2 Maintenance of the Peristaltic Tube ............................................................15
6.3 Maintenance of the Electrode......................................................................15
6.4 Controller Winterising ..................................................................................15
6.5 Probe Winterising ........................................................................................15
7. Trouble Shooting ...............................................................................................16
8. Spare Parts.........................................................................................................17
Davey Repair or Replacement Guarantee ............................................................ 18
In accordance with AS/NZS 60335.2.41 we are obligated to
inform you that this pump is not to be used by children or
inrm persons and must not be used as a toy bu children.

3
1. Warnings and Tips
Please read the warning notices very carefully because they provide
important information regarding safety in installation, maintenance and use
of the pH pump.
• Keep this manual in a safe place, so that it will always be available for
further consultation
• The device complies with EMC:2004/108/EEC “electromagnetic
compatibility” and LVD:2006/95/EC “low voltage” and also the
subsequentmodications.
Note: This pump has been constructed in accordance with best practice.
Product life, electrical and mechanical reliability will be enhanced if it
is correctly used and regularly maintained.
WARNING Any intervention or repair to the internal parts of the pump must
becarriedoutbyqualiedandauthorisedpersonnel.Themanufacturers
decline all responsibility for the consequences of failure to respect this rule.
1.1 Proper use of the Pump
The pump should be used only for the purpose for which it has been
expressly designed namely the dosing of liquids. Any different use is to
be considered dangerous. The pump should not therefore be used for
applications that were not allowed for in its design. In case of doubt, please
refer to the details listed within this document, or contact your point of
purchase or Davey Water Products for further information. The manufacturer
of this product will not be liable for damage deriving from improper,
erroneous or unreasonable use of the pump.
1.2 Risks
• After unpacking the pump, make sure that it is completely sound. In
case of doubt, do not use the pump and contact Davey
•The packing materials (plastic bags, polystyrene, etc.) should be kept
out of the reach of children: As they may constitute a potential source of
danger
• Before you connect the pump make sure that the voltage ratings
correspondtoyourparticularvoltagesupply.Youwillndthisvalueon
the rating plates attached to the pump
• The electrical installation to which the pump is connected must
comply with the local standards enforced in the state or country under
consideration
Use of electrical equipment always implies observance of some basic rules.
In particular:
- Do not touch with wet or damp hands or feet.
- Do not operate the pump with bare feet (example: swimming pool
equipment)
Never connect your pH pump direct to mains power. Always
connect it to the chlorinator power supply so it operates during the
presetltrationtimecycles.

4
- Do not leave the equipment exposed to atmospheric agents
- Do not allow the pump to be used by children or unskilled individuals
without supervision
• In case of breakdown or improper functioning of the pump, switch it
off, but do not touch. Contact Davey for technical assistance for any
necessary repairs and insist on the use of original spares. Failure to
respect this condition could render the pump unsafe to use
• When the Davey AS Series pump is not in use for a substantial period
of time, or use is to be discontinued, disconnect the unit from any power
supply
Before carrying out any service on the pump:
1) Disconnect the mains power from the unit and
2) Relieve all the pressure from the pump head or the injection tube
In the event of possible losses on the hydraulic system of the pump
(breakage of the O-ring, the valves or the hoses), stop the pump
immediately and contact Davey.
1.3 Toxic and/or Dangerous Liquid Dosage
To avoid risk from contact with hazardous liquids or toxic fumes, always
adhere to the notes in this instruction manual and wear protective clothing
(gloves, goggles & overalls).
• Follow the instructions of the dosing liquid manufacturer
• Check the hydraulic part of the pump and use it only if it is in perfect
condition
• Use only the correct materials for the tubing, valves and seals to suit the
liquid to be dosed: where possible shield the tubing with PVC conduit
•Beforedisconnectingthemeteringpump,makesuretoushoutand
neutralise the pump head with the proper reagent liquid
1.4 Instructions for diluting pool acid
The ChloroMatic
®
Salt Water Chlorinator with pH control, automatically
doses a diluted acid solution into the pool when the pH level needs to be
reduced. The peristaltic pump draws this diluted acid from a container in
which the solution is mixed.
Use the table below to determine what water/acid ratio is recommended for
your pool, in an approved 20 litre Hydrochloric Acid container.
IMPORTANT: KEEP BARE HANDS AWAY FROM POOL ACID AND ALWAYS
USE CAUTION WHEN HANDLING POOL CHEMICALS.

5
2. Pump Description
The Davey Peristaltic pump is characterised by its ability to measure pH
value(between0and14)withitsprobeplacedontheltrationsystem
that analyses the pool water.
Depending of the measured value, the pump will inject the required
amount of product needed to maintain the balance of the pool water.
The pump works in acid (pH-) or basic (pH+) dosage.
2.1 Parts description
Here are the complete contents of the package you received. All parts
will be necessary for the proper operation of your device.
A
Fig. 1
B
C
D
E
F
H
G
I
J
K
A. Peristaltic pump
B. 4 meters of PVC Cristal tube
C. Electrode/pH Probe & Protective Cap
D. Footlter
E. Injection valve
F. Clamp DN50 x 2
G. Buffer solution pH7
H. Screws & Masonry plugs for wall mounting
I. Inline electrode holder
J. Shutter washer
K. Controller mounting bracket
Pool Size
Recommended Water/Acid
Dilution Ratio
Volumes for a Suitable
20 Litre Container
Water (parts) Acid (parts)
Water
(Litres)
Hydrochloric
Acid (litres)
Up To 100,000 litres 5 1 17 3
Above 100,000 to 160,000 litres 3 1 15 5
Note: These ratios are based on Hydrochloric Acid strength of 28% and
should not be any greater than this percentage.
Please ensure that you keep the storage area of the acid well ventilated
and ensure you use a suitable container with resistance to Hydrochloric
Acid. These containers can be purchased at pool stores.

6
2.2 Buttons Description
CAL
SET
pH
-
1. Press SET to see and adjust the set point.
2. Press CAL allows calibration of the pH to pH 7.0 when using the
buffer solution pH7.
3. Current value of pH being measured, eg 7.0
4. pH - unit of measurement and indicates that the device must inject acid.
5. On/off button to turn on the device. When held down, primes the pump.
Fig. 2
1 2
3
4

7
3. Installation Recommendations
3.1 Recommendations
• Install the pump in a dry place and well away from sources of heat
and in environments not exceeding 40°C. The operating minimum
temperature depends on the liquid to be pumped, bearing in mind that it
must always remain in a liquid state
• Carefully observe any standards in force in your state, territory or
country, as to electrical installation regulations and requirements
•TheDaveypHpumpwillbeinoperationonlywhenyourltrationpump
is running
WARNING
• It is important to keep a minimum distance of 200mm
between the probe “C“ and the injection valve “E”
• The injection valve “E” must be placed last in the pipework
hydraulic installation
• In the case of an installation with redox and pH regulation,
it is advised to put the two sensors side by side and the
pH injection before chlorine injection to minimise the risk of
scale deposition on the chlorine injection
• For optimal service life of your peristaltic pump tube, it is
advised not to exceed a pressure of 1 bar and under no
circumstances exceed a pressure of 1.5 bar
• The pH probe must be located before any other device
such as a heater or an electrolyser
Please refer to the enclosed Davey ChloroMatic or Sanitiser
Installation & Operating Instructions for the “Injection Valve”
and “pH probe” location and positioning.

8
3.2 Mounting the Pump
3.2.1 Bracket
•Usemountingaccessories«H»toxthebracketofthepump
• Remove the bracket on the pump by sliding it down
• Locate the bracket in the space chosen and mark the holes
• Drill the holes as required
(3mm for timber walls & 6mm for masonry walls)
• Fix the bracket to the wall
• Slide and secure pump into the bracket
Fig. 4

9
3.2.2 Mounting of the Probe clamp
3.3.3 Mounting of Injection Valve
Fig. 5
Fig. 7
Fig. 6
Fig. 8
O-ring
A nut
Put Teon tape
on threads
Next
Pierce the top wall of the pipe
work through the clamp:
- Ø 8mm for the injection valve
- Ø 14 mm for the electrode/pH
probe.
Thisassemblyisxedonthe
pipe work.
E

10
3.2.5 Mounting description of the Tube on the Injection Valve
Fig. 10
A nut
Disk brake
Washer seat
Oring
Bracket
A nut
The PVC tube
A nipple
3.2.4 Mounting of the pH Probe into the Probe Holder
After removing the protective cap from the probe, you need to insert all
the parts as shown in the Fig.9.
Once the probe has been constructed as indicated in Fig.9, tighten
the probe nut without crimping the probe body. Push the probe
approximately 20mm into the pipe work so that the probe tip is
approximately halfway into the pipe work. Connect the probe lead to
the BNC terminal on the pump. (Fig.10)
Thehydraulichoseisplacedinthesamewayonthefootlterandon
the pump.
1. Slide the tube through the nut
2. Put the tube at the bottom of the conical nipple
3. Screw the nut by hand onto the nipple
Fig. 9
Fig. 11

11
4. Connecting the power and pool pump to your
pH Controller
Connection diagram for the ESC pH Pump System
The ESC pH pump system should ideally be plumbed and connected up as
shown in the diagram below.
Never connect your pH pump direct to mains power. Always
connect it to the chlorinator power supply so it operates during the
presetltrationtimecycles.
If your pool pump is plugged into your Chlorinator:
Step 1. Remove the pump plug from the Chlorinator pump power socket.
(Usually at the bottom of the Chlorinator)
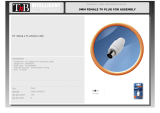
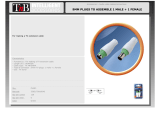
Step 2. Plug the 3 pin male piggy back plug on your pH pump into the
Chlorinator pump power socket.
Step 3. Plug your pool pump into the female piggy back socket on the
back of the pH pump power socket.
Flow
Flow
Example of
ESC50
NB: The pH probe must be located
before a heater or an electrolyser.

12
5. Commissioning and Operation
5.1 Calibration Procedure
This operation is used to set the sensor response reading of the pH and
peristaltic pump.
Some important points
• To ensure the probe signal remains as accurate as possible, please
follow the procedure as listed below during the commissioning of the
pool and every 3-4 weeks thereafter, or as required.
• The procedure is renewed in case of abnormal consumption of
chemicals.
1) Remove the
protective cap
of the probe and
keep it for reuse
at the time of
winterising
2) Rinse the
probe in tap
water for at least
20 minutes
Steps:
Before carrying out the calibration of the probe,
remember to:
•Stoptheltrationpump
•Closetheisolationvalves,iftted
• Remove the probe from the probe holder
•Puttheshutterwasher(g.12)intocloseoff
the hole in the probe holder
•Opentheisolationvalves,iftted
•Turnontheltrationpumpandcheckthatthe
ON/OFF switch (I/O) of the AS Series
pump is switched to “I”
• Carry out the calibration of the probe and
repeat the previous actions to put the probe
back in place. As described in 3.2.4
Nut
Disk brake
Washer seat
Shutter Washer
Oring
Fig. 12
Probe
Protective
Cap

13
5.2 Settings
Functions Factory Settings
Unit of measure pH
Set point 7.4
Type of regulation Acid- reduce the pH by dosage of an acid (pH-)
pH 7 calibration To an accuracy more than 0.2 pH
Proportional regulation* Factory function
* Proportional: Dosage adjusted according to different cycles time/breaks. At the approach
of the set point, the pump reduces its time of dosing.
5.2.1 Adjustment of the Set Point
The calibration of AS Series is completed;
It is now ready to measure the pH of your pool.
3) Next immerse
the probe in the
pH 7 solution, stir
around in bottle
and leave it in the
solution being
careful not to
touch the probe
or the cable.
4) After a period of at least one minute,
the stabilized value is displayed. Press the
CAL button until the display shows CAL
ashingthenrelease.Thequalityofthe
probereadingisthenbrieydisplayed.
When you press the SET button,
the value of the set point is
displayed.
To change the value of the set
point, press SET and press CAL
by pulse. Each pulse changes
the pH value by 0.1 pH,
between 7.0 and 7.6.
CAL
SET
pH
-
CAL
SET
pH
-
CAL
SET
pH
-

14
5.3 Operating Principle
The Davey Peristaltic pump adjusts its dosage in proportion to the
demand. It will dose less if the displayed measure is near the set point. In
normal operation, the AS Series pump will increase its ‘non operational’
time period proportional to the required dosage demand. That is why the
device often has the pump off. This is normal.
Adjust the pH slowly to preserve the natural quality of your water.
After 30 minutes without pressing the keys, the backlight turns off to save
energy. A short press on SET or CAL turns it on again.
6. Maintenance
6.1 Replacement of the Peristaltic Tube
Follow steps 1 to 9 as shown
1.
5.
9.
Fig. 13
2.
6.
3.
7.
4.
8.

15
6.2 Maintenance of the Peristaltic Tube and Roller Holder
The Peristaltic Pump uses a roller holder and a “squeeze” tube to pump
the acid into the pool. This tube is perishable and must be replaced
periodically. We recommend replacement approximately once per year.
The tube should be visually inspected regularly for leaks or damage.
It is recommended that the roller holder be periodically inspected and
replaced every 2 years.
6.3 Maintenance of the probe
Over time, in addition to the normal wear of the probe, according to use
and water quality more or less calcareous, measurement will deteriorate.
A thin layer of limestone with other elements present in the pool water will
deposit on the sensing element of the probe. To overcome this problem,
it is advisable to use the cleaning solution for electrode/pH probe and
redox AYACSOLNET01 and follow the procedure on the suppliers’ bottle.
6.4 Controller Wintering
Only in areas where subzero temperatures are experienced
• During winterising, you must protect the peristaltic tube
• Itisadvisabletoremovetheperistaltictubeandushitwithfresh
water. Once complete ensure the tube is completely dry and re-install
as shown on page 13, Fig 13, 5.1
6.5 Probe Wintering
• During winterising, the probe must be removed from of the installation
and pipe work
• Theprotectioncapasshownonpage11,mustbelledwithfresh
water a 1/3 of the way up
• Place the probe into the protection cap and water and store in a safe
place until after the winter period is over. (Re-install as shown on page
10,gure9)

16
7. Trouble Shooting
Error Reasons How to solve it
CAL Err
If this error is displayed
during the calibration
phase and cycle it is as
a result of:
1). Your pH probe is not
working properly
2). Your buffer solution
is polluted
3.) You have water/
oxidisation in the
probe connector
1). Change the probe
2). Change the buffer
solution
3). Change over the
probe
Alarm Alr Err
If the pH is lower than
pH 5 or above pH 9, this
alarm will be displayed
and dosing will be
stopped.
Adjust your water
parameter manually so
that it comes back to the
required value of these
parameters:
- Total alkalinity
- TH (hardness)
- pH
The dosing pump will
restart as soon as the
pH reading
If trouble persists, please contact Davey or your nearest Davey
Dealer for assistance.

17
1
3
2 4
5
5
6
8. Spare Parts
ITEM NOTES DESCRIPTION QTY REQ’D PART NO.
1 Bracket
2 BNC
3 Circuit board PRIM PH Evol
4
Motor MET 10 RPM 230V-240V
5
Kit Roller 6*9mm+ holder + Front cover + hose 6*9
6
Peristaltic hose 6*9mm
7 Injection valve
8 pH electrode
9 Probe holder
10 Shutter
11 Footlter
12 Clamp DN50
13 Tube 4x6 PVC Cristal
14 Buffer solution pH7
NOT SUPPLIED
Storage liquid for probe pH-RX 100mL
NOT SUPPLIED
Cleaning solution for probe pH-RX 250mL
7 8 9
10 11 12 13 14

18
Davey pump warranty
Davey Water Products Pty Ltd (Davey) warrants all products sold will be (under normal use and service)
free of defects in material and workmanship for a minimum period of one (1) year from the date of original
purchase by the customer as marked on the invoice, for specific warranty periods for all Davey products visit
daveywater.com.
This warranty does not cover normal wear and tear or apply to a product that has:
• been subject to misuse, neglect, negligence, damage or accident
• been used, operated or maintained other than in accordance with Davey’s instructions
• not been installed in accordance with the Installation Instructions or by suitably qualified personnel
• been modified or altered from original specifications or in any way not approved by Davey
• had repairs attempted or made by other than Davey or its authorised dealers
• been subject to abnormal conditions such as incorrect voltage supply, lightning or high voltage spikes,
or damages from electrolytic action, cavitation, sand, corrosive, saline or abrasive liquids,
The Davey warranty does not cover replacement of any product consumables or defects in products and
components that have been supplied to Davey by third parties (however Davey will provide reasonable
assistance to obtain the benefit of any third-party warranty).
To make a warranty claim:
• If the product is suspected of being defective, stop using it and contact the original place of purchase.
Alternatively, phone Davey Customer Service or send a letter to Davey as per the contact details below
• Provide evidence or proof of date of original purchase
• If requested, return the product and/or provide further information with respect to the claim. Returning
the product to the place of purchase is at your cost and is your responsibility.
• The warranty claim will be assessed by Davey on the basis of their product knowledge and reasonable
judgement and will be accepted if:
o a relevant defect is found
o the warranty claim is made during the relevant warranty period; and
o none of the excluded conditions listed above apply
• The customer will be notified of the warranty decision in writing and if found to be invalid the customer
must organise collection of the product at their expense or authorise its disposal.
If the claim is found to be valid Davey will, at its option, repair or replace the product free of charge.
The Davey warranty is in addition to rights provided by local consumer law. You are entitled to a
replacement or refund for a major failure and compensation for any other reasonably foreseeable loss or
damage. You are also entitled to have the goods repaired or replaced if the goods fail to be of acceptable
quality and the failure does not amount to a major failure.
For any internet connected products the consumer is responsible for ensuring a stable internet connection.
In the event of a network failure the consumer will need to address the concern with the service provider.
Use of an App is not a substitute for the User’s own vigilance in ensuring the product is working to
expectation. Use of a Smart Product App is at the User’s own risk. To the fullest extent permitted by law
Davey disclaims any warranties regarding the accuracy, completeness or reliability of App data. Davey is not
responsible for any direct or indirect loss, damage or costs to the User arising from its reliance on internet
connectivity. The User indemnifies Davey against any claims or legal actions from them or others relying on
internet connectivity or App data may bring in this regard.
Products presented for repair may be replaced by refurbished products of the same type rather than being
repaired. Refurbished parts may be used to repair the products. The repair of your products may result in
the loss of any user-generated data. Please ensure that you have made a copy of any data saved on your
products.
To the fullest extent permitted by law or statute, Davey shall not be liable for any loss of profits or any
consequential, indirect or special loss, damage or injury of any kind whatsoever arising directly or indirectly
from Davey products. This limitation does not apply to any liability of Davey for failure to comply with a
consumer guarantee applicable to your Davey product under local laws and does not affect any rights or
remedies that may be available to you under local laws.
For a complete list of Davey Dealers visit our website (daveywater.com) or call:

19
Davey Water Products Pty Ltd
Member of the GUD Group
ABN 18 066 327 517
® Davey is a trademark of Davey Water Products Pty Ltd. © Davey Water Products Pty Ltd 2019.
NORTH AMERICA
Ph: 1-877-885-0585
Email: [email protected]
Website: daveyusa.com
AUSTRALIA
Head Offi ce
6 Lakeview Drive,
Scoresby, Australia 3179
Ph: +613 9730 9124
Fax: +613 9753 4248
Email: [email protected]
Website: davey.com.au
NEW ZEALAND
7 Rockridge Avenue,
Penrose, Auckland 1061
Ph: 0800 654 333
Fax: 0800 654 334
Email: [email protected]
Website: daveynz.co.nz
EUROPE
ZAC des Gaulnes
355 Avenue Henri Schneider
69330 Meyzieu, France
Ph: +33 (0) 4 72 13 95 07
Fax: +33 (0) 4 72 33 64 57
Email: [email protected]
Website: daveyeurope.eu
MIDDLE EAST
Ph: +971 50 6368764
Fax: +971 6 5730472
Email: [email protected]
Website: daveyuae.com
* Installation and operating instructions are included with the product when purchased new.
They may also be found on our website.
DWP1702
/