4
AXXESS INTERFACE INSTALLATION
• Provides accessory power (12-volt 10-amp)
• Retains R.A.P. (retained accessory power)
• Provides NAV outputs (parking brake, reverse, speed sense)
• Allows visual of HVAC and gauges on Pioneer screen
• Allows adjustment of HVAC functions through Pioneer screen
• Retains audio controls on the steering wheel
• Allows for auto stop/start override (if equipped)
• Works in both Single and Dual-zone vehicles
• Retains safety chimes (speaker sold separately)
• Designed for amplified or non-amplified vehicles
• Micro-B USB updatable
•
Allows the retention and adjustment of the OE Personalization Settings
• Plug-n-Play installation
• Designed for Pioneer’s DMH-W4600NEX/WC4660NEX
• Painted scratch resistant matte black to match the OE finish
• Includes radio antenna adapter & antenna adapter for GPS
• Includes water resistant - ip68 rated direct oe camera replacement
• Includes USB/AUX/HDMI replacement panel (3 feet)
FEATURES
• Crimping tool and connectors, or solder gun, solder, and heat shrink
• Tape • Wire cutter • Zip ties
TOOLS REQUIRED
• LD-CH5-PIO • LD-CHRYHAZ2T • LD-2PIN-CAN
• Radio interface • Jeep Camera (JP-JLKT)
• PR04AVIC-PIO
• External Speaker • AXUSB-RAM1
AXUSB-RAM1 Installation .............................................................................................................. 5
Programming ............................................................................................................................ 6-8
Assembly .......................................................................................................................................9
Wiring ...........................................................................................................................................10
USB replacement & camera install ..............................................................................................11
Interface installation ...................................................................................................................12
Dash assembly .............................................................................................................................13
Radio operation ......................................................................................................................14-15
Specifications ...............................................................................................................................16
COMPONENTS
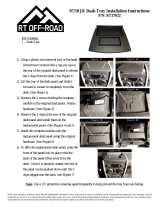
TABLE OF CONTENTS