5
6
7
8
730427-100 Rev. B
AMERICAN STANDARD ONE-YEAR LIMITED WARRANTY
If inspection of this American Standard plumbing product, within one year after its initial installation, confirms that it is defective in
materials or workmanship, American Standard will repair or, at its option, exchange the product for a similar model.
This limited warranty does not apply to local building code compliance; since local building codes vary considerably, the purchaser
of this product should check with a local building or plumbing contractor to insure local code compliance before installation.
This warranty shall be void if the product has been moved from its initial place of installation; if it has been subjected to faulty
maintenance, abuse, misuse, accident or other damage; if it was not installed in accordance with American Standard's instructions; or if it
has been modified in a manner inconsistent with the product as shipped by American Standard.
American Standard's option to repair or exchange the product under this warranty does not cover any labor or other costs of removal
or installation, nor shall American Standard be responsible for any other incidental or consequential damages attributable to a
product defect or to the repair or exchange of a defective product, all of which are expressly excluded from this warranty. (Some
states or provinces do not allow the exclusion or limitation of implied warranties, so this exclusion may not apply to you.)
This warranty gives you specific legal rights. You may have other statutory rights that vary from state to state or from province to
province, in which case this warranty does not affect such statutory rights.
For service under this warranty, it is suggested that a claim be made through the contractor or dealer from or through whom the
product was purchased, or that a service request (including a description of the product model and of the defect) be sent to the following
address:
In the United States:
American Standard, Inc.
One Centennial Ave.
Piscataway, New Jersey 08855
Attention: Director of Consumer Affairs
Toll Free: (800) 442-1902
In Canada:
American Standard, Inc.
2480 Stanfield Rd.,
Mississauga, Ontario
Canada L4Y 1S2
Toll Free: (800) 387-0369
In Mexico:
Customer Service Manager
American Standard, Inc.
Via Morelos #330
Col. Santa Clara
Ecatepec 55540 Edo. Mexico
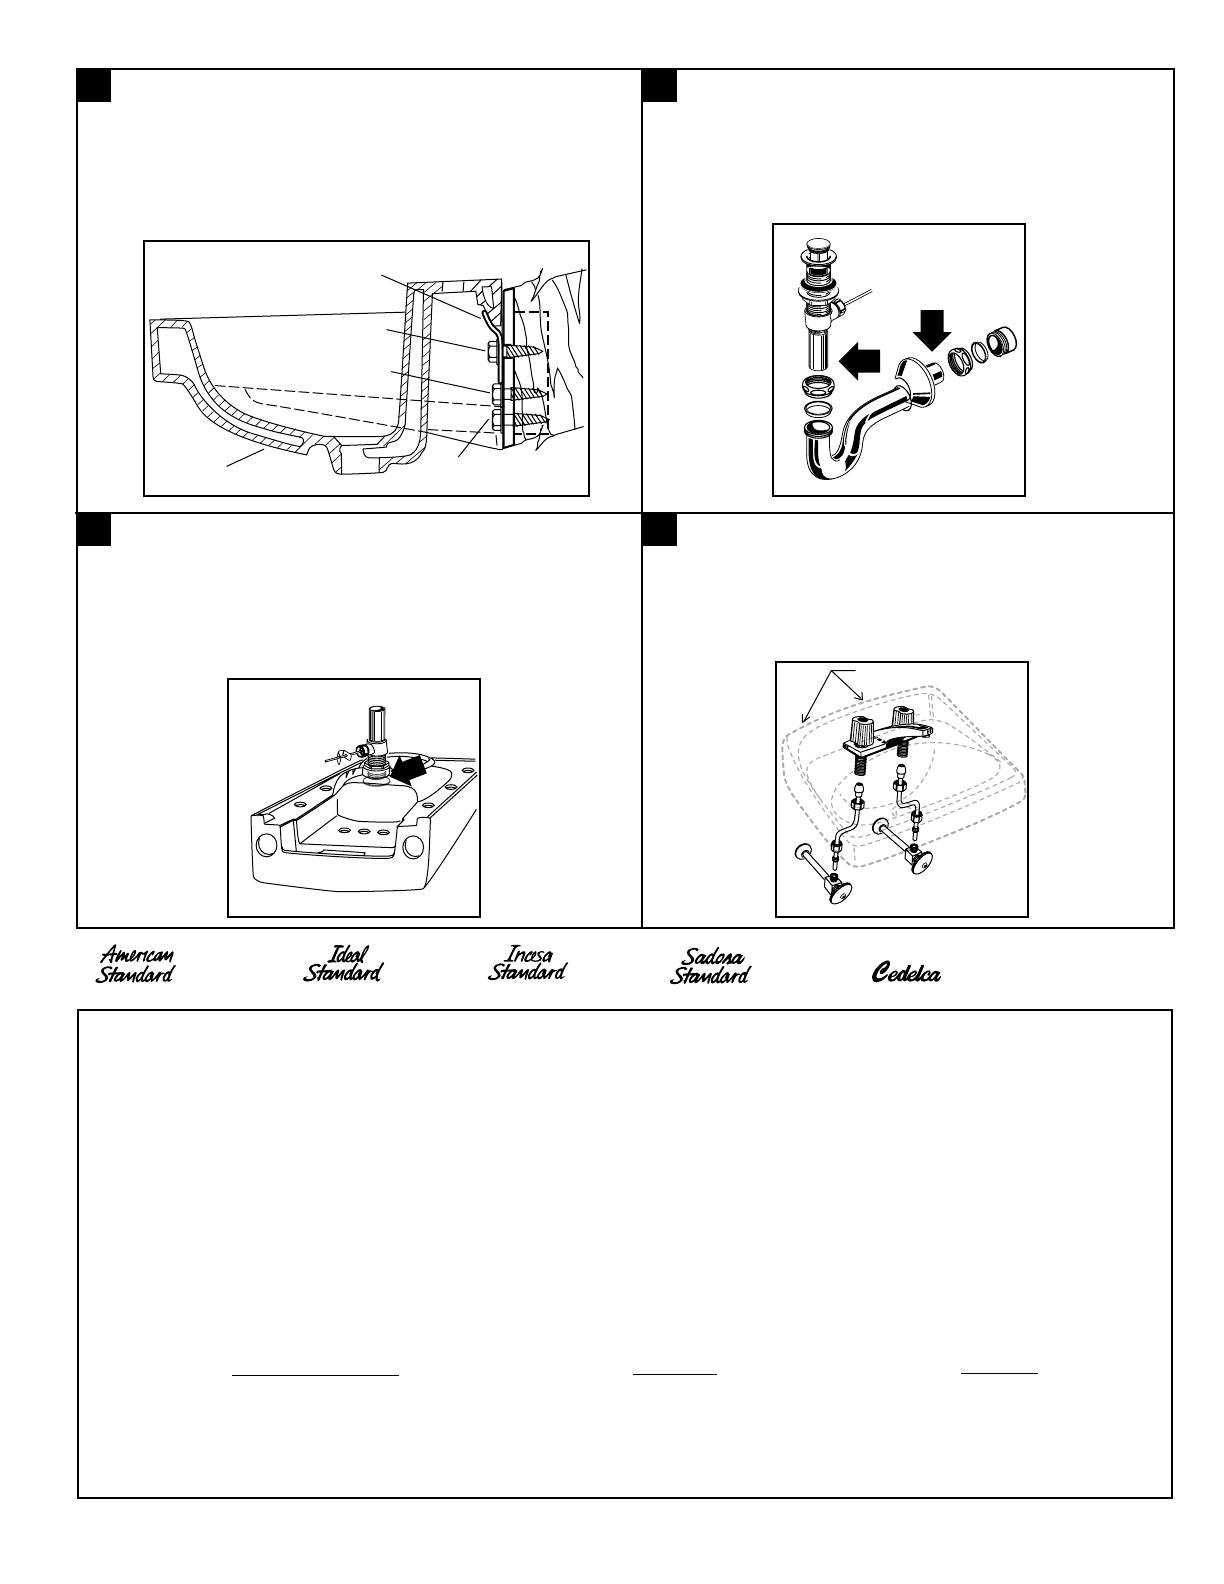
Saniwares
Steel
Hanger
Mounting
Screw
Positioning
Screw
Anchor Screw
(if used)
Lavatory
Affix hanger to wall (hand tighten only). Mount lavatory for
positioning, level the deck, and mark bottom anchor screw
holes (if applicable). Remove lavatory, tighten the hanger
positioning screws and drill pilot holes for anchor screws
and 4 mounting screws. Install and tighten the mounting
screws.
Return the fitted lavatory to the installed position.
Connect trap to drain assembly hand tight to check
alignment. It may be necessary to cut off part of the
tailpiece (area "B") or part of the horizontal leg of the
trap (area "C").
Secure lavatory on hanger as shown in 5. Insert and
tighten anchor screws if applicable. Connect hot and
cold supply lines to the shut-off valves. Tighten trap
joints for watertight assembly. Apply a bead of caulk
around the edge which contacts the wall as shown.
Following manufacturers instructions, install faucet and
drain assembly. (Not included). Be certain to apply a
bead of sealing putty on the underside of the drain (Part
"A") in order to ensure a watertight seal between the
lavatory and drain. Remove excess putty after installing
drain on lavatory.
B
C
A
Shut-off
Valves
Caulk


