TO MAXIMIZE THE PERFORMANCE OF YOUR SLOAN LAVATORY, USE ONLY SLOAN FAUCETS
Note: Adequate reinforced wall framing is required
behind the wall for proper hanger bracket support.
Use of wall anchors or toggle bolts is not
recommended. For concrete walls a properly sized
wall anchor can be used.
•
Mount and level wall hanger bracket using six (6)
screws and washers (not supplied)
5. INSTALL LAVATORY ON WALL BRACKET
Note: Check if lavatory is level. If not level, remove
lavatory and adjust wall bracket as needed.
Install two (2) 5/16” anchor bolts (not supplied),
through the (2) 3/8” anchor holes, in the sink and into
the wall.
CAUTION! Do not overtighten the bolts. Breakage
and chipping of vitreous china can occur.
COMPLETING THE INSTALLATION
• Connect all supply lines and waste pipes.
• Turn on water. Check to see that the faucet
and drain are operating properly and there
are no leaks.
• Caulk around lavatory perimeter where lavatory
meets the wall.
• Record lavatory model number for reference.
NEW INSTALLATIONS
1. PRIOR TO NEW INSTALLATION
• Determine appropriate wall location for the lavatory.
Consider that hot and cold water supply lines with
supply stops or a tempered water supply line with
supply stop and a drain line will be required. A 120V
electrical source (receptacle) may also be required.
Compare the physical dimensions of the lavatory to
the space available for the installation.
2. UNPACK AND INSPECT LAVATORY
• Carefully remove sink from its protective carton so
as not to damage porcelain finish. Check for any
damage to lavatory before proceeding with the
installation.
• Examine the carton for additional parts before
discarding packaging.
3. INSTALL DRAIN POP-UP AND FAUCET
• Install the faucet and drain assembly (not included).
Follow faucet manufacturers instructions. Use
plumbers putty to ensure a water seal.
THE RIGHT CHOICE
We thank you for your purchase. Our products are
1
00% tested but should you have any questions,
please contact us by phone or at our web site.
Wall-Hung Lavatory with Backsplash Installation
Model
SS-3003 / SS-3103 / SS-3803
Standard Wall Hung Lavatory with Backsplash
WARNING: Any vitreous china can chip or break if
the bolts or nuts are over-tightened or if mishandled.
BEFORE YOU START…
• Check all local plumbing and building codes.
• Check for any damage to the new lavatory sink
before installation.
WHAT YOU WILL NEED…
• Putty knife • 10” adjustable wrench
• Safety glasses • Phillips screwdriver
• Measuring tape • Flathead screwdriver
• Basin wrench • Drill
• Tube cutter • Plumbers putty
• Hacksaw • Silicone sealant
• Channel lock pliers • Compatible with:
• Carrier: Jay R. Smith- 0700 series lavatory; Josam-
17100-202 series lavatory; Watts TCA-411 concealed
arm “track”; Watts WCA-411 carrier with concealed
arms or equal
Reinforced wall framing
Holes for Hanger Bracket
CARE AND CLEANING OF VITREOUS CHINA
Clean lavatory with a cleaner safe for vitreous china.
Spray and wipe clean using soft cloth. Soft abrasive
cleaners may be used to remove stains.
LIMITED WARRANTY
Sloan Valve Company warrants its vitreous china
products to be made of first class materials, free from
defects of material or workmanship under normal use
and to perform the service for which they are intended
in a thoroughly reliable and efficient manner when
properly installed and serviced, for a period of three
years from date of purchase. During this period, Sloan
Valve Company will, at its option, repair or replace any
part or parts which prove to be thus defective if
returned to Sloan Valve Company, at customer’s cost,
and this shall be the sole remedy available under this
warranty. No claims will be allowed for labor,
transportation or other incidental costs. This warranty
extends only to persons or organizations who
purchase Sloan Valve Company’s products directly
from Sloan Valve Company for purpose of resale.
THERE ARE NO WARRANTIES WHICH EXTEND
BEYOND THE DESCRIPTION ON THE FACE HEREOF. IN
NO EVENT IS SLOAN VALVE COMPANY RESPONSIBLE
FOR ANY CONSEQUENTIAL DAMAGES OF ANY
MEASURE WHATSOEVER.
NOTE: IN NO EVENT SHALL THE SLOAN VALVE
COMPANY BE LIABLE FOR INCIDENTAL DAMAGES,
RESULTING FROM IMPROPER INSTALLATION, OR FOR
DAMAGES CAUSED BY NEGLECT, ABUSE OR
ALTERATION.
The information contained in this document is subject to change
without notice.
SLOAN VALVE COMPANY
10500 Seymour Avenue
Franklin Park, IL 60131
Phone: 1-800-9-VALVE-9 (982-5839)
or 1-847-671-4300
Fax: 1-800-447-8329 or 1-847-671-4380
www.sloanvalve.com
Copyright © 2010 Sloan Valve Company
Code No. 0816413 Rev. 3 (07/10)
SS-3803
SS-3003
SS-3103
16.75” (426 mm)
6”
(152.4 mm)
4”(102 mm)
8” (203 mm)
6”
(152.4 mm)
16.75” (426 mm)
(102 mm)
4”
20.75” (527 mm)
16.75” (426 mm)
20.75” (527 mm)
20.75” (527 mm)
8.00”
(203 mm)
12
.
25
”
(
3
11 mm)
8.63”
(
21
9 mm)
6”
(152.4 mm)
6”
(152.4 mm)
4”(102 mm)
18.25”
(464 mm)
6”
(152.4 mm)
6”
(152.4 mm)
4”(102 mm)
18.25”
(464 mm)
18.25”
(464 mm)
4”
(10
2
mm
)
4
”
(1
0
2
m
m)
1
.
2
”
(
3
1
m
m
)
31”
(787 mm)
34”
(864 mm)
ADA
3/8”
(10 mm)
Diameter
Anchor Screw
Holes
3/8”
(10 mm)
Diameter
Anchor Screw
Holes
1 1/4”
(32 mm)
O.D. Drain
Outlet
Finished Floor
8”
(203 mm)
10 1/4”
(260 mm)
11 3/8”
(298 mm)
Water
Supply
1
.
7
5
”
(
4
5
m
m
)
RETROFIT INSTALLATIONS
1. REMOVE EXISTING LAVATORY
• Turn off the water supply.
• Disconnect the supply lines and waste pipes.
• Remove the existing lavatory.
•
Scrape any old putty or sealant from wall surface.
• Remove old wall bracket and discard.
• Adequate structural support in or behind the wall is
required to withstand the weight of the lavatory
when filled with water.
2. CLEAN DRAIN
• Clean out waste pipe using hand or power cleaner
to be sure pipe is clear.
• Proceed to NEW INSTALLATIONS.
EAF-150 SF-2250 EBF-650 EAF-275 EBF-85
I
mportant: Fixture dimensions are nominal and may vary slightly from
d
rawings.
W
all Carrier rough-in information to be provided by wall carrier
m
anufacturer. Carrier and hardware not included with fixture
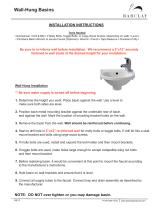
SS-3003 Shown
4. INSTALL NEW WALL HANGER BRACKET
• Determine the desired height to the top of lavatory
sink rim. Mark level line on wall. This line is
centerline of holes for wall hanger bracket
mounting holes.
• Mark and drill holes in wall for mounting lavatory
/