ASSEMBLY AND INSTALLATION INSTRUCTIONS
Rack Assembly
1) If your rack is plated it is best to keep the tissue on during installation to avoid fingerprinting.
2) It is very important to determine the front and back of the rectangular base. The front has two threaded
holes and four smaller unthreaded holes. The back has two large holes and three small holes unthreaded.
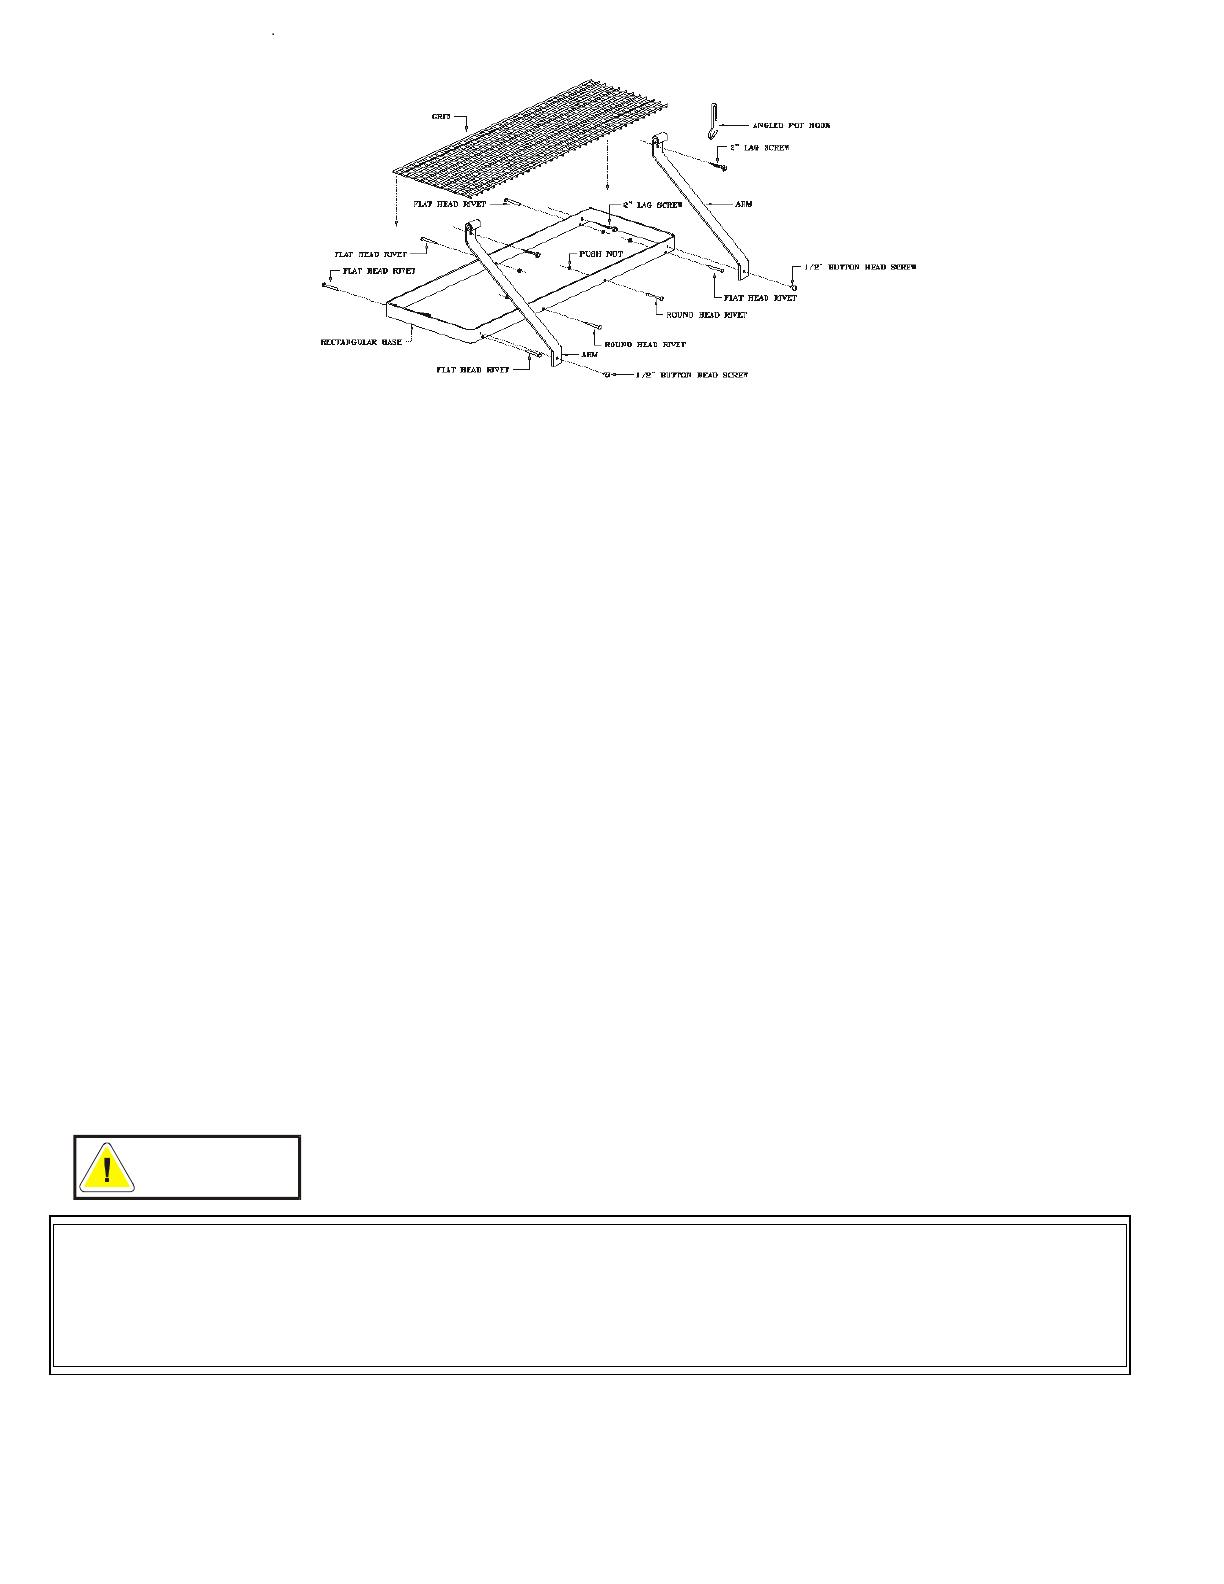
3) In the back of the rack, insert three flathead rivets into the smaller holes so they protrude into the rack’s
interior. Slide a push nut onto each rivet and push toward the rack body so the rivets are held tightly.
4) On the front of the rack, insert the two remaining flathead rivets into the two smaller holes near each end of
the rectangular base. Put the two round head rivets into the small holes near the center. Looking at the rack
front from left to right with the rivets in place, you should have one flat head rivet two round head rivets
and one flat head rivet. When you are sure of the order, lock in place with the push nuts as you did on the
back.
5) Turn the rectangular base so that the rivets are closest to the bottom. Using the Allen wrench and the two
3/8” x ½” button head screws, attach the arms to the rack body through the threaded holes in the front.
6) We recommend that you anchor your rack into the solid wood of wall studs. Carefully measure the area
where the rack is to be hung and install the lag screw directly into the wood studs. If it is not convenient to
hang your rack directly into wood you may use the included DRYWALL anchors enclosed with your rack.
See Toggler® brand manufacturer recommendations for weight limits included in the instructions in the
Toggler kit.
7) After the rack has been mounted onto the wall, place the grid into it with the long wires facing up. Push the
grid against the back of the rack so there is clearance for the pot hooks to hang along the front bar.
8) Distribute the weight of your cookware evenly around the rack and grid.
It is important that your rack is assembled correctly. If the unit is assembled or used
incorrectly, it could become unstable and collapse, possibly causing injury.
WARNING
Limited Warranty: This product is warranted to be free of material defects for a period of five years from the date of purchase. Customer's exclusive remedy shall
be the repair or replacement of the defective product and shall be subject to the following conditions: (1) notice of any defect is received by Enclume within the
warranty period and (2) customer returns the defective product to Enclume Design Products, 24 Colwell St., Port Hadlock, WA 98339, postage prepaid within 20
days following a return authorization number (which may be obtained by telephoning the number at the top of this instructions) being provided to the customer by
Enclume. There are no other warranties, expressed or implied. THERE ARE NO WARRANTIES OF MERCHANTABILITY OR FITNESS FOR A
PARTICULAR PURPOSE. ENCLUME SPECIFICALLY DISCLAIMS ANY AND ALL INCIDENTAL OR CONSEQUENTIAL DAMAGES ARISING
OUT OF THE PURCHASE OR USE OF ENCLUME'S PRODUCTS.


